


Domain General Process
Introduction
Watch the Video: Domain Setup Tutorial | Register, Configure, Verify
To help you get started quickly, we’ve prepared a short introduction video covering the essential steps and features of DBM domain service. In this video, you’ll learn:
✅ Register your domain
✅ Configure DNS (default & custom)
✅ Complete domain verification
Part 1: Order a Domain
Database Mart offers six Domain Extensions, allowing you to select based on your business requirements. You can place your order either on our Domain sales page or through the Client Console. Please enter the domain name, select your desired domain extension, and click the 'search' button.
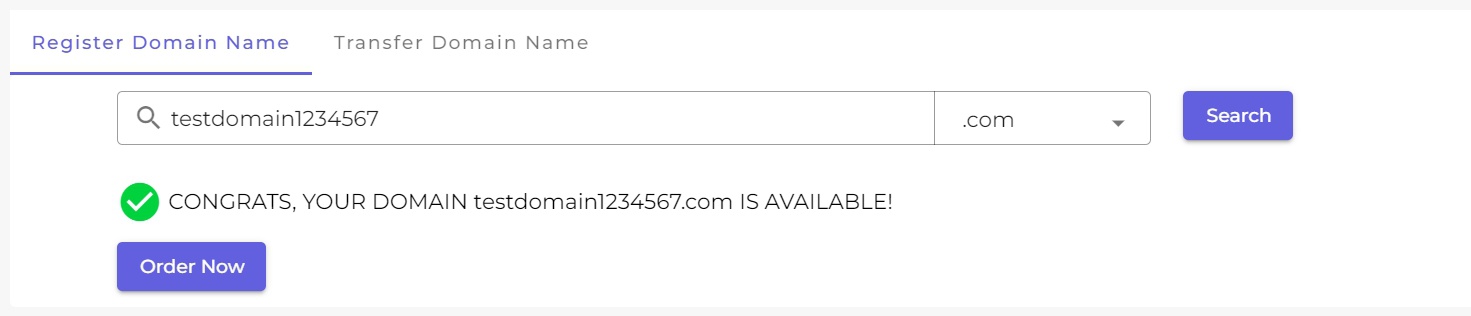
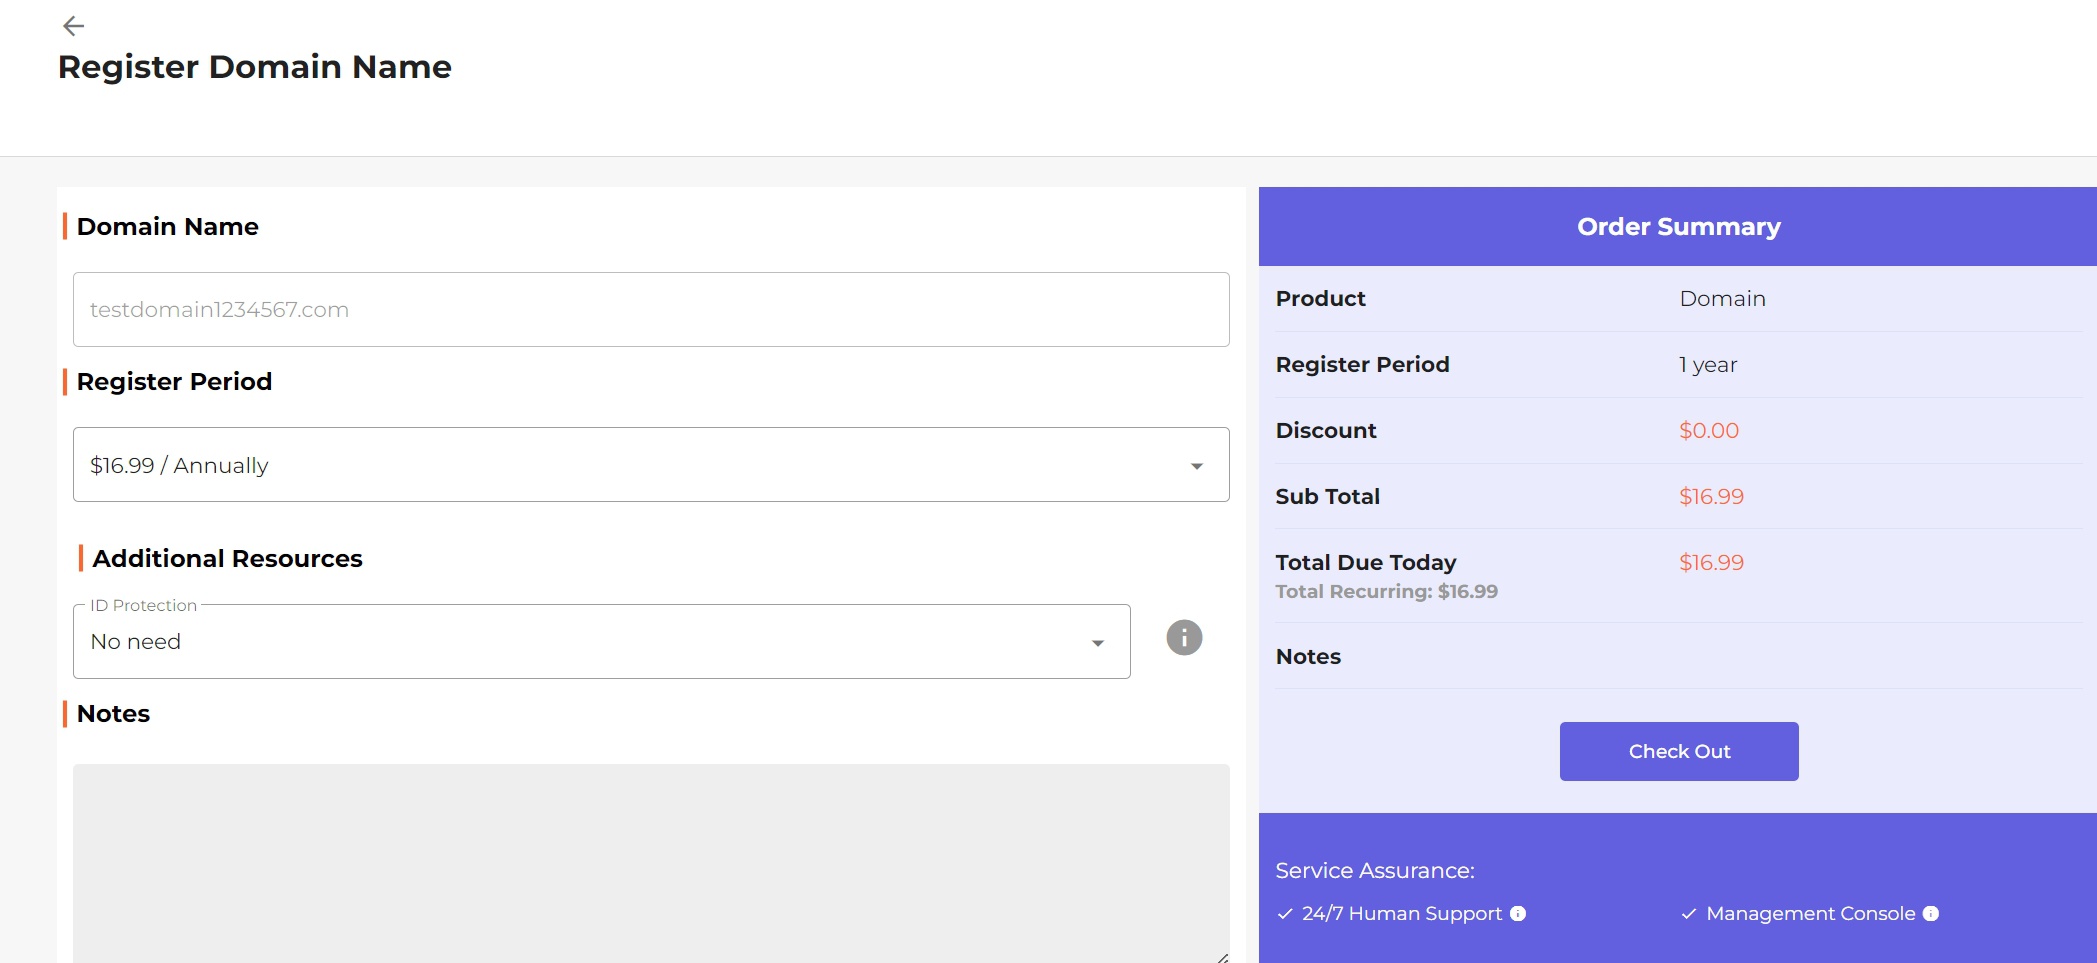
Fill out the relevant order information and submit the order.
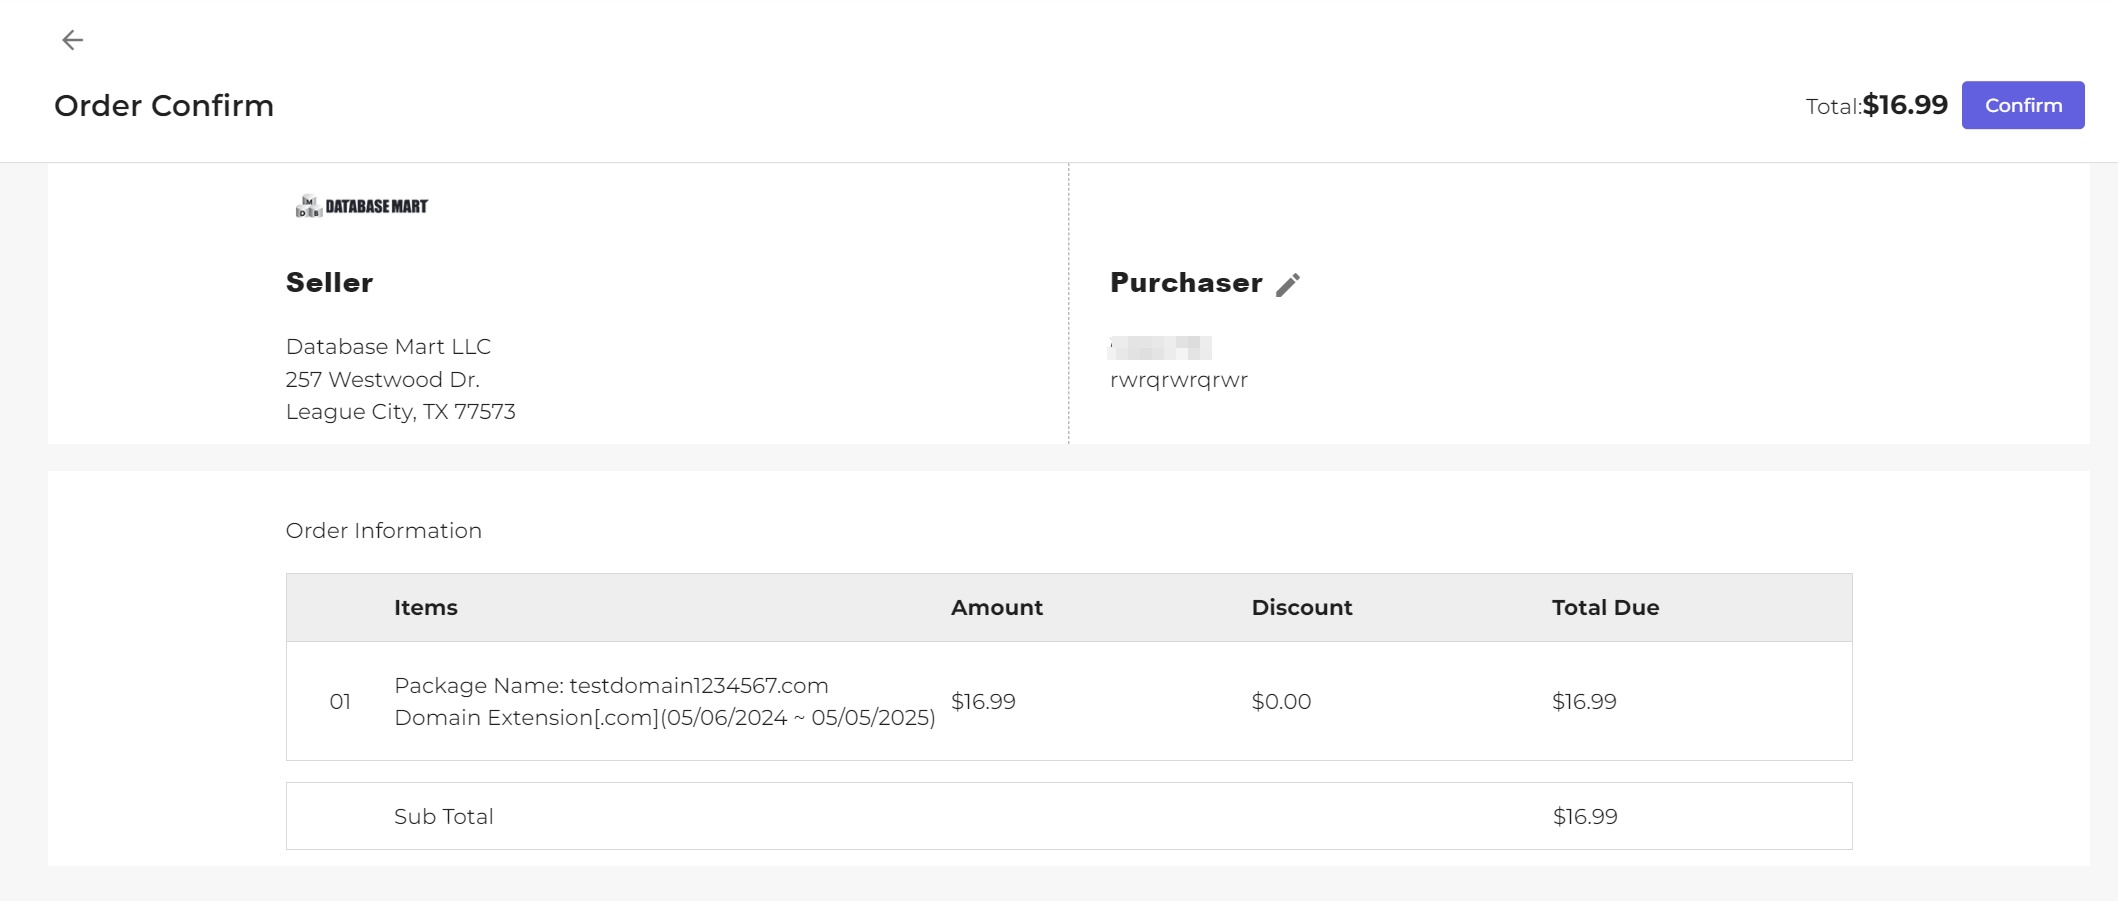
On the Order Confirmation page, fill in the purchaser information, and then click the 'Confirm' button to make a payment.
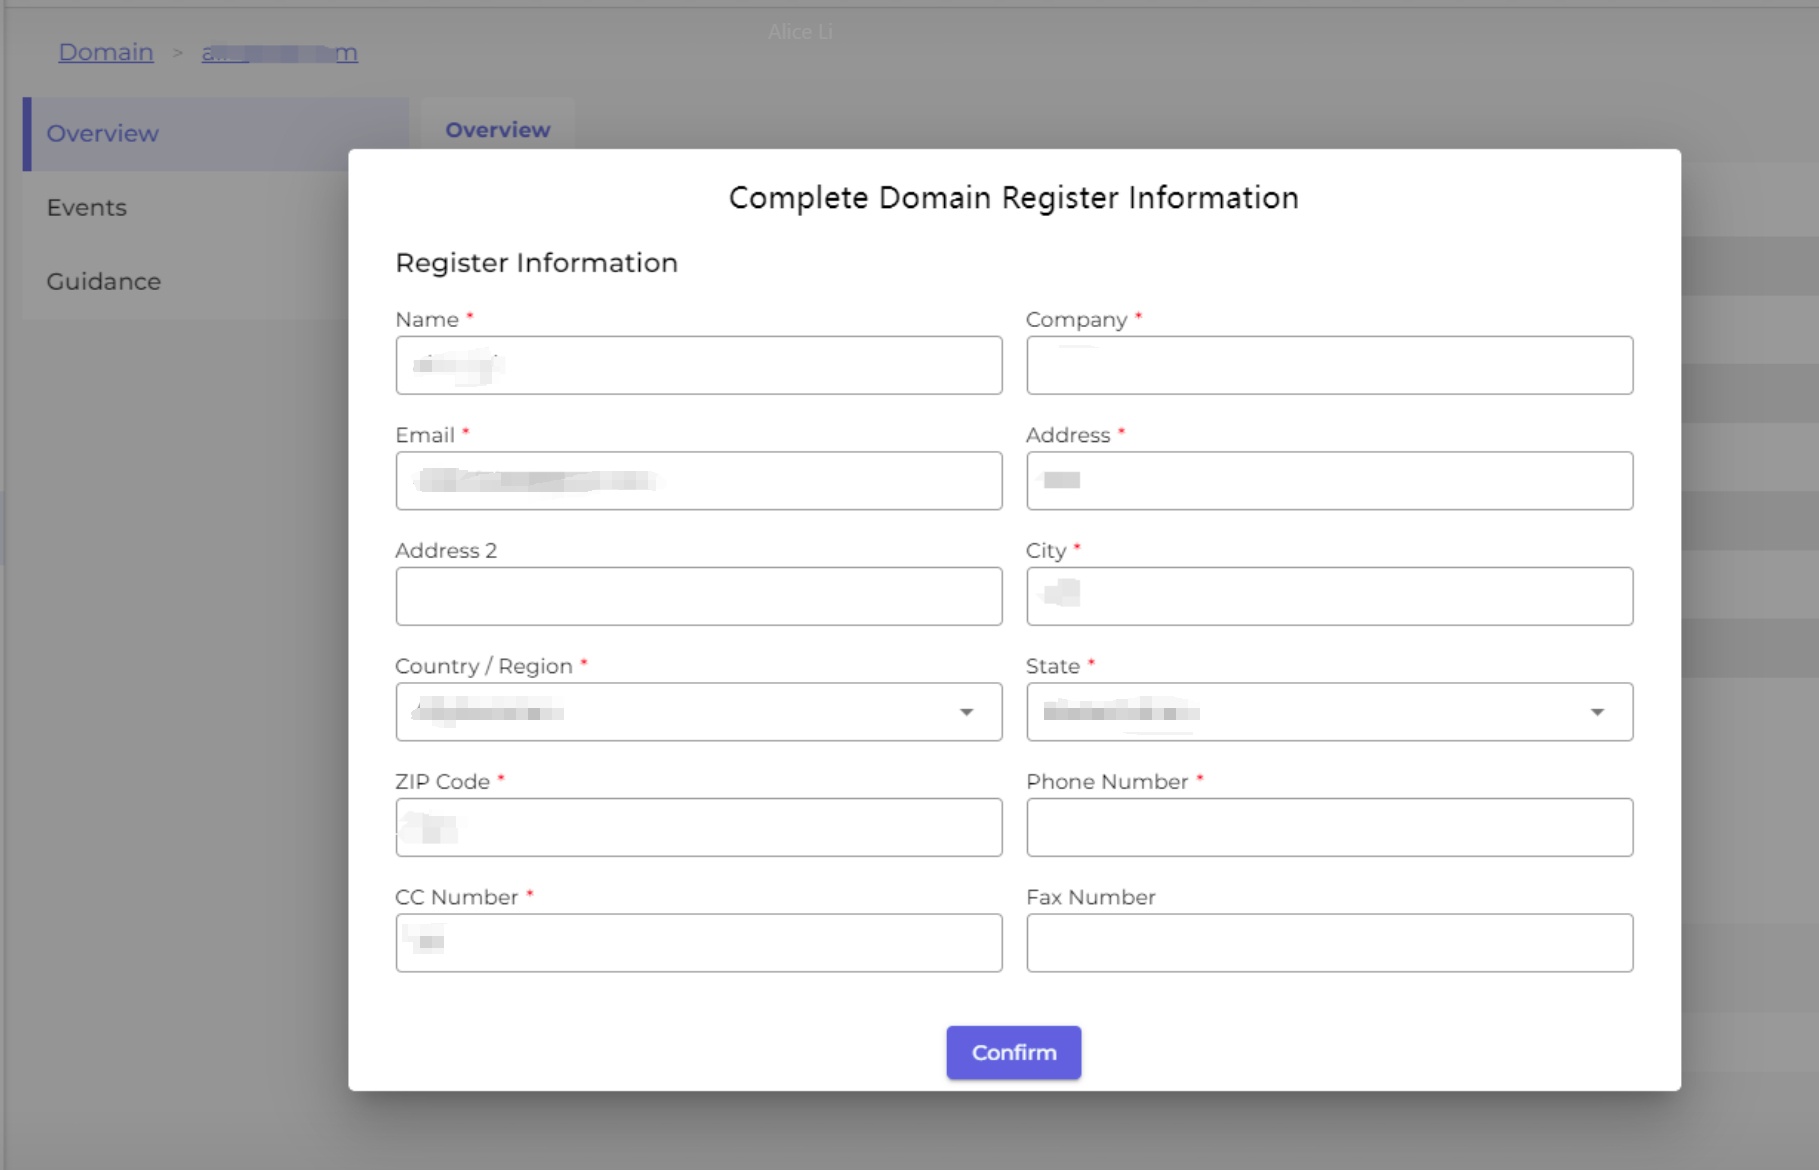
Fill in the information for the domain owner. After submitting the information, wait a few seconds, and the domain will be successfully registered.
Part 2: Domain DNS Management
When your domain purchase is successful, you will be automatically redirected to the DNS management interface.
You have two options for configuring DNS:
- The default option is to use the name servers provided by the provider.
- Choose your own name servers.
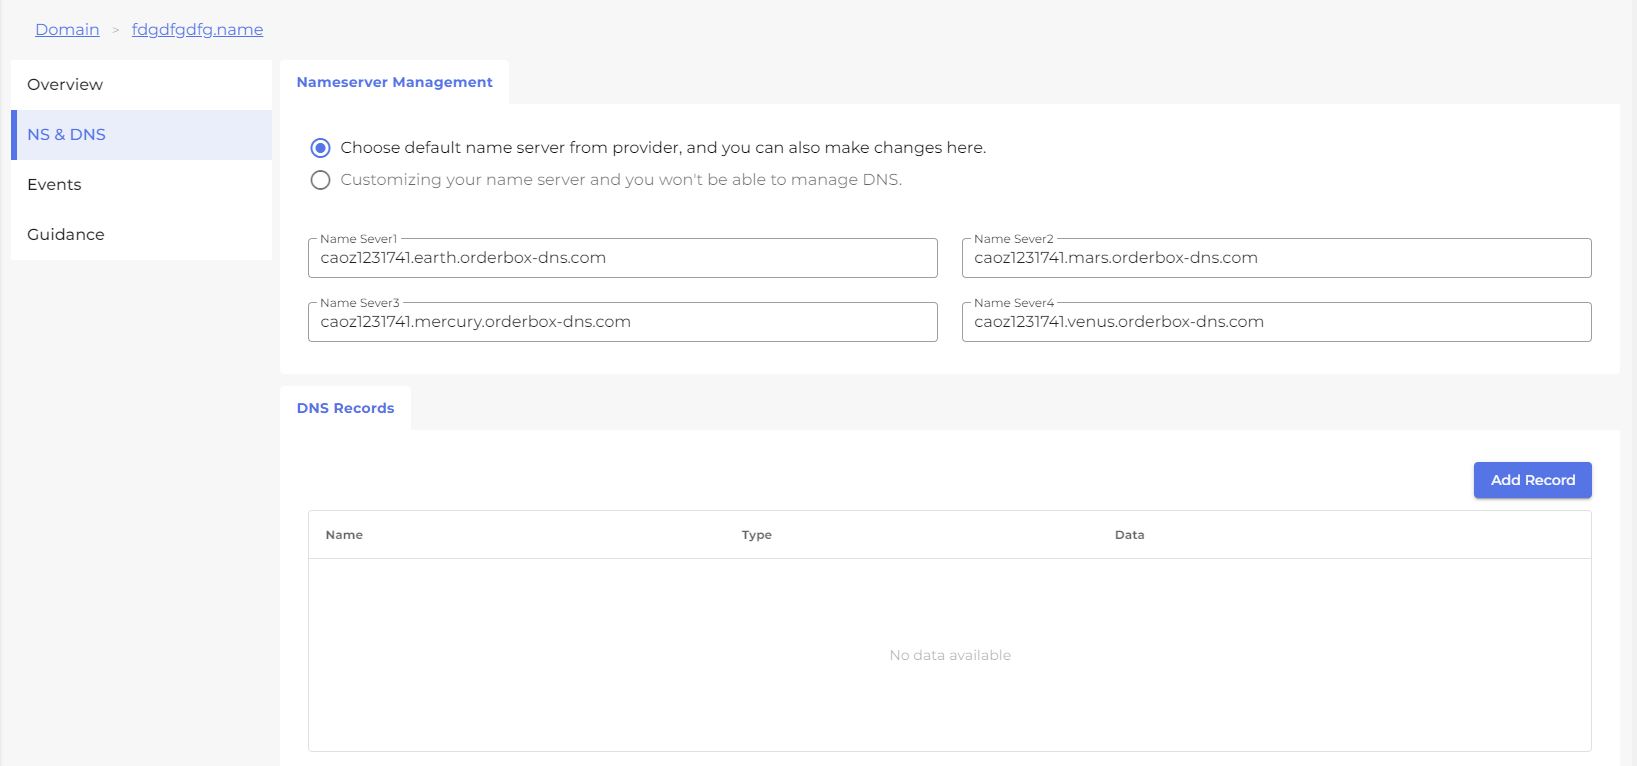
Option 1. Using the name servers provided by the provider
Click on 'Add Record', enter the corresponding DNS information, and then click 'Confirm'. In the DNS list, there are also options for editing and deleting.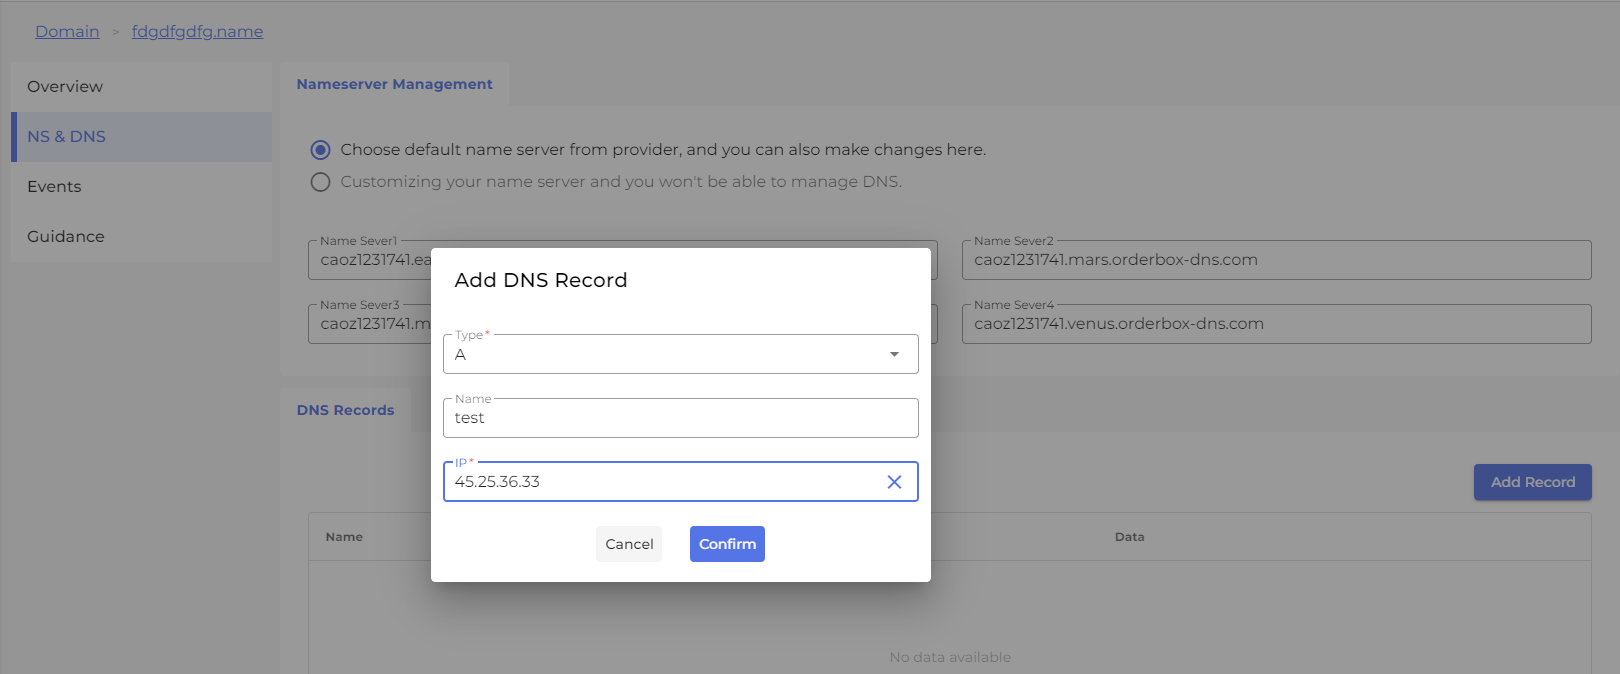
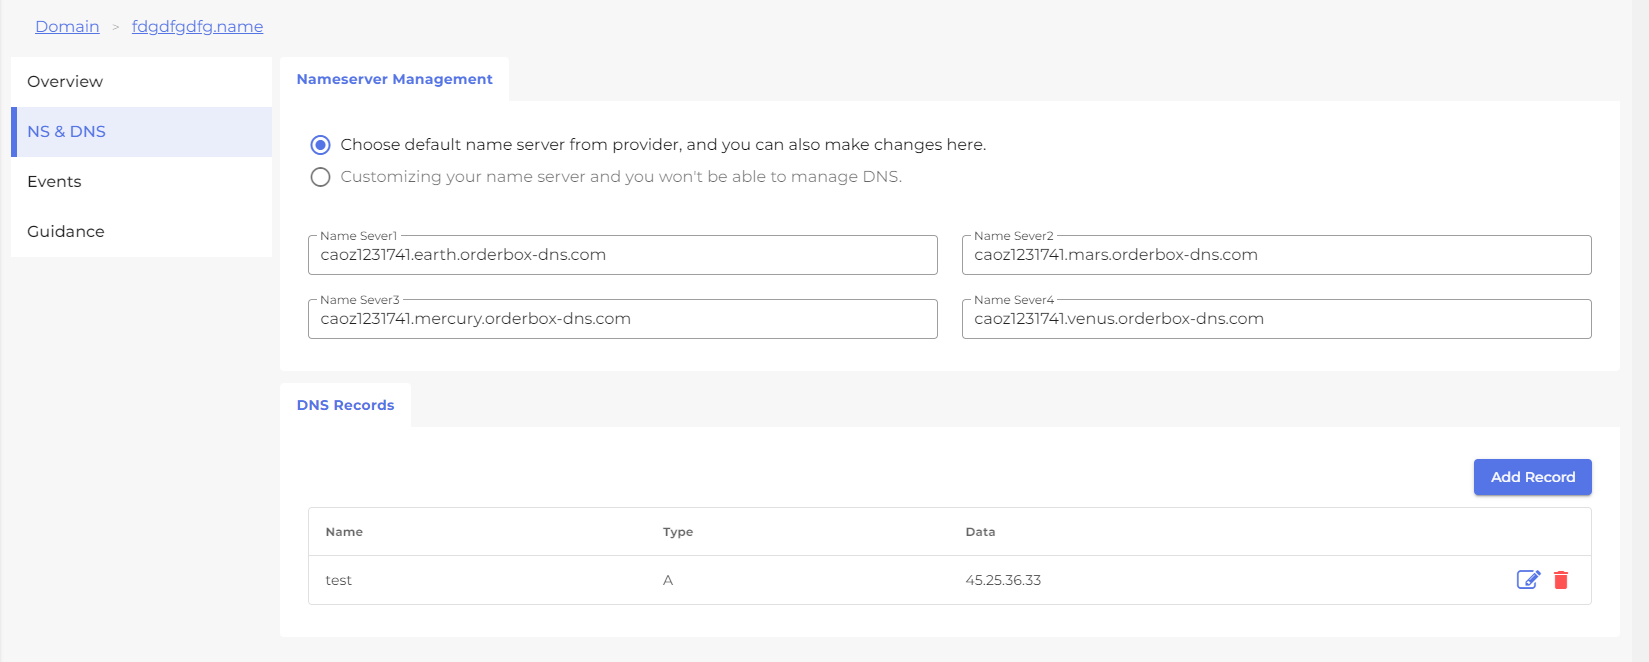
If you need to modify the Type and Name, you need to delete this entry and add it again.
Option 2. Using your own name servers
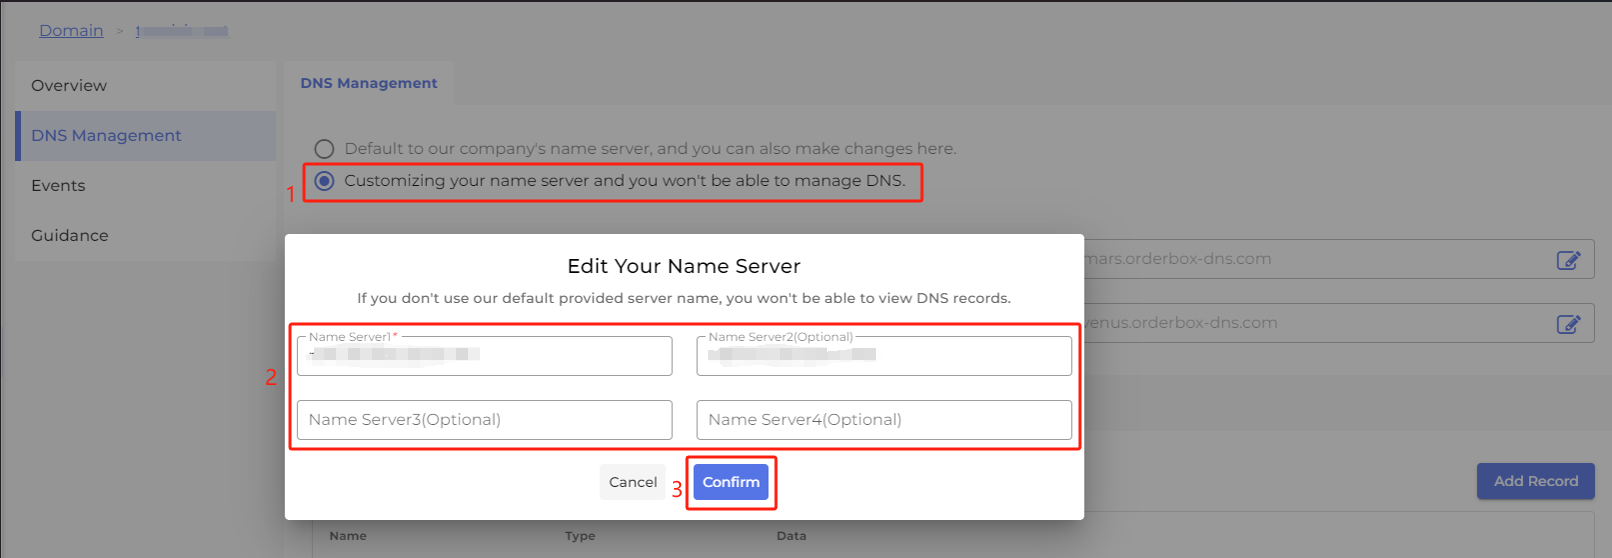
On the DNS management page, select the second option.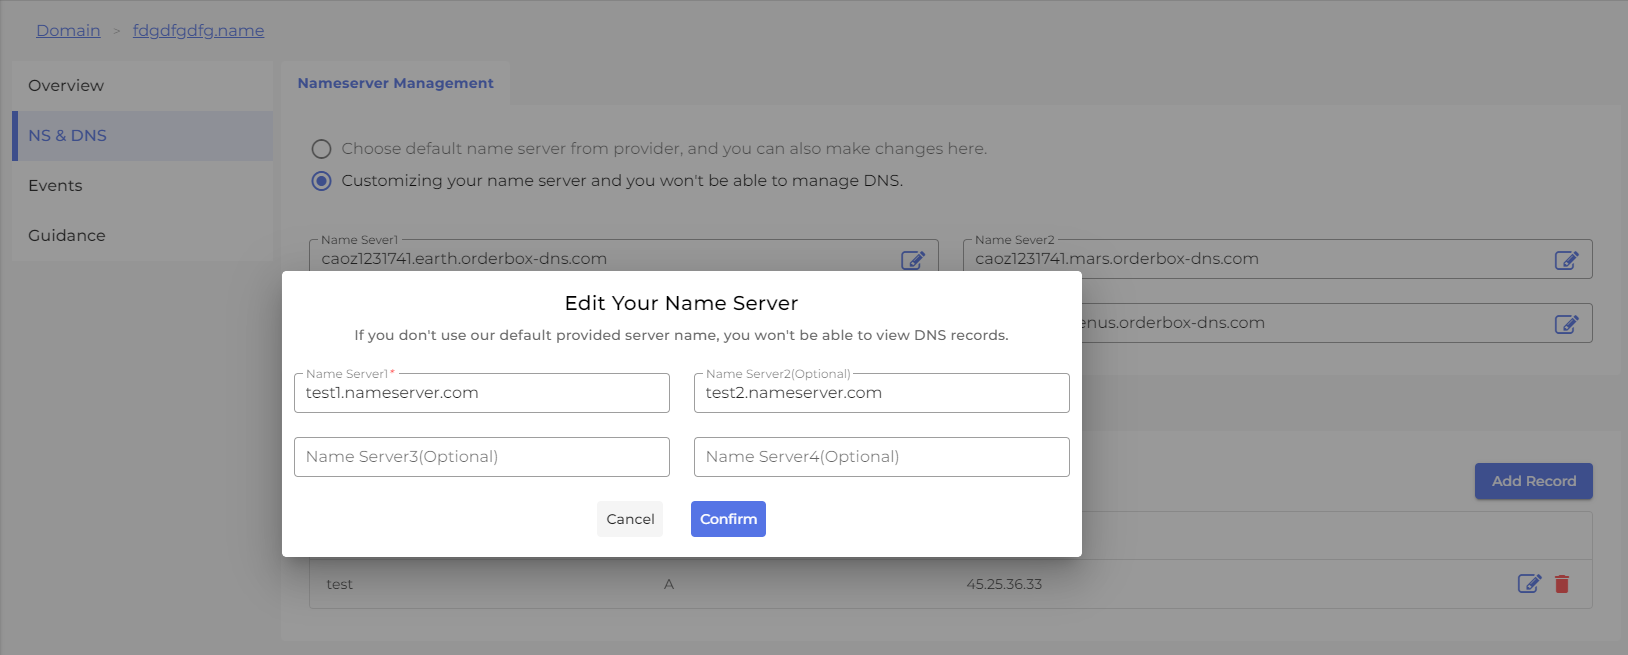
The system will automatically prompt a pop-up window for modifying the name server. Enter the corresponding name server information, then click 'Confirm'.
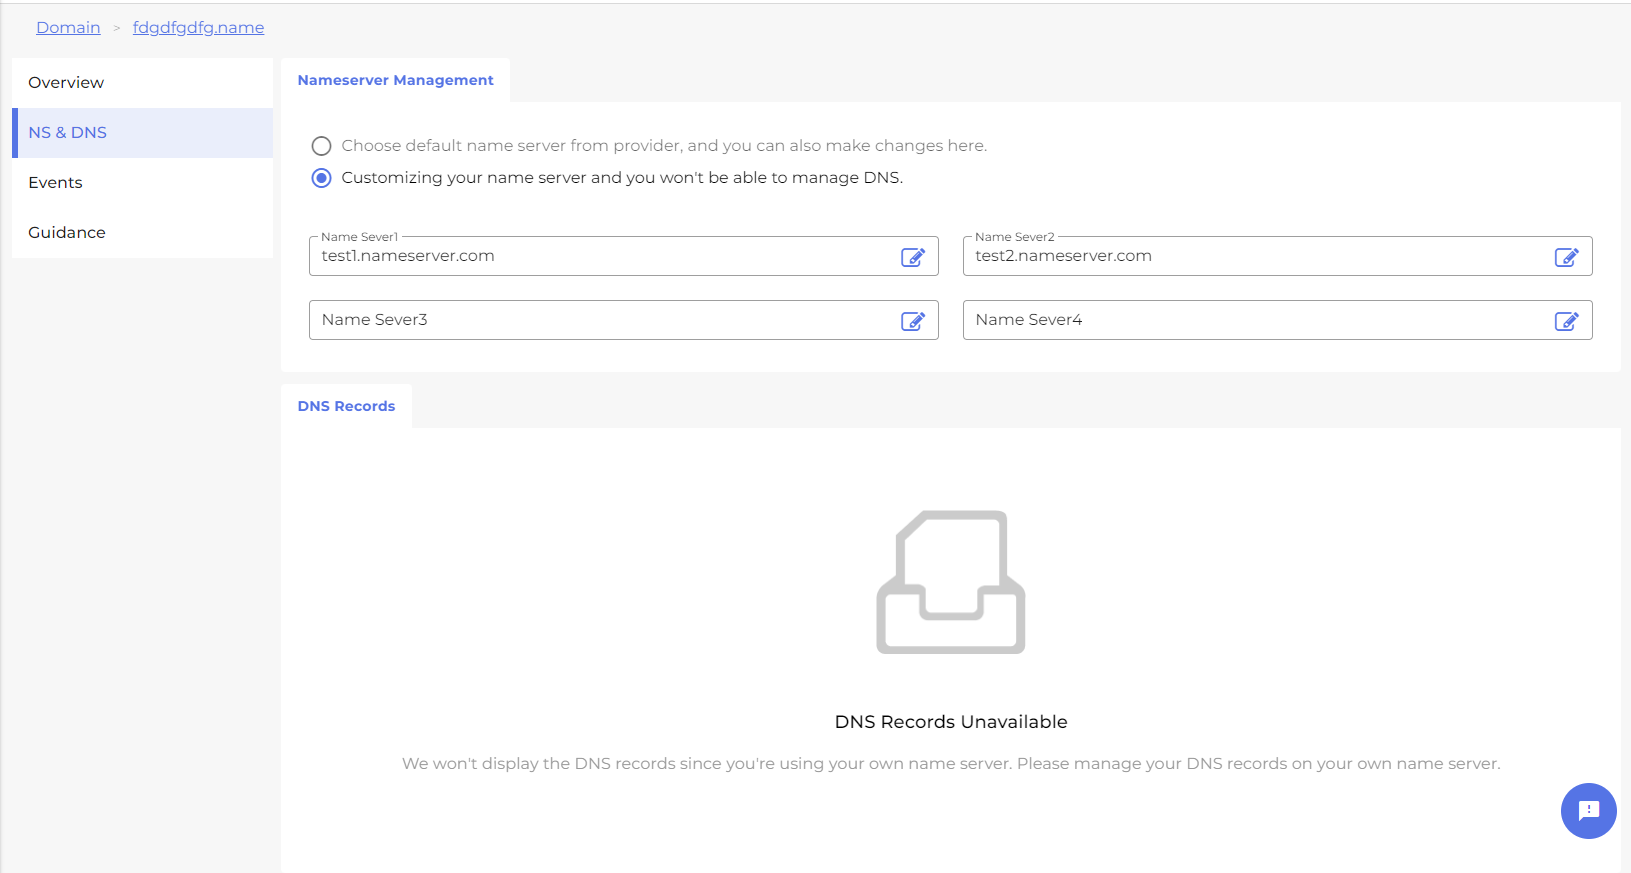
After successful modification, it will appear as shown in the figure below.
Part 3: Verification (Required)
The registrar will send a verification email to the email address you provided during registration.
Please open the verification email and follow the instructions in the email to complete the verification.
⚠️ Important:
Verification must be completed within the specified timeframe.
If the verification is not completed, your domain will be suspended until the process is done.