

How to Use an SSL for RDP with a WMI Script
Introduction
Securing your Remote Desktop Protocol (RDP) connection with an SSL certificate is essential for protecting sensitive data and ensuring a trusted remote access environment. This step-by-step guide explains how to configure remote desktop SSL by using a Windows Management Instrumentation (WMI) script on a Windows Server. By following the instructions, you can easily bind a valid SSL certificate to the RDP listener, enable encrypted communication, and eliminate security warnings caused by self-signed certificates.
Steps to Configure an SSL Certificate for RDP Using a Windows Management Instrumentation script
Step 1: Start the Microsoft Management Console (MMC) and import the SSL certificate for the computer account
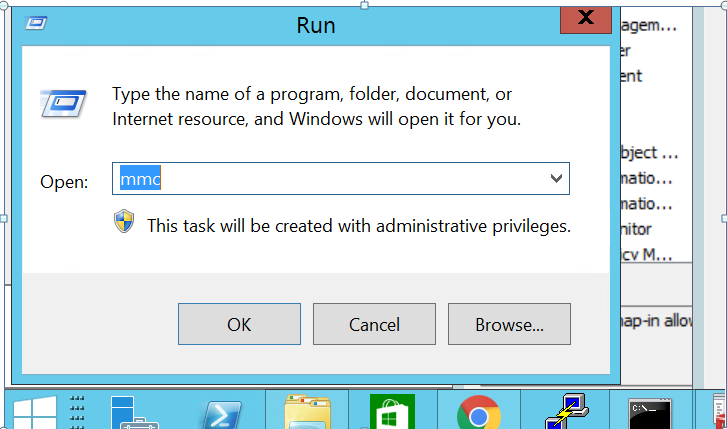
Click Start→ Run, type mmc, and click OK.
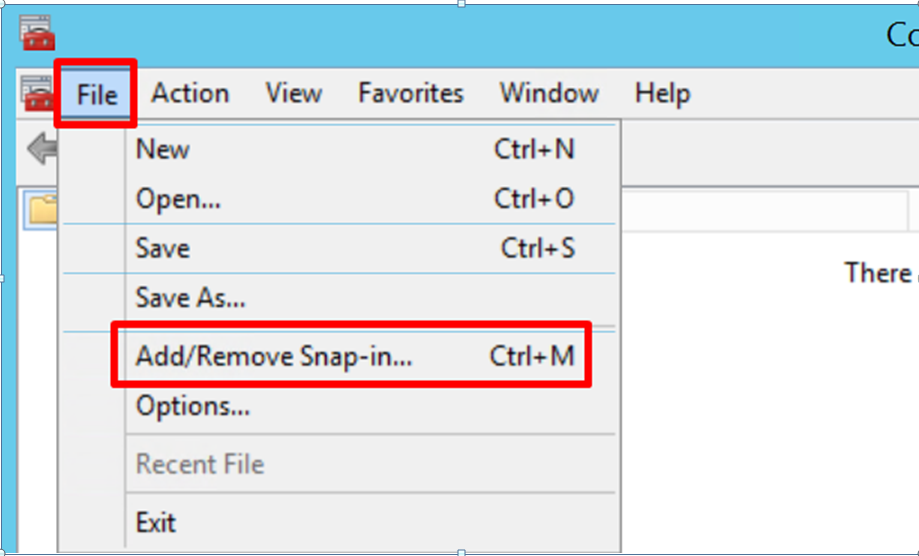
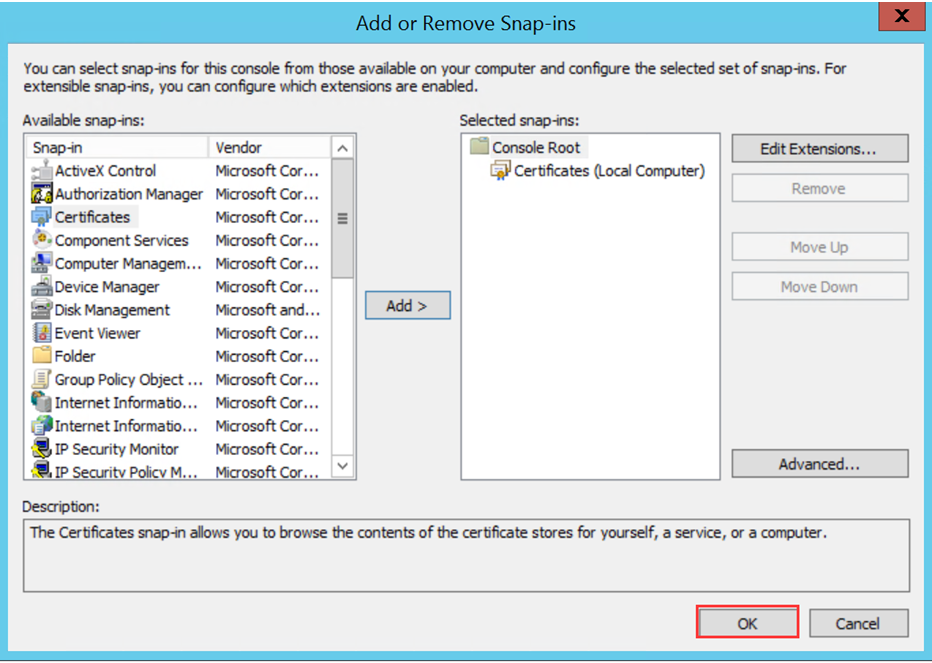
In the MMC window, go to File> Add/Remove Snap-in.
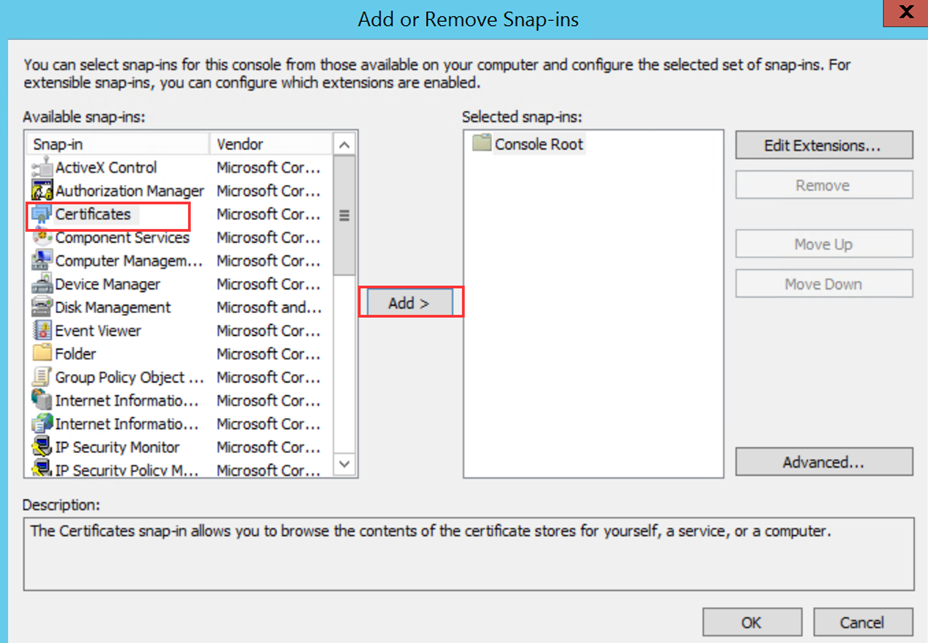
Select Certificates in the left panel and click Add to move it to the right panel, then click OK.
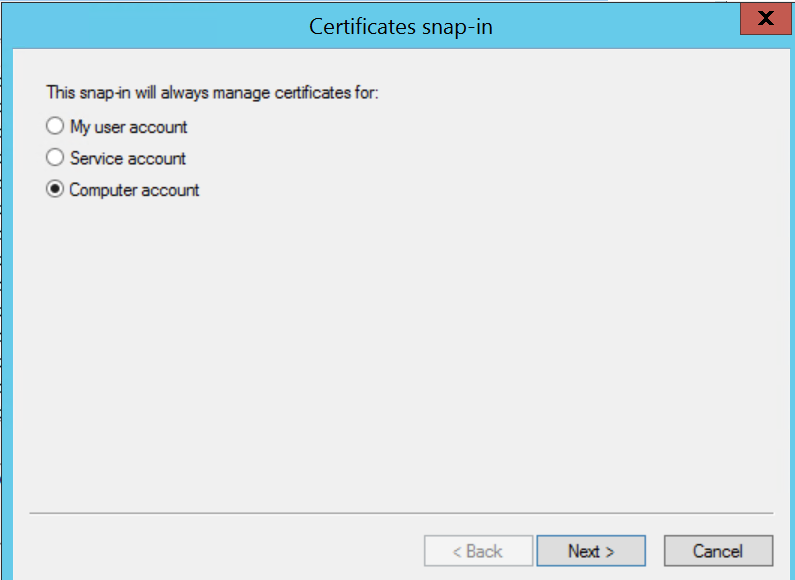
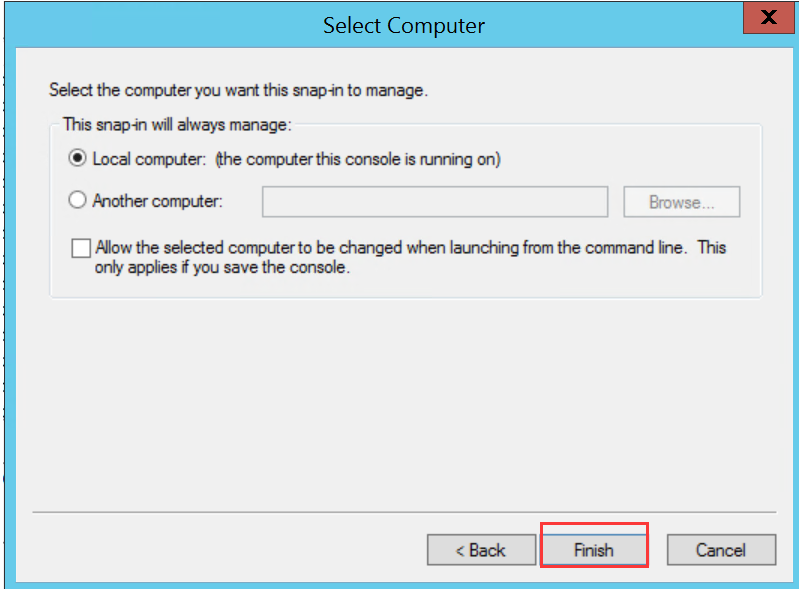
Choose Computer account, then click Next→ Finish→ OK.
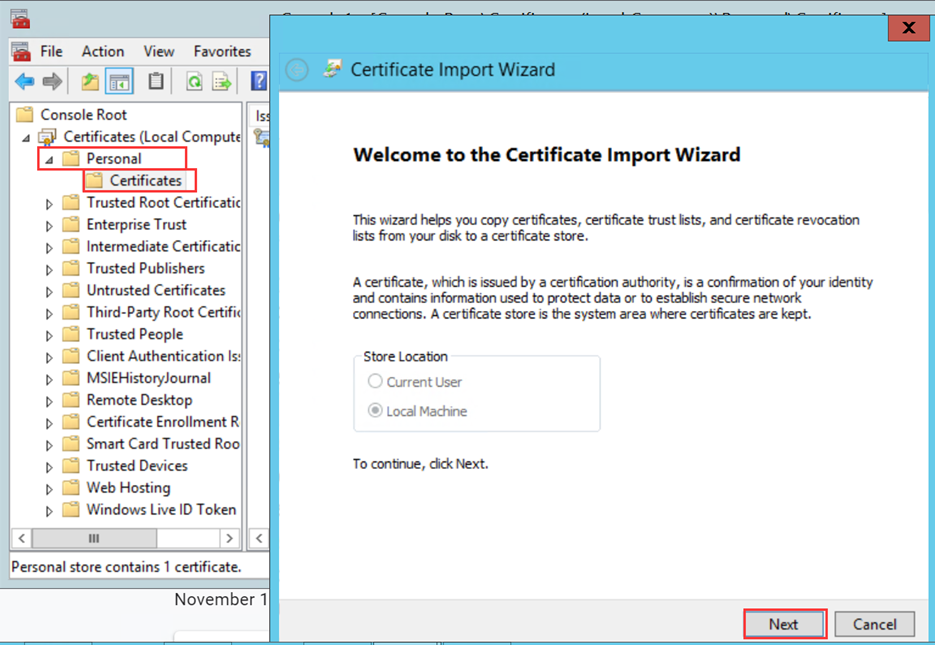
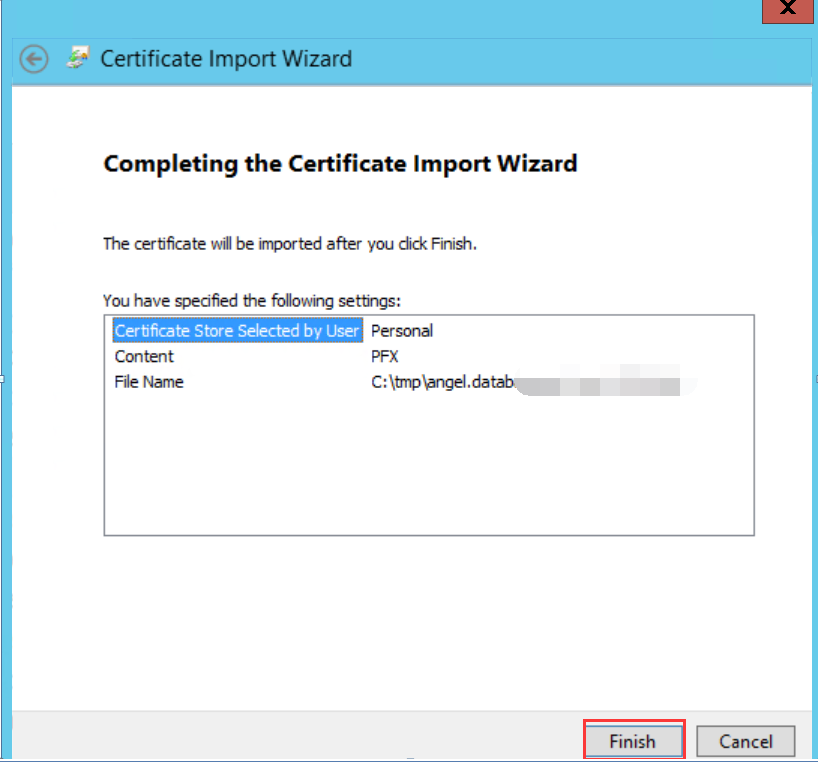
Expand Certificates(Local Computer) → Personal, right-click Certificates, and choose All Tasks > Import.
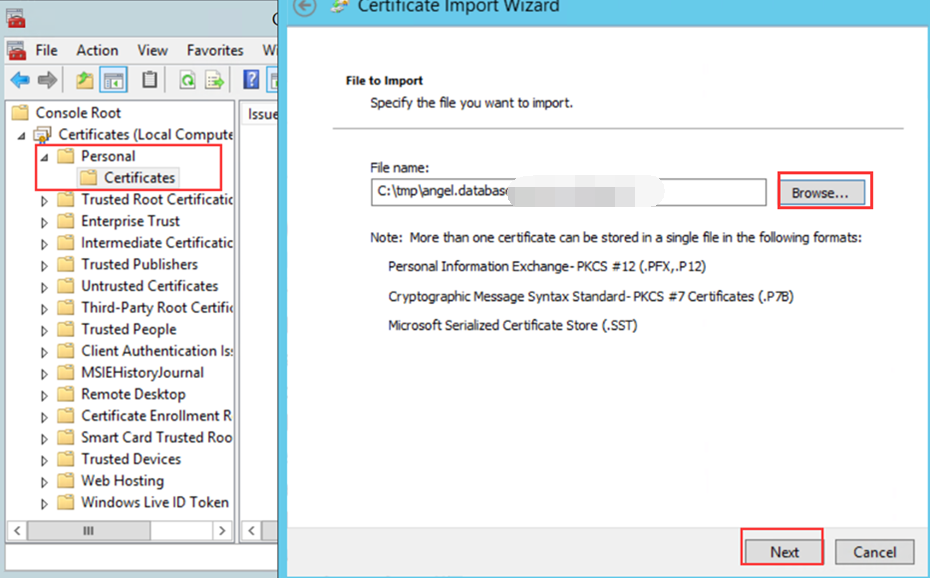
Click Browse to select the correct certificate file and click Next.
Click Finish to complete the certificate import wizard.
Step 2: Locate the certificate thumbprint and save it to a text file
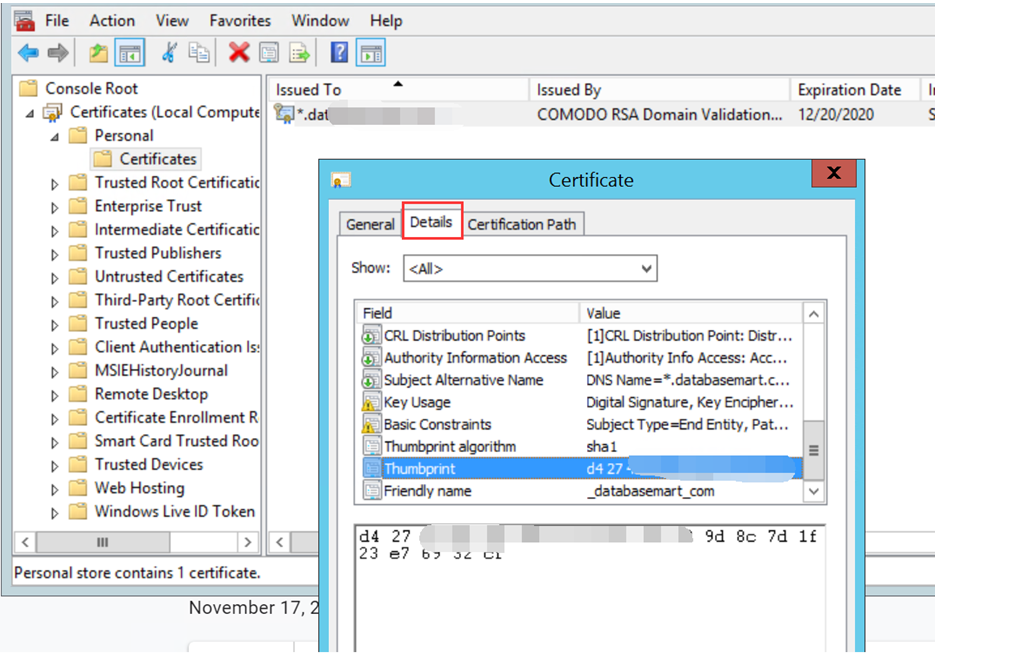
- In MMC, click the imported SSL certificate under Certificates(Local Computer) → Personal→ Certificates.
- Switch to the Detailstab.
- Scroll down and select the Thumbprint field.
- Copy the space-delimited hexadecimal string shown in this field.
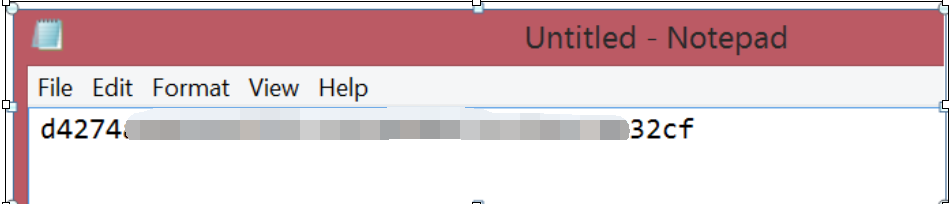
- Paste the thumbprint into a .txt file and save it for later use.

Step 3: Remove all spaces in the string from the .txt file
Note:
You'll also want to watch out for and remove a non-ASCII character that sometimes gets copied just before the first character in the string. It's not visible in Notepad. You may see it when you running the command in the next step 4.
Step 4: Run the WMIC command with the certificate thumbprint
At the Command Prompt, run the following command, replacing the thumbprint with the one you copied in Step 2:
wmic /namespace:\\root\cimv2\TerminalServices PATH Win32_TSGeneralSetting Set SSLCertificateSHA1Hash="your_thumbprint_here"
If the cmd command does not work, you can also use the following PowerShell command:
$TSGS = Get-WmiObject -Class "Win32_TSGeneralSetting" -Namespace "root\cimv2\terminalservices"
Set-WmiInstance -Path $TSGS -Arguments @{SSLCertificateSHA1Hash="d4274aea12dbfff5c11c389d8c7d1f23e76932cf"}
RDP Certificate (remote desktop certificate) can be easily set via the tool MicrosoftEasyFix20151.mini.diagcab.
Step 5: Test RDP authentication connection
Note:
- You need to use your certificate name rather than your server IP to connect to your server.
- The certificate name must point to the server IP.
- Check the referenced article about secure remote desktop listener certificate configurations.
Testing & Troubleshooting
After configuring your SSL certificate for RDP, you may encounter common issues. Here are some solutions:
Certificate not trusted: If your remote desktop certificate shows as untrusted, ensure the certificate is installed correctly on the client and the root CA is trusted. For self-signed certificates, import the CA into the client’s trust store.
Connection fails or cannot connect: Verify that the RDP certificate thumbprint is correctly set in the listener configuration. Remove any extra spaces or hidden characters. Ensure the remote desktop SSL listener is active and using the new certificate.
Security warnings or expired certificates: Check that the SSL for RDP certificate has a valid expiration date. Replace or renew certificates before they expire and rebind them to the RDP listener.
Encryption or protocol issues: Make sure the server and client support modern TLS protocols for remote desktop SSL. Disable outdated protocols if possible to maintain secure connections.
Following these steps helps ensure your SSL certificate works correctly for RDP, improving both security and reliability of your remote desktop connections.