

How to Configure And Enable FastCGI on IIS
Whether you’re setting up a PHP site hosting environment for testing or looking for the best PHP hosting setup on Windows IIS, this tutorial will help you get started.
Why Use FastCGI for PHP Hosting?
FastCGI is an interface that makes PHP applications run faster and more efficiently on Windows IIS. With it, you can:
- Enable FastCGI to speed up your PHP applications.
- Use IIS as a host PHP server.
- Set up a reliable environment for PHP website hosting or even cheap PHP hosting.
Steps to Install FastCGI on IIS
Step 1: Enable FastCGI in IIS
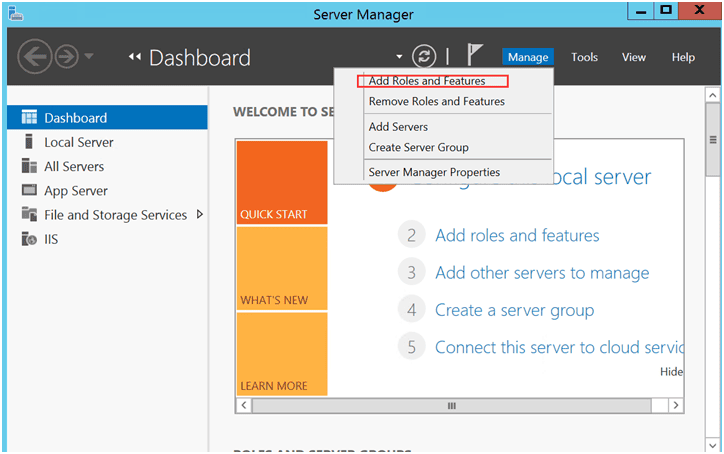
- Click Manage → Add Roles and Features.
- On the Role Services page, expand:
Web Server (IIS) → Web Server → Application Development. Select CGI and click Next.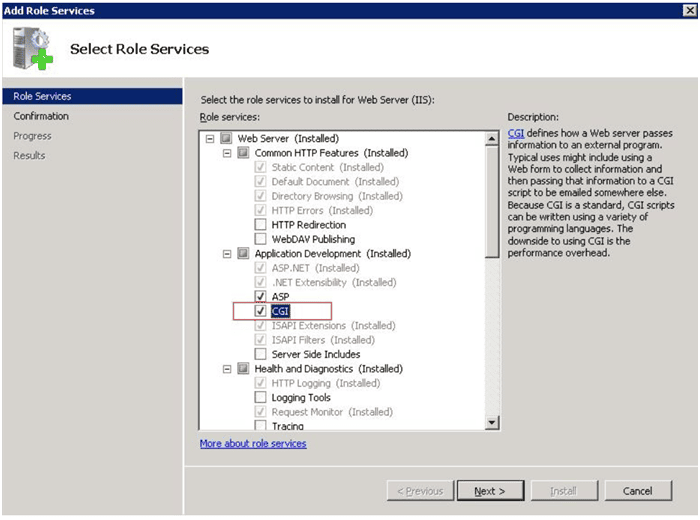
- On the Select Features page, click Next.
- On the Confirm Installation Selections page, click Install.

- When installation completes, click Close.
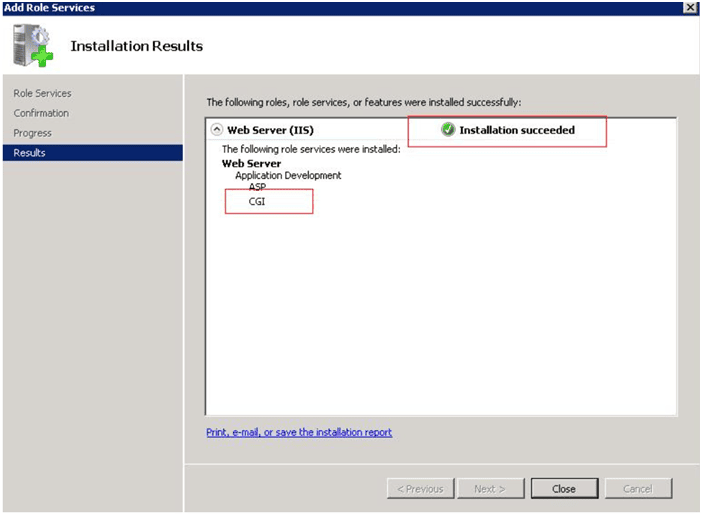
You have now enabled FastCGI in IIS.
Step 2: Download PHP
Go to the PHP official site. Download the version you want to use for your PHP web hosting project.
Step 3: Configure IIS
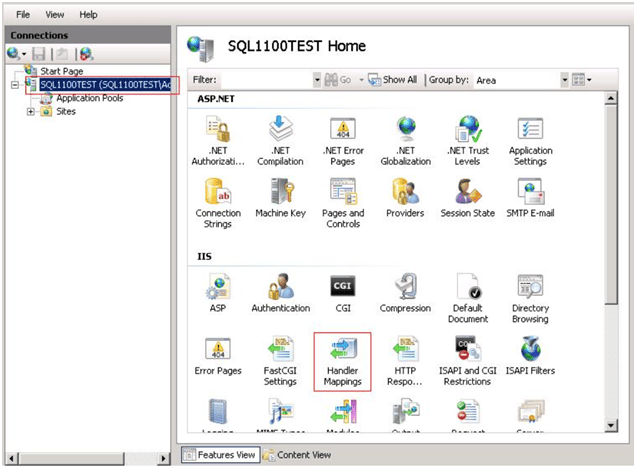
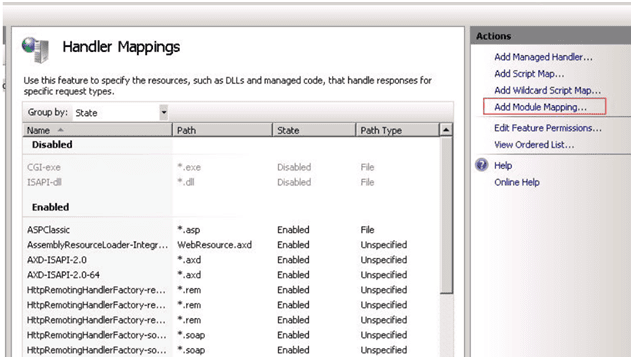
- Click on your server name in the left panel.
- Double-click Handler Mappings.
- In the right-hand Actions panel, click Add Module Mapping.
- Fill out the fields as follows:
- Request path:
*.php - Module:
FastCgiModule - Executable:
C:\[Path to your PHP installation]\php-cgi.exe - Name:
PHP via FastCGI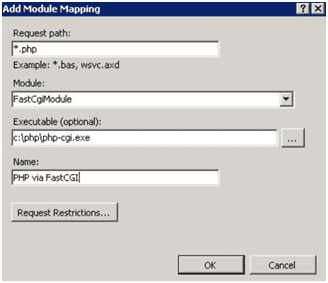
- Request path:
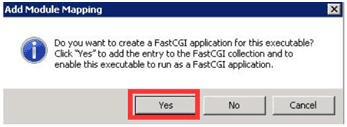
- Click Yes to confirm when prompted.
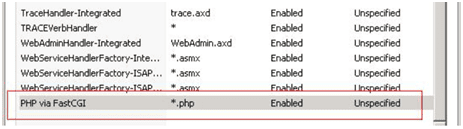
- IIS can now process PHP requests with FastCGI.
Step 4: Test Your PHP Hosting Setup
- Create a new file:
- Location:
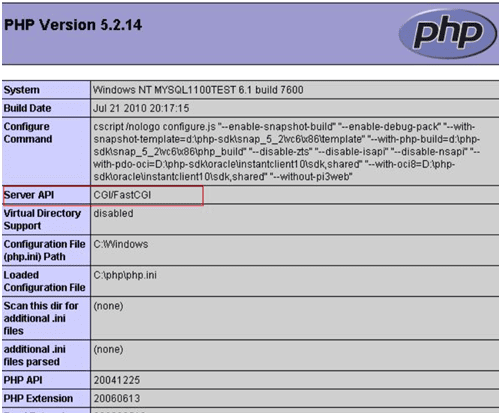
C:\inetpub\wwwroot\phpinfo.php - Content:
- Location:
<?php phpinfo(); ?>- Open a web browser and go to: localhost/phpinfo.php. If you see the PHP info page, your IIS server is ready for PHP web hosting.
Conclusion
By following this guide, you’ve successfully:
- Installed and enabled FastCGI on IIS.
- Configured IIS to host PHP applications.
- Verified your PHP hosting server with a test file.
This setup is perfect if you want to experiment with PHP website hosting, look for cheap PHP hosting solutions, or build your own best PHP web hosting environment on Windows. With FastCGI and IIS, you’re ready to host PHP sites smoothly and efficiently.
nginx fastcgi conf, enable fastcgi, host php, hosting website php, hosting web php, php site hosting, cheap php web hosting, php hosting cheap, best php web hosting, best php hosting, cheap php hosting, php hosting server, host php server, php web hosting, php website hosting, web hosting php