

How to Use Visual Studio Code Connect to Remote Server
Visual Studio Code supports remote development over SSH, allowing you to connect to a Linux server and work with files and folders directly from VS Code. Using the VS Code Remote - SSH extension, you can open a remote folder on any machine with an SSH server running and take full advantage of VS Code’s features.
This guide shows beginners how to connect VS Code to a Linux server via SSH step by step.
This guide shows beginners how to connect VS Code to a Linux server via SSH step by step.
Step 1: Install OpenSSH Client
Before connecting, make sure your local computer has an OpenSSH client installed.
- Open Server Manager.
- In the left navigation pane, select Local Server.
- In the Properties window, locate Remote SSH Access.
- Select Disabled to enable the OpenSSH service.
Step 2: Install Visual Studio Code
Download and install Visual Studio Code from the official website.
Step 3: Install Remote - SSH in VS Code
- Open VS Code.
- Go to Extensions (Ctrl+Shift+X) and search for Remote - SSH.
- Click Install.
This extension allows remote SSH VS Code access to Linux servers and containers.
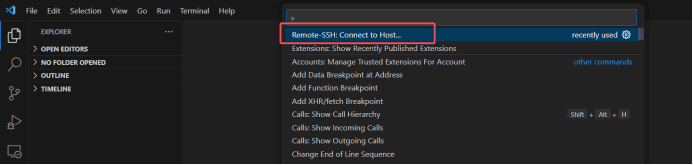
Step 4: Connect to Linux Server
- Open the Command Palette (F1 or Ctrl+Shift+P).
- Select Remote-SSH: Connect to Host…
- Click Add New SSH Host and input your server’s SSH information, including username and IP address.
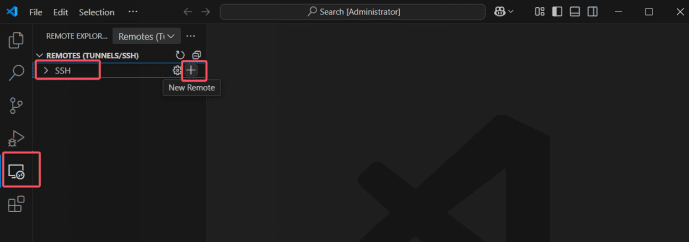
- Choose a Config File (local) to save the SSH information.

- Confirm the connection.

- Enter the server password when prompted.

Once connected, you can operate the Linux server directly from VS Code, browse folders, edit files, and run commands as if you were on the server itself.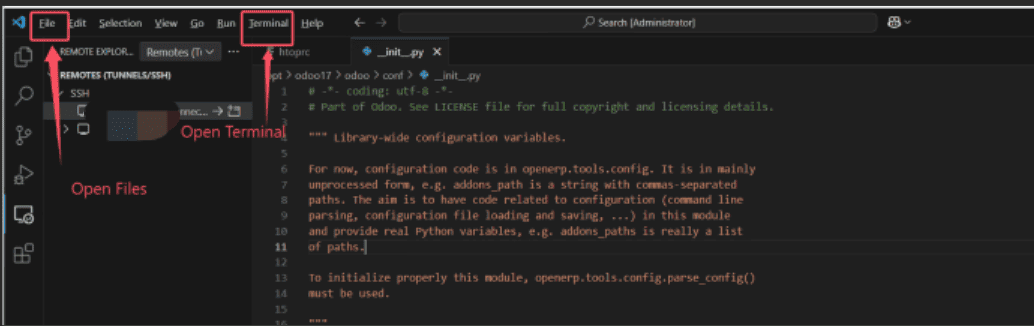
Step 5: Default VS Code SSH Shortcuts
- F1 or Ctrl+Shift+P: Open Command Palette
- Remote-SSH commands: Access server configuration and connection options
Notes
- Ensure the SSH server is running on your Linux machine before connecting.
- This setup supports VS Code remote development, SSH, Visual Studio SSH connection, and remote SSH Visual Studio Code workflows.
- Works with Linux servers, Windows Subsystem for Linux (WSL), and virtual machines.
Keywords:
visual studio linux, vscode remote ssh, vs code ssh, remote ssh vscode, ssh vscode, vscode ssh remote, visual code ssh, vscode ssh config, vscode ssh remote, visual code remote ssh, visual studio ssh, ssh visual studio code, vscode ssh connection, visual studio code connect to remote server
Outline