

How to Uninstall SQL Server Completely
If you’ve ever struggled with removing SQL Server from your computer, you’re not alone. Many beginners find it confusing to uninstall SQL Server or remove SQL Server instances properly. This guide will walk you step by step on how to uninstall SQL Server completely from Windows, whether you’re dealing with SQL Server 2014, 2016, 2017, 2019, or SQL Server Express.
Why You May Need to Uninstall SQL Server
Sometimes you need to remove SQL Server because:
- You installed the wrong edition (e.g., Express instead of Developer).
- You want to reinstall due to errors or corruption.
- You no longer use it and want to free up disk space.
Whatever the reason, here’s a beginner-friendly tutorial on how to uninstall SQL Server.
How to Uninstall SQL Server
Step 1: Stop SQL Server Services
Before removing SQL Server, you need to stop all related services.
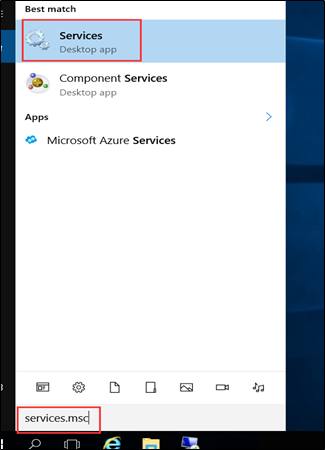
- Press Win + R, type
services.msc, and hit Enter.
- In the list, look for services starting with SQL Server.
- Right-click each service and select Stop.
This ensures the uninstallation process goes smoothly.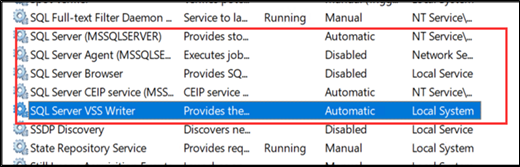
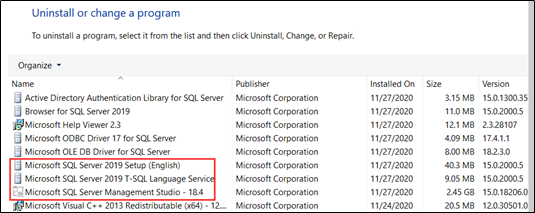
Step 2: Uninstall SQL Server from Control Panel
Now let’s uninstall SQL Server instances using the built-in removal tool.
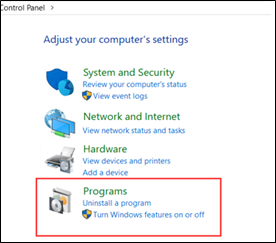
- Open Control Panel → Uninstall a program.
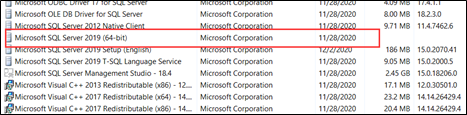
- Find Microsoft SQL Server [Version] (64-bit), right-click, and choose Uninstall/Change.
- Example: Microsoft SQL Server 2014 if you want to uninstall SQL Server 2014.
- Same applies for SQL Server 2016, 2017, 2019, or Express Edition.
.png)
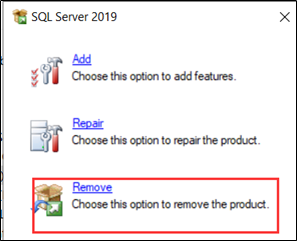
- In the SQL Server setup wizard, click Remove.
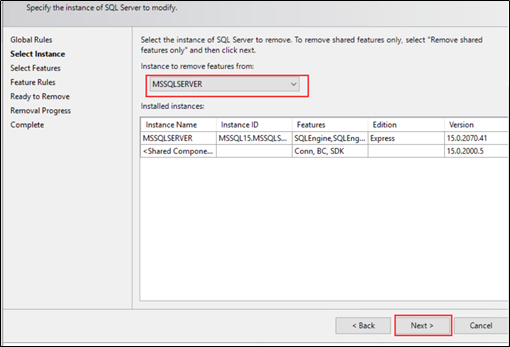
- Choose the instance you want to remove (important if you have multiple).
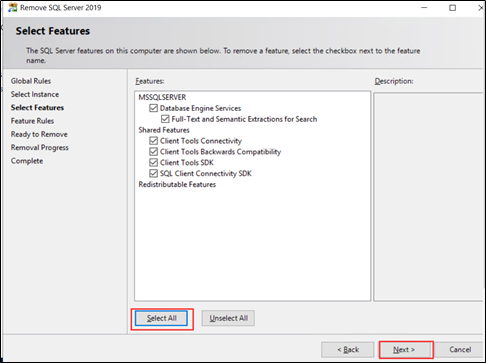
- Click Select All → Next → Remove.
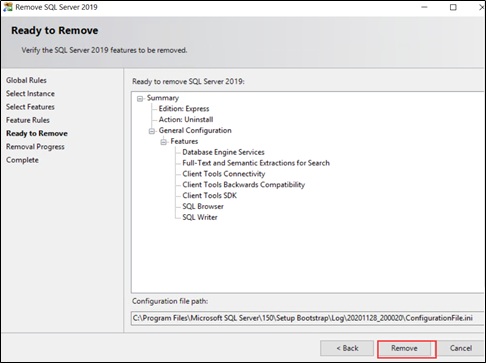
- Wait until all components are uninstalled, then click Close.
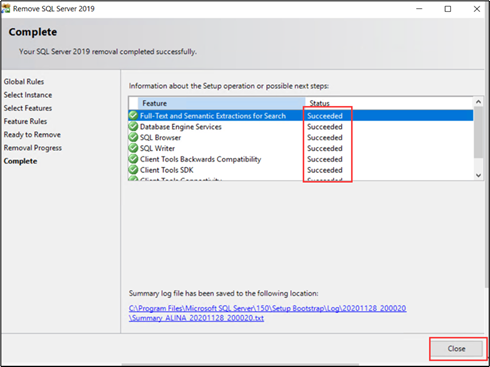
👉 Repeat this step for all remaining SQL Server components listed in Control Panel.
Step 3: Delete SQL Server Related Files
Even after uninstalling, leftover files may remain. To delete SQL Server completely, follow these steps:
3.1 Delete Installation Folders
Delete the default installation folder of SQL Server.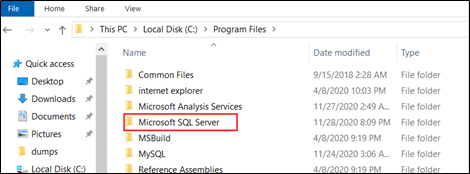
Step 4: Done
Once all services, instances, and files are removed, you’ve successfully uninstalled SQL Server completely from your system.