

How to Install Nginx with HTTPS on Ubuntu
In this guide, you’ll learn how to install Nginx on Ubuntu, configure it, and set up SSL with Let’s Encrypt so your site runs securely over HTTPS.
We’ll cover Ubuntu 20.04, but the steps also work for Ubuntu 22.04 with minor differences.
Prerequisites
Before starting, make sure you have:
- An Ubuntu 20.04 or Ubuntu 22.04 server (VPS or dedicated server).
- A non-root user with
sudoprivileges. - A domain name (optional but required for HTTPS setup).
Steps to Install Nginx on Ubuntu
Step 1: Installing Nginx on Ubuntu
Log in to your server:
ssh user_name@server_ip Nginx is included in Ubuntu’s default repositories. To install Nginx:
sudo apt update
sudo apt install nginx
That’s it! Nginx is now installed.
Step 2: Configuring the Firewall for Nginx
Ubuntu uses UFW (Uncomplicated Firewall). You need to allow Nginx traffic.
Check UFW status:
sudo ufw statusEnable UFW and allow SSH + Nginx HTTPS traffic:
sudo ufw enable
sudo ufw allow ssh
sudo ufw allow 'Nginx HTTPS'
sudo ufw status
This ensures that ports 80 (HTTP) and 443 (HTTPS) are open.
Step 3: Checking Your Nginx Installation
After installation, Nginx should be running automatically. Confirm with:
systemctl status nginxThen test in your browser:
http://your_server_ip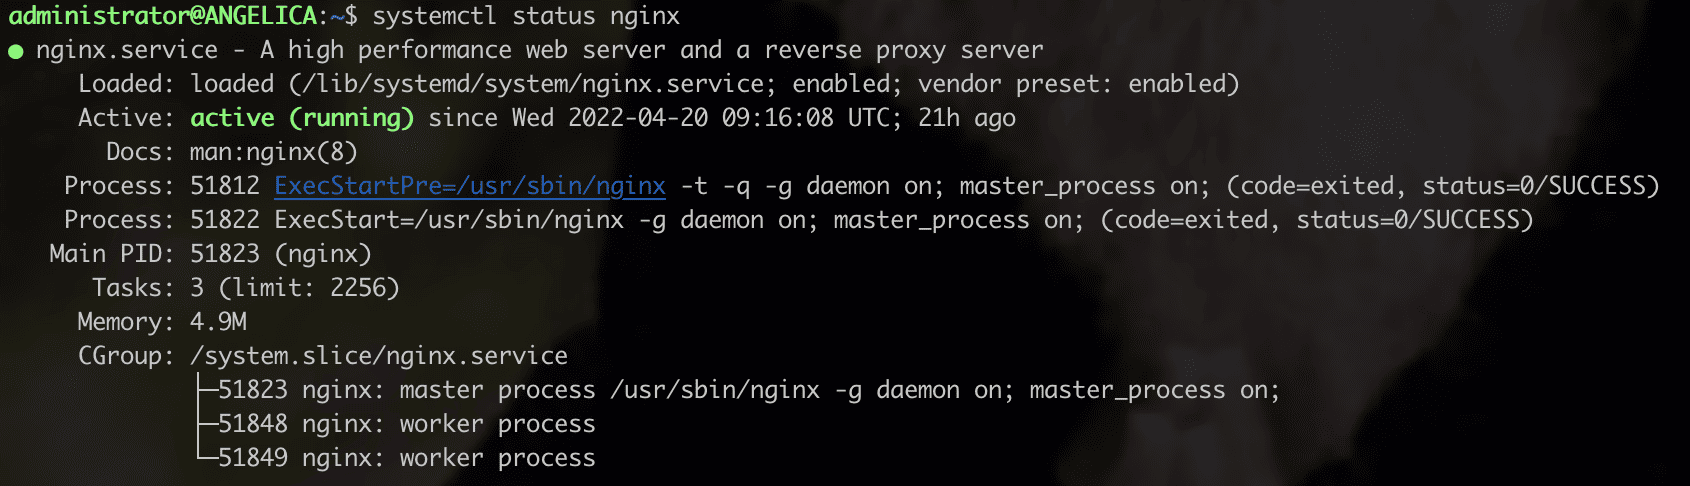
If you see the Nginx welcome page, your Nginx setup on Ubuntu is successful.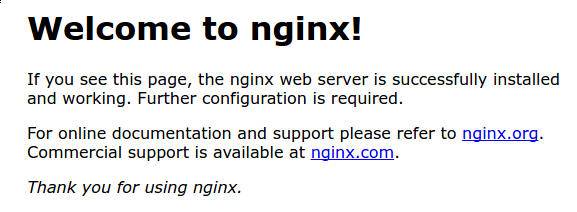
Step 4: Configuring Nginx for a Domain
Here are basic commands for managing Nginx:
sudo systemctl stop nginx     # Stop Nginx
sudo systemctl start nginx    # Start Nginx
sudo systemctl restart nginx  # Restart Nginx
sudo systemctl reload nginx   # Reload configs without stopping
sudo systemctl enable nginx   # Auto start at boot
sudo systemctl disable nginx  # Disable auto start
Step 5: Managing Nginx Process
By default, Nginx serves files from /var/www/html. To host multiple domains, create new server blocks.
- Create a website directory
sudo mkdir -p /var/www/example.com
sudo chown -R $USER:$USER /var/www/example.com
sudo chmod -R 755 /var/www/example.com- Add a sample HTML page
nano /var/www/example.com/index.htmlPaste:
<html>
  <head><title>Welcome to example.com!</title></head>
  <body><h1>Success! example.com is working on Nginx!</h1></body>
</html>- Configure Nginx server block
sudo nano /etc/nginx/sites-available/example.comAdd:
server {
    listen 80;
    server_name example.com www.example.com;

    root /var/www/example.com;
    index index.html;

    location / {
        try_files $uri $uri/ =404;
    }
}
Enable site:
sudo ln -s /etc/nginx/sites-available/example.com /etc/nginx/sites-enabled/Test and reload:
sudo nginx -t
sudo systemctl restart nginx
Visit http://example.com and your new site should be live.
Step 6: Install Certbot for SSL
Let’s Encrypt provides free SSL certificates. Install Certbot:
sudo apt install certbot python3-certbot-nginxStep 7: Obtain and Install SSL Certificate
Run Certbot with the Nginx plugin:
sudo certbot --nginx -d example.com -d www.example.comCertbot will:
- Verify domain ownership
- Install the SSL certificate
- Update Nginx config automatically
Now test:
https://example.comYour site is now secure with HTTPS.
Step 8: Auto-Renewing SSL Certificates
Let’s Encrypt certificates expire every 90 days. Certbot sets up automatic renewal with a systemd timer.
Check status:
sudo systemctl status certbot.timerYou can test renewal manually:
sudo certbot renew --dry-runConclusion
You’ve successfully:
- Installed Nginx on Ubuntu
- Configured firewall & server blocks
- Installed and configured SSL with Let’s Encrypt
- Enabled auto-renewal for HTTPS
Now your Ubuntu server is ready to securely serve websites using Nginx HTTPS setup.
setup nginx, install nginx ubuntu, instal nginx ubuntu, install and configure nginx ubuntu, install nginx in ubuntu, nginx setup ubuntu, nginx ubuntu setup, install nginx, nginx ubuntu, nginx for ubuntu, config ssl nginx, configure ssl on nginx, nginx setup ssl, ssl configuration in nginx, ssl configuration nginx, install nginx ubuntu 22.04, nginx https setup, nginx configure https, install nginx on ubuntu 22.04, let's encrypt nginx ubuntu