

VPN Setup: How to Install VPN on Windows Server
Introduction
Setting up a VPN (Virtual Private Network) on Windows Server 2016 or 2019 allows secure remote connections for your users. This step-by-step beginner-friendly guide shows how to install the Remote Access role, configure Routing and Remote Access Service (RRAS), open firewall ports, and enable user accounts for VPN access.
Prerequisites
- A Windows Server 2016 or 2019 server
- Administrator rights
- Static public IP (recommended)
- Basic understanding of Server Manager and firewall configuration
Steps to Install VPN on Windows
Step 1: Install the VPN Role (Remote Access)
Option 1: Install via Server Manager
- Open Server Manager.
- Go to Manage > Add Roles and Features.
- Select Role-based or feature-based installation.
- Choose your server.
- Under Server Roles, select Remote Access.
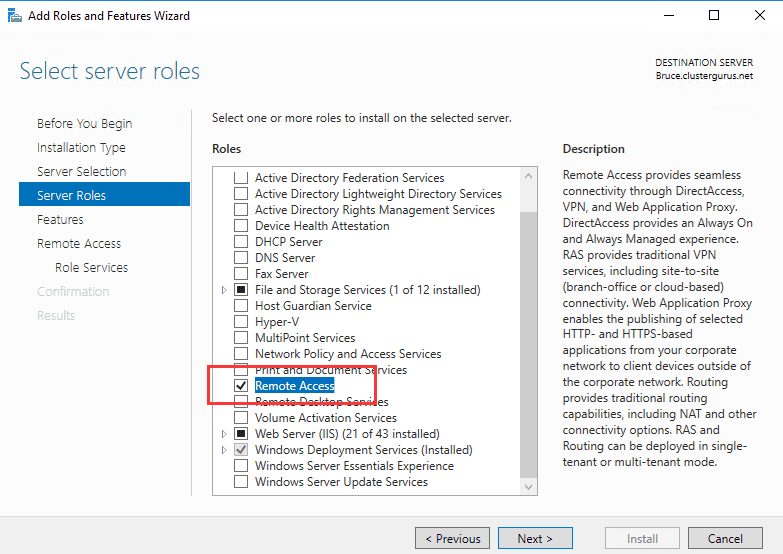
- Under Role Services, select DirectAccess and VPN (RAS).
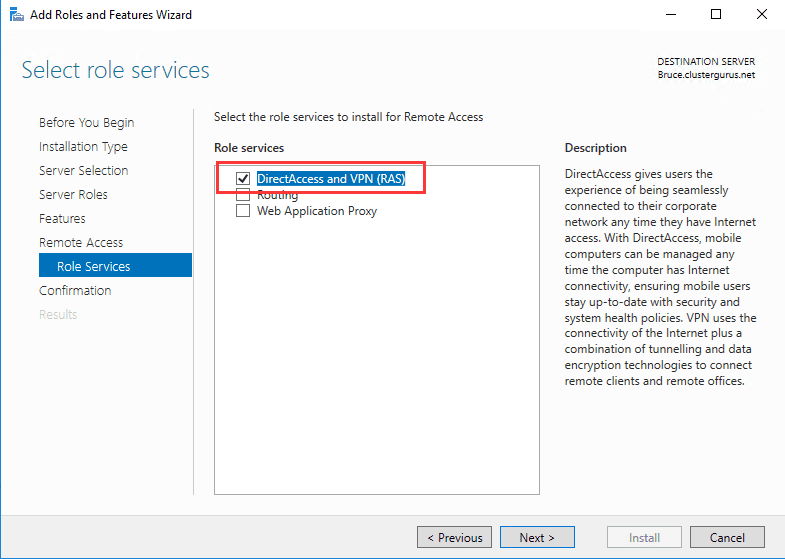
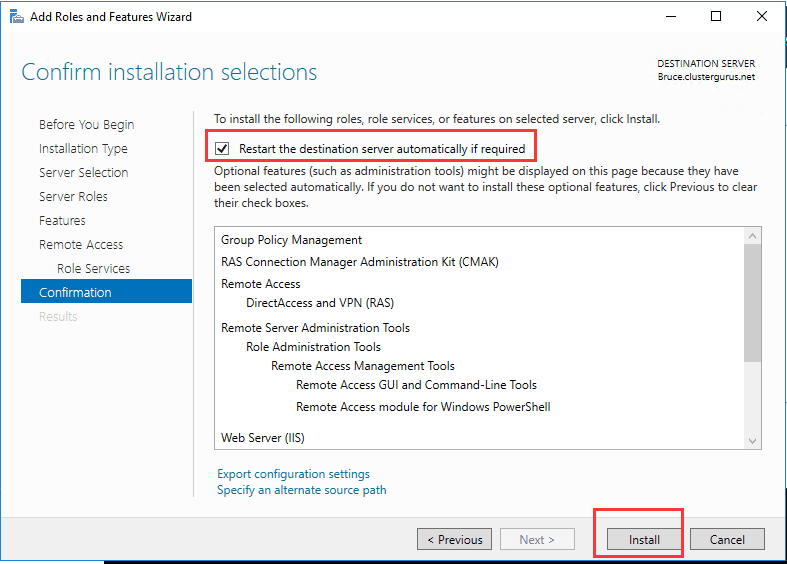
- Proceed with the default settings and click Install.
Option 2: Install via PowerShell
Install-WindowsFeature RemoteAccess -IncludeManagementTools
Install-WindowsFeature DirectAccess-VPN -IncludeManagementTools
Step 2: Start the VPN Configuration Wizard
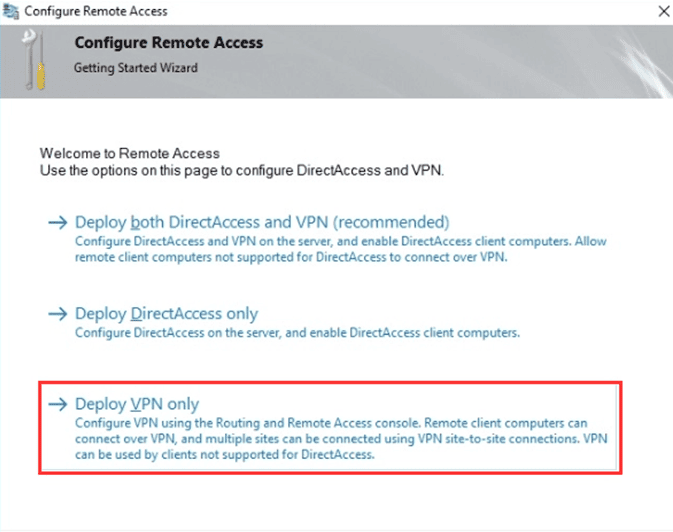
- In Server Manager, click Notifications.
- Select Open the Getting Started Wizard.

- Choose Deploy VPN only to start VPN setup.
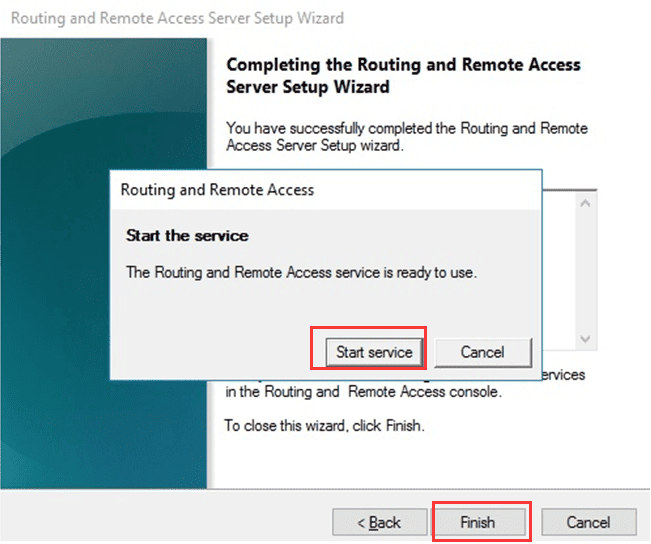
Step 3: Configure VPN with RRAS
- Select Custom configuration.

- Check VPN Access.
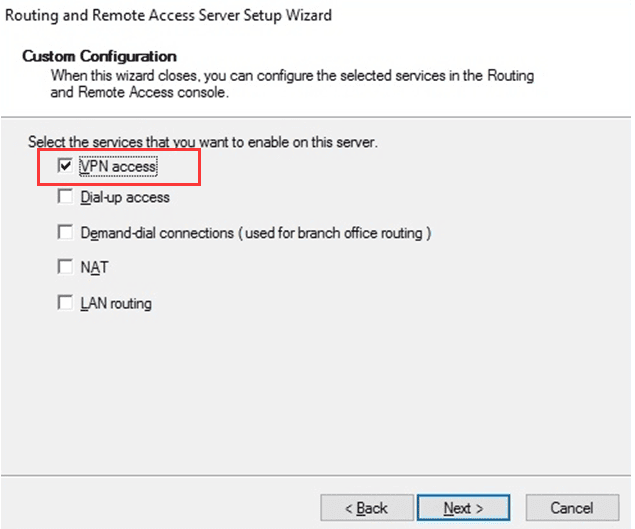
- Finish the wizard and start the RRAS service.
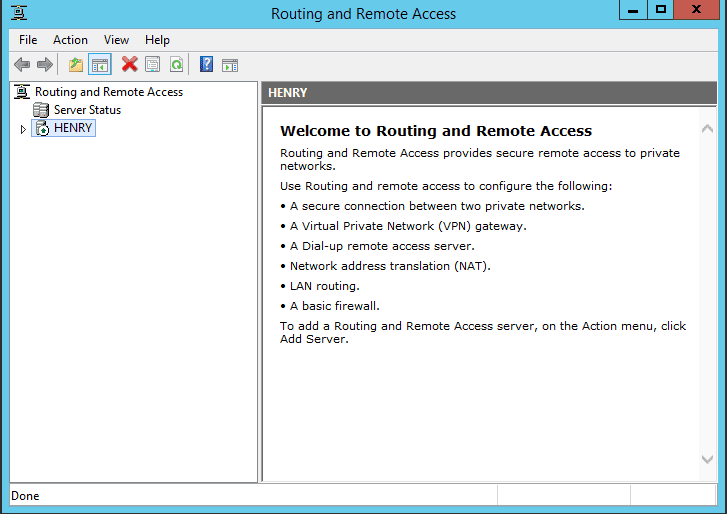
Step 4: Configure Routing and Remote Access
- Open the RRAS Management Console.
- Right-click your server name > Configure and Enable Routing and Remote Access.
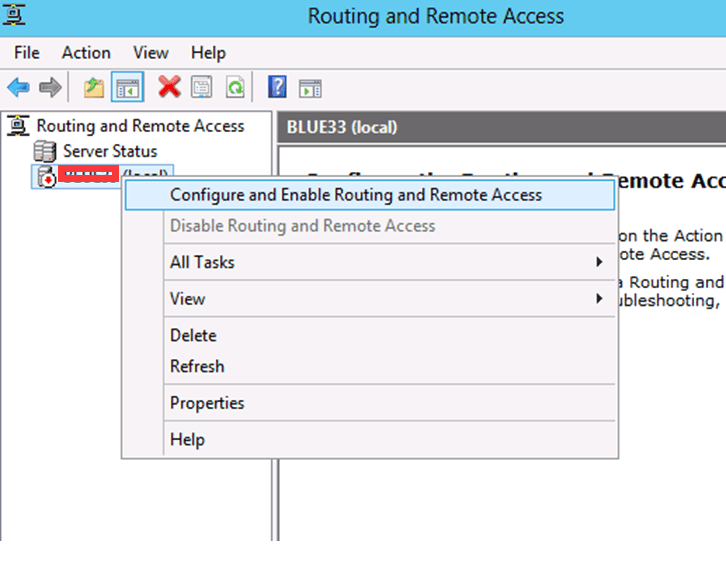
- Complete the wizard to enable VPN.
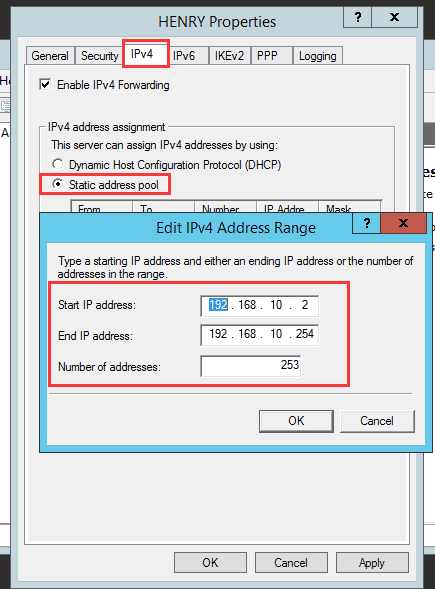
Configure IP Address Assignment
- With DHCP: IPs are automatically assigned.
- Without DHCP:
- Go to RRAS > Properties > IPv4.
- Enable the Static address pool and define an IP range.
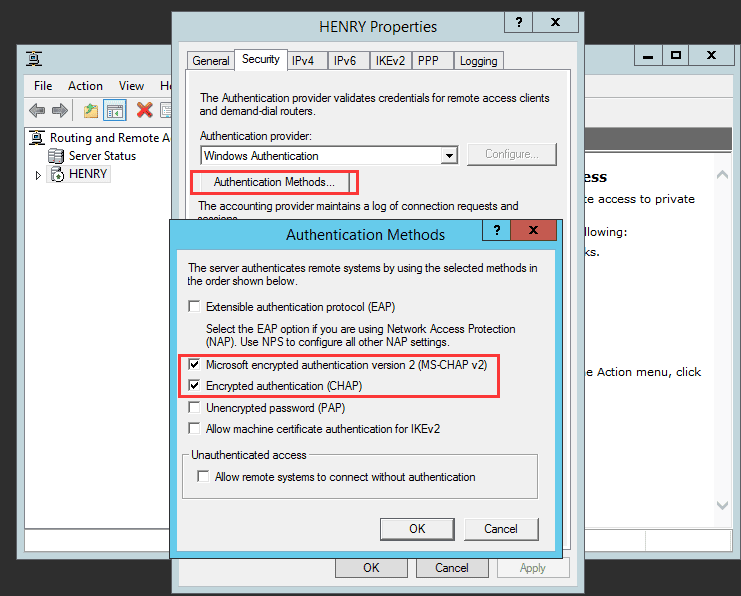
Step 5: Open Required Firewall Ports
To allow VPN traffic, make sure these ports are open and forwarded:
- PPTP VPN: TCP 1723 + GRE (Protocol 47)
- L2TP over IPsec VPN: UDP 1701, 500, 4500
- SSTP VPN: TCP 443
- IKEv2 VPN: UDP 500, 4500
Step 6: Enable VPN Access for Users
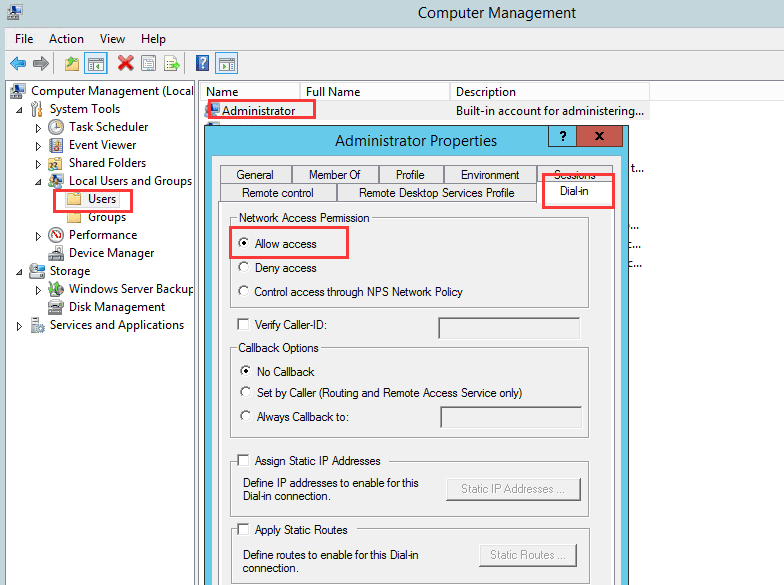
- On Standalone Server:
- Open Computer Management > Local Users and Groups.
- Right-click user > Properties > Dial-in tab.
- Select Allow access.
- On Active Directory Domain:
- Open Active Directory Users and Computers.
- Right-click user > Properties > Dial-in tab.
- Select Allow access.
Step 7: Test the VPN Connection
- On a client PC, create a new VPN connection.
- Enter the server’s public IP or hostname.
- Log in with a user account enabled for VPN access.
- Confirm that the connection is successful.
Conclusion
By following this tutorial, you have installed and configured a VPN server on Windows Server 2016 or 2019 using Remote Access and RRAS. Your VPN can now handle connections over PPTP, L2TP/IPsec, SSTP, or IKEv2.
This VPN setup guide for Windows Server ensures secure remote connections for users and is a reliable way to manage remote access.
Tip: For stronger security, use SSTP or IKEv2 VPN protocols with a valid SSL certificate instead of PPTP.