

How to Download MySQL 5.7 for Windows
Introduction
This guide walks you, step-by-step, through installing MySQL 5.7 on a Windows Server, verifying the service, and testing the connection with MySQL Workbench. It is written for beginners — every action is explicit, so you won’t miss anything.
Prerequisites & Download
Requirements
- Windows Server with Administrator account (Windows Server 2016/2019/2022/2025 OS).
- Internet access on the server (or have the installer downloaded and copied onto the server).
- A plan for a strong root password (use uppercase/lowercase, numbers, symbols).
Get the installer
- Open a browser on the server and go to this site for downloads
- Download MySQL 5.7 for Windows. Make sure to download MySQL 5.7 installer for Windows (64-bit) or the MySQL Installer Community 5.7 if available.
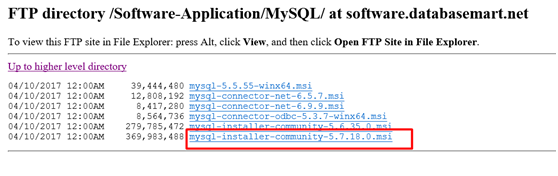
- Save the installer to the server (e.g., C:\Downloads\mysql-installer-5.7.x.exe).
Steps to Install MySQL Server 5.7
Double click to install “mysql-installer-community-5.7.18.0”.
Step 1: License and setup type
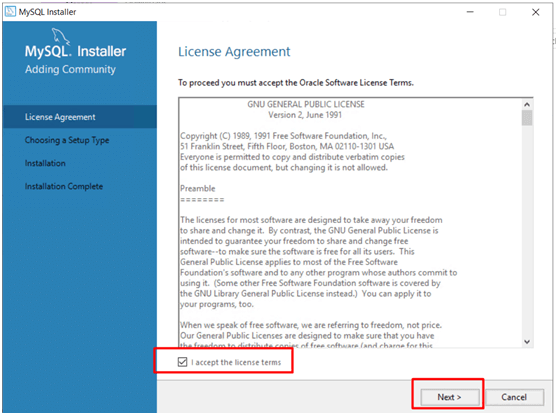
- On the first screen, accept the license by checking “I accept the license terms” and then click Next.
- Choose a Setup Type:
- Developer Default (includes Workbench and tools), or
- Server only (only MySQL server).
For this guide, select 'Server only' and click 'Next'.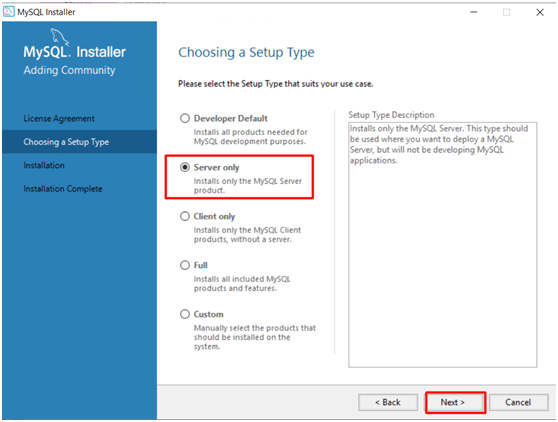
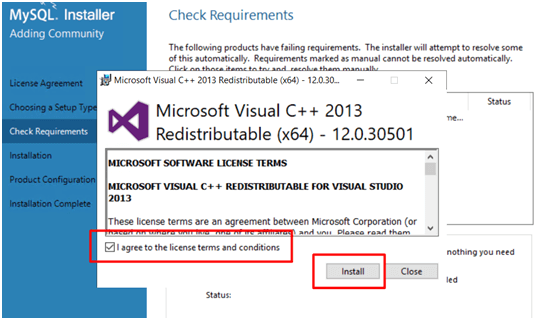
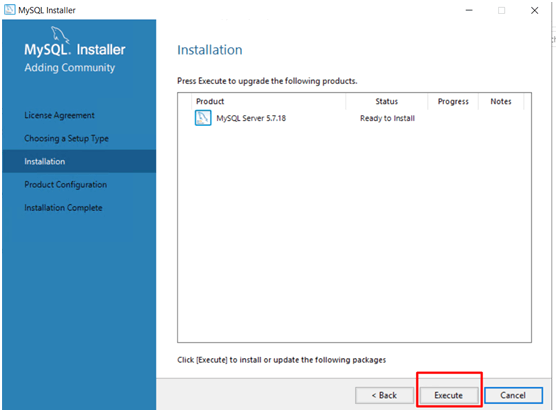
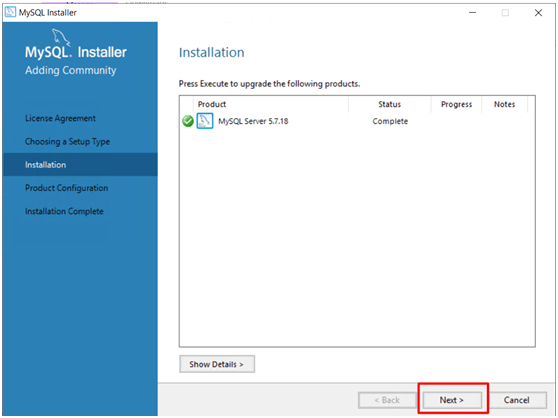
Step 2: Check requirements and install
- The installer checks requirements. Click Execute to install required components (e.g., Visual C++ if needed).

- Accept any additional license prompts and allow the installer to finish downloading/installing selected components.
Step 3: Configure MySQL Server
When the installer finishes copying files, it will launch a Configuration wizard. Please follow these items carefully. First, click Next to walk through the configuration wizard.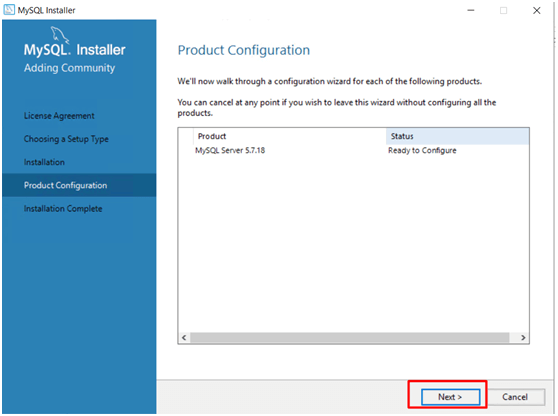
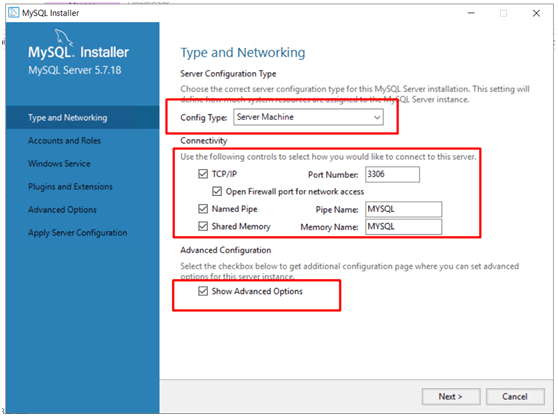
3.1 Type & Networking
- Config Type: select Server Machine.
- Connectivity / Port: leave default
3306(change only if port is in use). - Enable the network options:
- Check TCP/IP.
- Check the Open Windows Firewall port for network access.
- Optionally enable Named Pipe and Shared Memory (pipe name typically
MYSQL).
- Click Show Advanced Options if present. Then click Next.
3.2 Accounts and Roles
- Set root password: enter a strong password in Root Password and Confirm.
- Optionally create a non-root administrative user (recommended for remote/admin tasks).

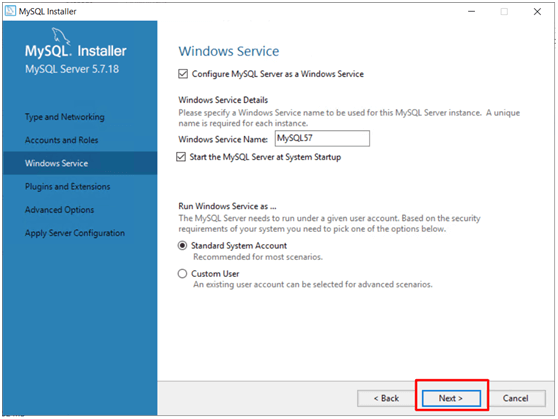
3.3 Windows Service
- Check Configure MySQL Server as a Windows Service.
- Check Start the MySQL Server at System Startup.
- Set Service Name (default often
MySQL57). - Use the Standard System Account unless you have a reason to use another account.
- Click Next.
3.4 Plugins & Extensions
Leave defaults (unless you know you need specific plugins). Then click Next.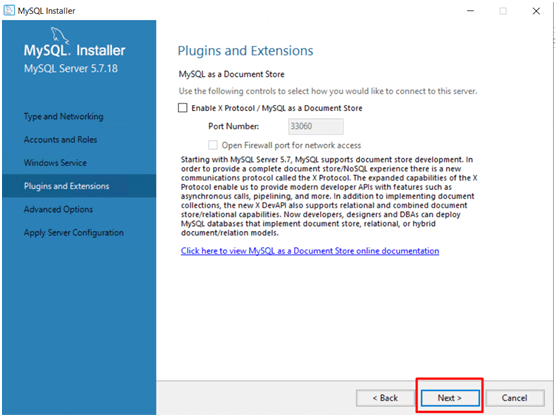
3.5 Advanced Options (optional)
You may enable logs: General Log, Slow Query Log, and Binary Log if you need them. Then click Next.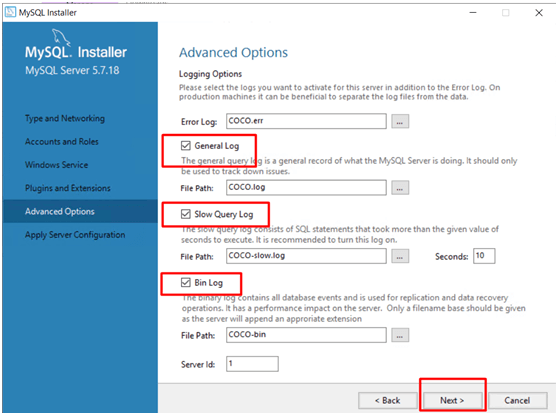
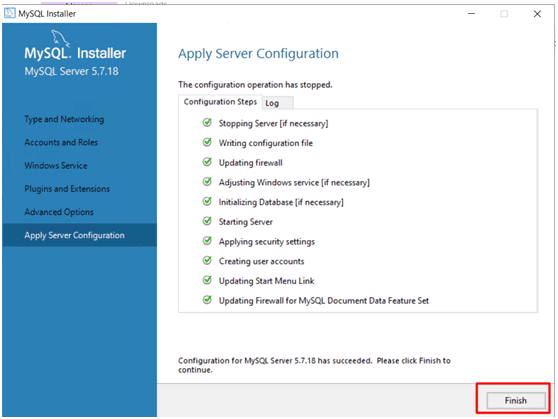
3.6 Apply configuration
- Click Execute to apply the configuration.

- Wait until the wizard reports Configuration for MySQL Server 5.7.x has succeeded. Then click Next.
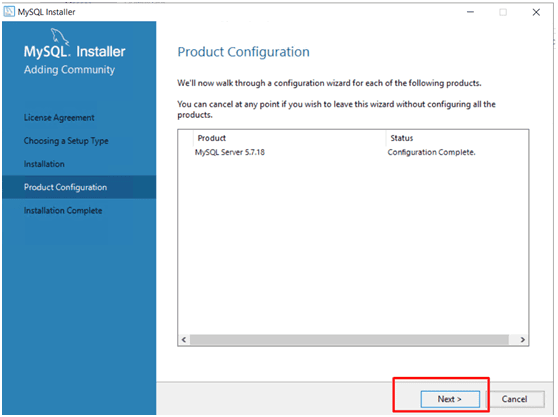
Step 4: Installation complete
When the wizard finishes, click Finish on the installer. The MySQL service should be running if you selected auto-start.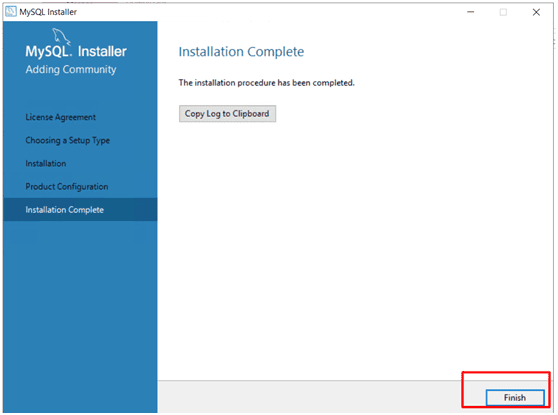
Step 5: Add Workbench and Connectors
If you want GUI tools, drivers, or utilities (recommended for easier management):
- Open MySQL Installer - Community
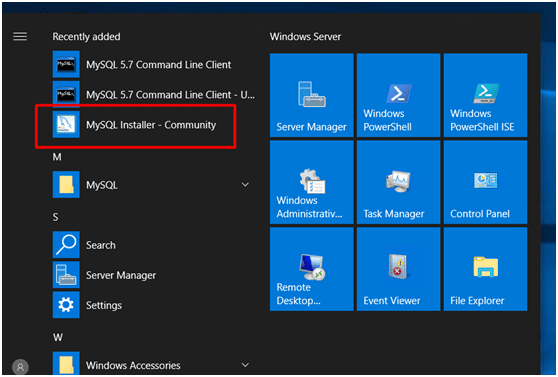
- In the MySQL Installer main screen, click Add(right side).

- In Select Products and Features, pick items from Available Products (e.g., MySQL Workbench, MySQL Notifier, Connector/ODBC, Connector/NET) and click the right arrow to move them into Products/Features To Be Installed.
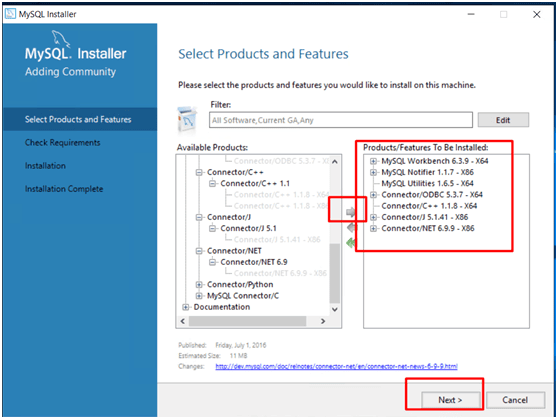
- Click Next and Execute to install selected components. Then click Finish.
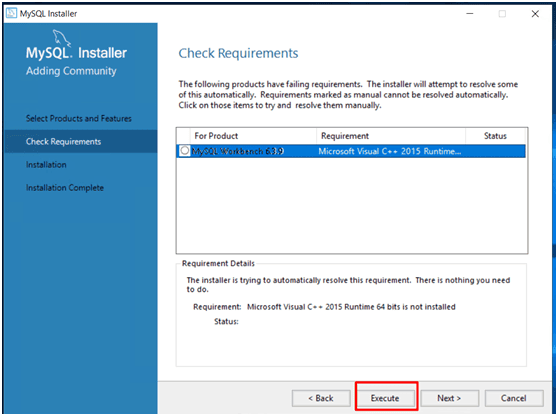
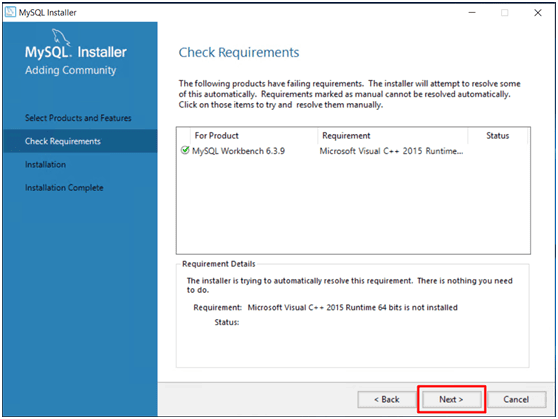
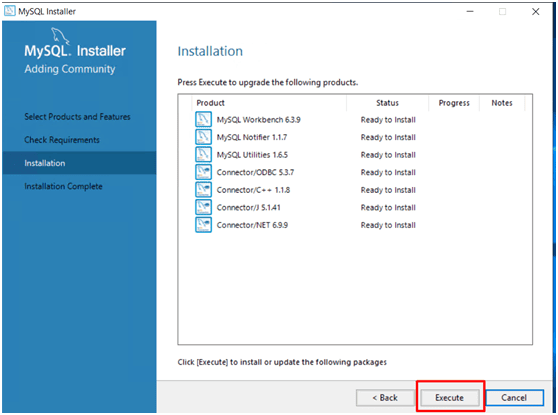
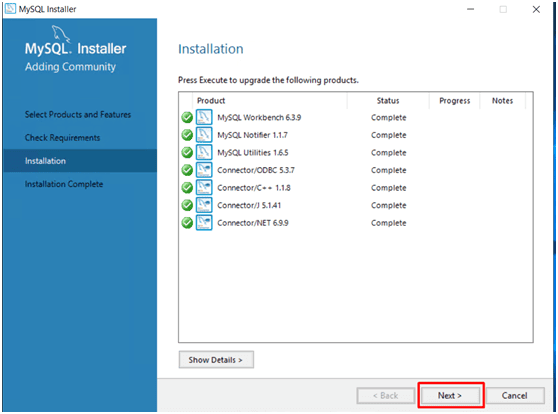
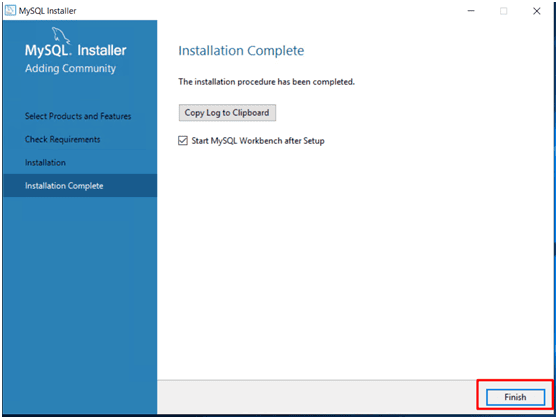
This step lets you install tools to manage and connect to the server easily.
Step 6: Verify MySQL service & basic login
Check service status
- Method A: Services MMC
- Press
Win + R, typeservices.msc→ Enter. - Find the service named
MySQL57(or the name you used). Ensure it shows Running.
- Method B: Command Prompt
- Open an elevated command prompt
- Run:
sc query MySQL57or:
net start | findstr /i mysqlLog in using MySQL Command Line Client
- Open MySQL 5.7 Command Line Client from the Start Menu.

- When prompted, enter the
rootpassword you set.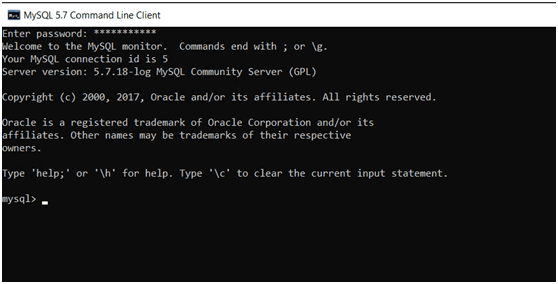
- At prompt run:
\showYou should see system databases like mysql, information_schema, and performance_schema.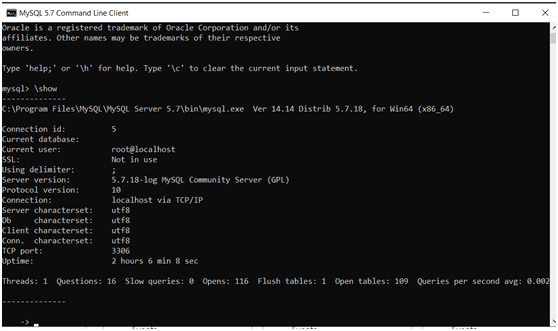
Step 7: Create a Non-Root Remote User
Using a dedicated user for remote access improves security.
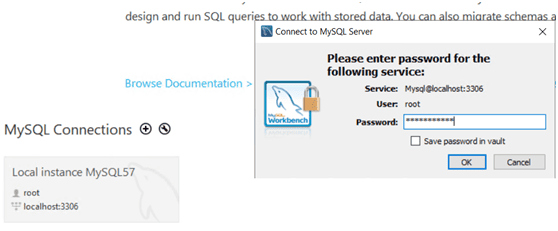
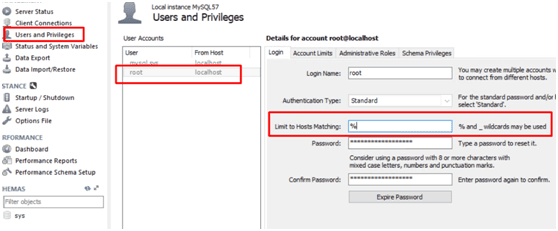
Using MySQL Workbench (GUI)
- Open MySQL Workbench, connect as
root(Local). - Go to Server → Users and Privileges.
- Click Add Account. Enter:
- Login Name:
remuser(example) - Limit to Hosts Matching:
%(allows any host) — better: set specific IP(s). - Password: Choose a strong password.
- Login Name:
- Under Users and Privileges, grant only the privileges you need (avoid full DBA if not required).
- Click Apply.
Or run SQL (in Workbench or MySQL CLI)
CREATE USER 'remuser'@'%' IDENTIFIED BY 'Str0ngP@ssw0rd';
GRANT SELECT, INSERT, UPDATE, DELETE ON your_database.* TO 'remuser'@'%';
FLUSH PRIVILEGES;
Replace your_database and privileges as needed. Use % only if you accept connections from any IP; prefer a specific host/IP if possible.
Step 8: Test Remote Connection
With MySQL Workbench
- Open Workbench → click + to create a new connection.
- Set Connection Method:
Standard (TCP/IP). - Hostname: server IP (public/private as appropriate). Port:
3306. User:remuser. - Click Test Connection → enter password when prompted.
- If successful, you can open SQL Editor and run
SHOW DATABASES;.
With CLI
mysql -u remuser -p -h <server_ip> -P 3306Enter the password; you should get the MySQL prompt.
Conclusion
This guide covers everything from installing MySQL on Windows to configuring MySQL as a Windows service. If you want to remote manage MySQL using MySQL Workbench, ensure that you have set up the correct remote connection parameters and granted appropriate privileges to your remote user. With this setup, you can easily connect MySQL Workbench to a remote server and perform remote management of your database. If you encounter issues like unable to connect to remote database in MySQL Workbench, make sure that the correct network settings and firewall rules are in place.
Related Keywords
mysql 5.7 download windows, installing mysql on windows, configure mysql server as a windows service, configure mysql server windows, download mysql 5.7 for windows, download mysql 5.7 installer 64 bit, download mysql 5.7 installer for windows, download mysql 5.7 installer for windows 64 bit, download mysql 5.7 installer for windows 64 bit, download mysql installer community 5.7, remote management mysql workbench, connect mysql workbench to remote server, connect remote database mysql workbench, mysql workbench remote connection, mysql workbench unable to connect to remote database, remote connection mysql workbench, workbench connect to remote mysql server