

How to Mount Disk on Linux Server
Step 1: Check Disk Information
Before mounting, first check if your server detects the new disk.
Run:
lsblkThis will list all disks.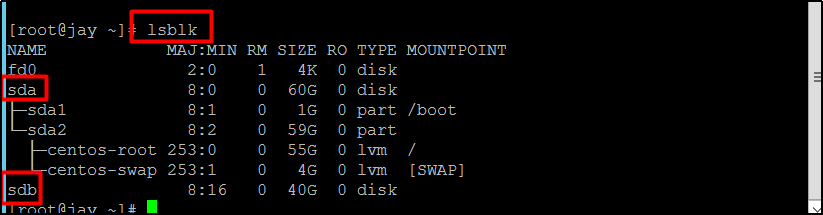
Typically, you will see something like sda (system disk) and sdb (new disk to mount). This step works on Ubuntu, Debian, CentOS, and almost all Linux distributions.
Step 2: Format the Disk
To use the new disk, you must format it with a file system.
For ext4:
mkfs -t ext4 /dev/sdbFor xfs:
mkfs.xfs /dev/sdb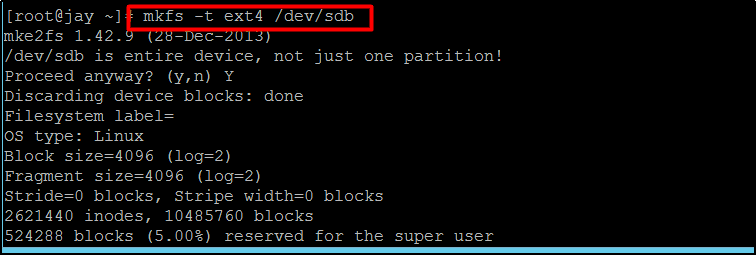
Tip: If you want to mount external disk Linux (like USB HDD/SSD), formatting may erase data. Make sure to back up important files.
Step 3: Mount the Disk Temporarily
Create a directory where you want to mount the disk:
mkdir /second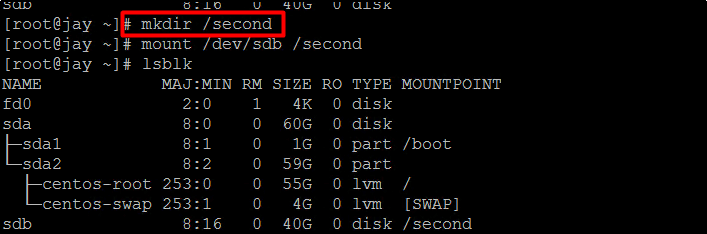
Then mount it:
mount /dev/sdb /second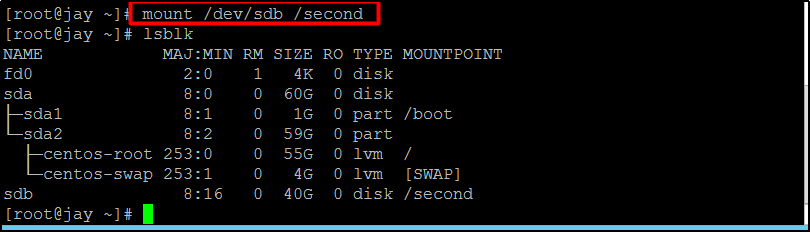
Now your disk is accessible at /second.
Step 4: Mount the Disk Permanently
By default, temporary mounts are lost after reboot. To make the mount permanent:
Open the fstab file:
vi /etc/fstabAdd one of the following lines depending on the file system:
For ext4:
/dev/sdb /second ext4 defaults 0 0For xfs:
/dev/sdb /second xfs defaults 0 0Save and exit.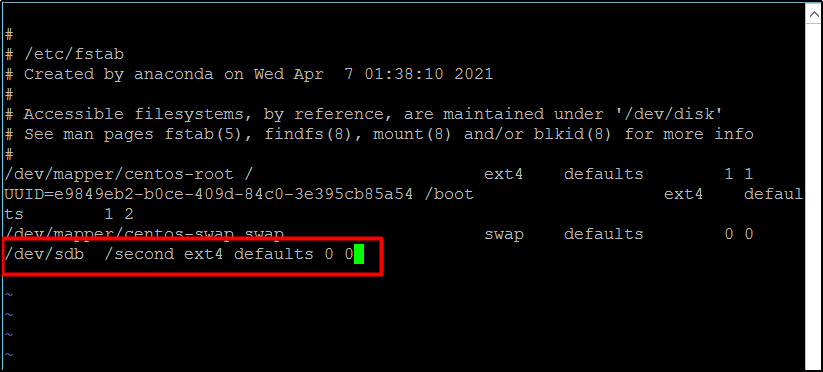
From now on, Linux will mount disk automatically at boot.
Step 5: Verify Disk Mount
To confirm the disk is mounted:
df -THYou should see /dev/sdb listed under /second.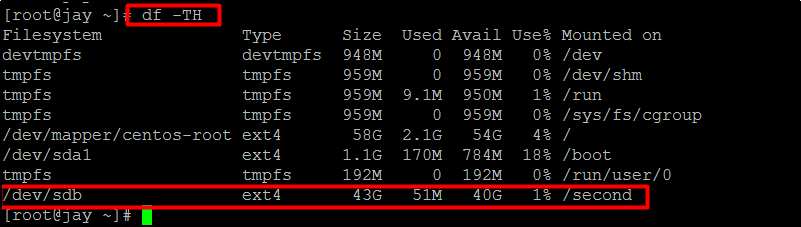
This confirms your new disk (HDD, SSD, NVMe, or external) is mounted correctly.
linux mount disk, mount disk ubuntu, mount hdd ubuntu, linux mount hard drive, linux mount hdd, mount an external hard drive linux, mount external hard drive linux, linux how to mount a drive, debian mount disk, mount external disk linux, mount new disk linux, linux mount new disk, ubuntu mount new disk, linux add new disk, mount disk debian, mount nvme drive linux, linux check mounted disk, centos mount disk, mount disk on linux