

How to SSH linux Server Using PuTTY
This guide will show beginners how to SSH to a Linux server using PuTTY on Windows, with step-by-step instructions.
Step 1: Download and Open PuTTY
If you don’t have PuTTY installed, you can download PuTTY here. PuTTY is a free and popular SSH client for Windows, making it easy to connect to Linux servers.
Once downloaded, double-click putty.exe to launch it.
Step 2: Enter Server IP and SSH Port
In the PuTTY window: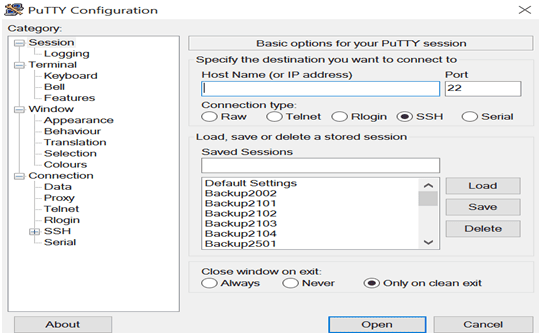
- Host Name (or IP address): Enter the IP address of your Linux server.
- Port: Enter the SSH port number. The default is 22, but your server may use a custom port for security.
- Connection Type: Select
SSH.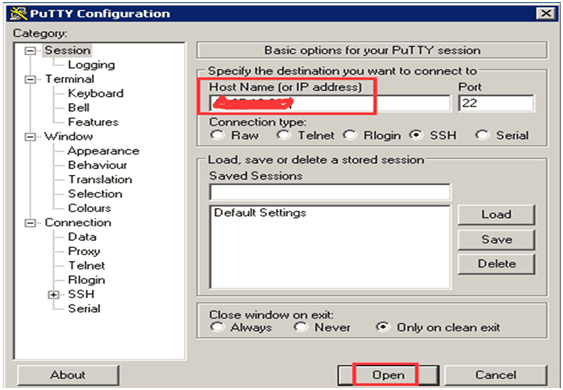
Click Open to start the connection.
Step 3: Accept Security Warning
When connecting to the server for the first time, PuTTY will display a security alert asking if you trust the server. Click Yes to continue.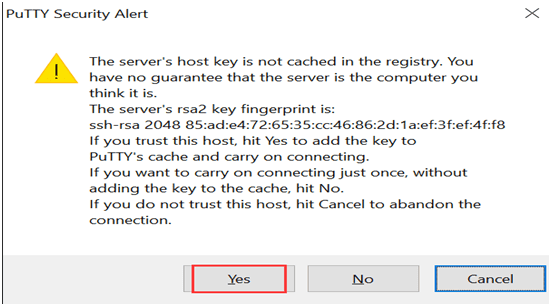
Step 4: Log in with Username and Password
In the terminal window that appears:
- For Ubuntu servers: Use
administratoras the default username. - For CentOS servers: Use
rootas the default username.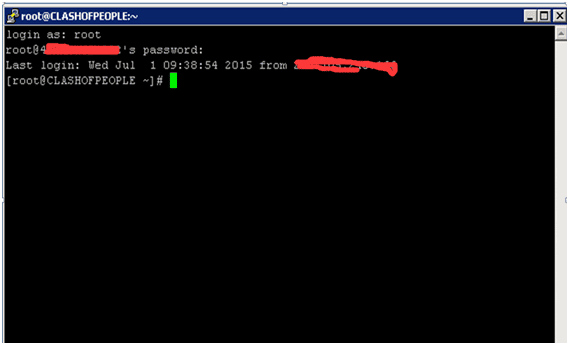
Type your password and press Enter. (Note: The password will not be visible while typing for security reasons.)
Step 5: Start Managing Your Linux Server
Once logged in, you’ll have full access to your Linux command line via SSH. You can now run Linux commands, upload/download files, and manage your server remotely.
Notes for Beginners
- SSH Ubuntu Server: Use
administratoror a created user. - SSH Linux Command Line: Commands are case-sensitive.
- SSH Port 22: If your server uses a different port, replace
22with the correct number in PuTTY. - For better security, you can change your SSH port later — see our Change SSH Port Tutorial.
putty download, ssh port 22, ssh ubuntu server, ssh linux server, ssh connection linux, ssh login linux, ssh tutorial, secure shell tutorial, ssh linux command line, putty ssh windows, how to ssh to linux server, ssh using putty, ssh putty tutorial