

How to Update DNS Records in ISPConfig
Introduction
When managing your domain, one of the most important tasks is DNS management. DNS (Domain Name System) connects your domain name to the right server so that websites, emails, and applications work correctly.
With ISPConfig, you can update DNS records, add DNS records, and configure DNS settings easily, even if you’re a beginner.
In this tutorial, we’ll walk you through step by step how to update DNS records in ISPConfig, including A records, MX records, and TXT records. By the end, you’ll know how to set up DNS, check your configuration, and manage your domain like a pro.
Steps to Guide to Update DNS Records
Step 1: Login to ISPConfig
- Open your web browser and go to the URL provided by your hosting provider.
- Enter your username and password to log in. Make sure you have administrator or DNS management access.
This is the starting point for all DNS updates and DNS settings changes.
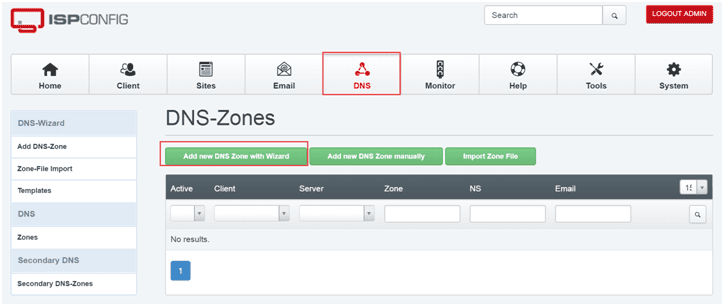
Step 2: Open DNS Management
- In the ISPConfig dashboard, look at the left-hand menu.
- Click DNS.

This section allows you to set up DNS zones, configure DNS records, and manage all DNS setup options for your domains.
Step 3: Create a New DNS Zone (if needed)
- Under the DNS menu, click Add new DNS Zone with Wizard.
- Enter the required details such as:
- Domain name
- IP address
- Email address for the domain administrator
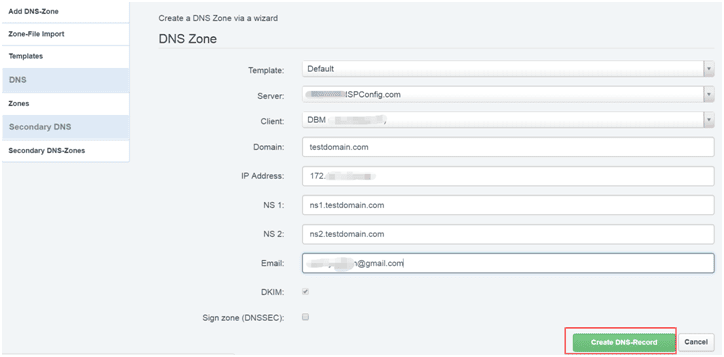
- Save your changes.
This step creates the DNS zone file, which is where all your DNS records (A, MX, TXT, etc.) will be stored.
Step 4: Edit DNS Records for Your Domain
- Click the domain you want to manage from the DNS list.
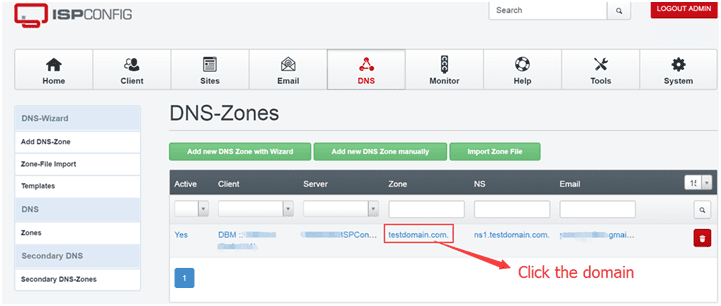
- Select Records.
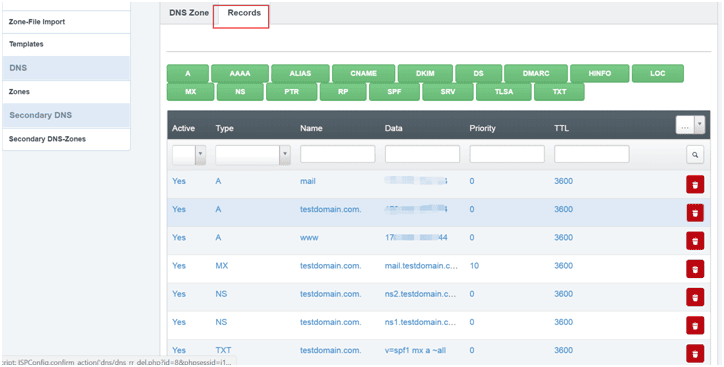
- Here, you can add, update, or delete DNS entries.
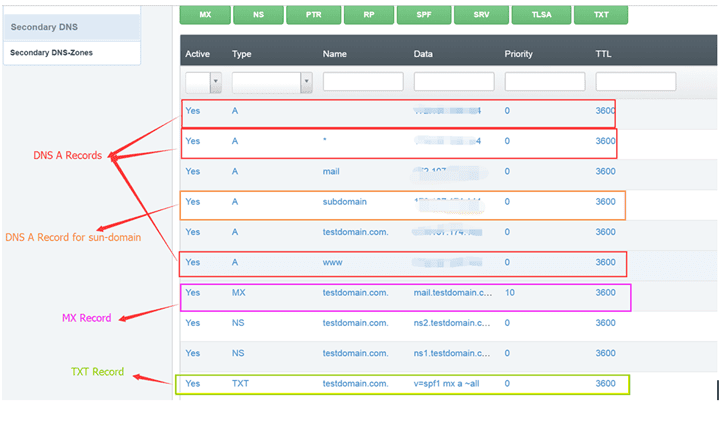
4.1 Add or Update A Records
- What it does: An A record maps your domain or subdomain to an IP address.
- Where it’s used: For pointing your domain to a web server, mail server, or FTP server.
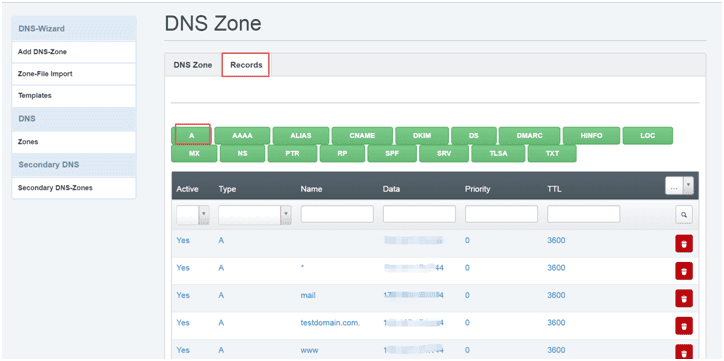
Fields you’ll see: - Record (Host Name): Example:
www,mail,ftp, or leave empty for the root domain. - Address (IP): The IP address of the server.
Examples of A records:
www.domain.com→ 192.168.1.1mail.domain.com→ 192.168.1.2ftp.domain.com→ 192.168.1.3
This is an essential part of DNS setup and config DNS.
4.2 Add or Update MX Records
- What it does: MX records control email delivery by pointing your domain to the correct mail server.
- Where it’s used: For setting up mail servers like Gmail, Outlook, or your own hosted mail system.
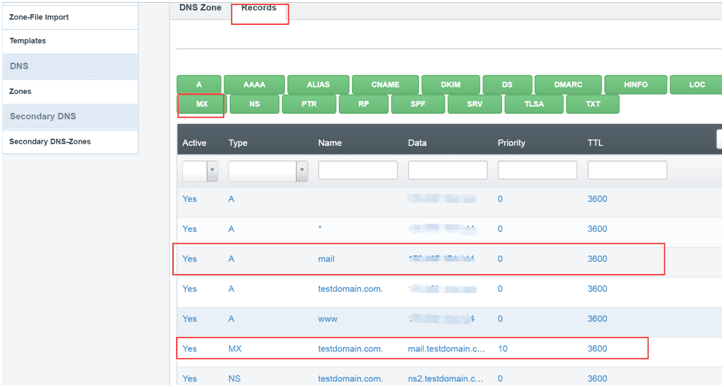
Fields you’ll see: - Priority: Lower numbers mean higher priority.
- Record (Host Name): Usually
mail.domain.com. - Address (Mail Server): Enter the domain name of your mail server, not just the IP.
Example:
- MX priority 10 →
mail.domain.com
This ensures your emails are delivered correctly and supports DNS settings for email.
4.3 Add or Update TXT Records
- What it does: TXT records are used for verification and security.
- Where it’s used: For SPF, DKIM, DMARC, and Google or Microsoft domain verification.
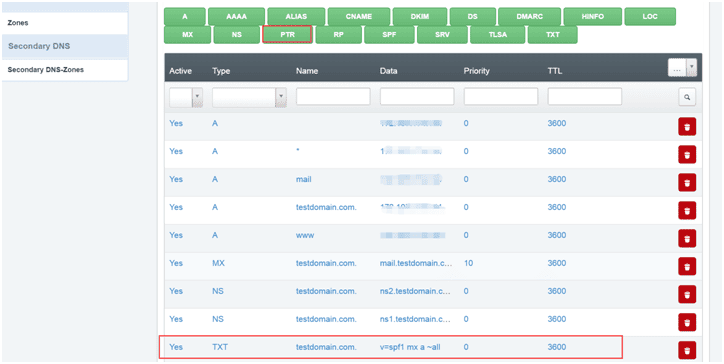
This helps prevent email spoofing and improves email delivery.
Step 5: Save and Apply DNS Changes
- After making updates to A, MX, or TXT records, click Save.
- Wait for DNS propagation. This can take anywhere from a few minutes to 24–48 hours, depending on your ISP and DNS caching.
Step 6: Verify Your DNS Setup
Once you update DNS records, you should always verify them.
Methods to check DNS setup:
- ISPConfig DNS Manager: Recheck your entries in the panel.
- Command line tools:
- Windows:
nslookup yourdomain.com - Linux/Mac:
dig yourdomain.com
- Windows:
- Online DNS checkers: Use tools like
whatsmydns.netto confirm your records are working globally.
This ensures your DNS update is correct and your services are running properly.
Conclusion
That’s it! You’ve successfully learned how to update DNS records in ISPConfig. With this guide, you can:
- Create and manage A records for websites, FTP, and subdomains.
- Configure MX records to set up email delivery.
- Add TXT records for security and verification.
- Perform a DNS update and verify your DNS setup.
Whether you’re setting up a website, email server, or verifying your domain, understanding DNS management is essential.
Related Resources
dns records, dns management, dns update, update dns records, settings dns, config dns, dns zone