

How to Setup Cisco ASA5500 Remote Access VPN
Introduction
This guide walks you through the process of setting up a Remote Access VPN on a Cisco ASA5500 firewall using Cisco ASDM.
The instructions are written in a beginner-friendly way, so even if you are new to Cisco firewall VPNs, you can follow along without missing a step.
Prerequisites
Before you begin:
- Cisco ASA5500 firewall running ASA version 8.2.2 or later. Windows clients cannot connect if you are on ASA 8.2.1, because of a known Cisco bug.
- Cisco ASDM (Adaptive Security Device Manager) installed and accessible
- Basic admin login credentials to the firewall
Steps to Configure Remote Access VPN using ASDM
Step 1: Start the IPsec VPN Wizard in Cisco ASDM
- Log in to your Cisco ASA5500 using Cisco ASDM.
- In the menu, go to Wizards > IPsec VPN Wizard.
- Follow the on-screen instructions.
Step 2: Configure VPN Tunnel Settings
2.1 Select VPN Tunnel Type
- Choose Remote Access.
- From the drop-down list, select Outside as the interface for incoming VPN tunnels.
- Keep the box checked for: Enable inbound IPSec sessions to bypass interface access lists
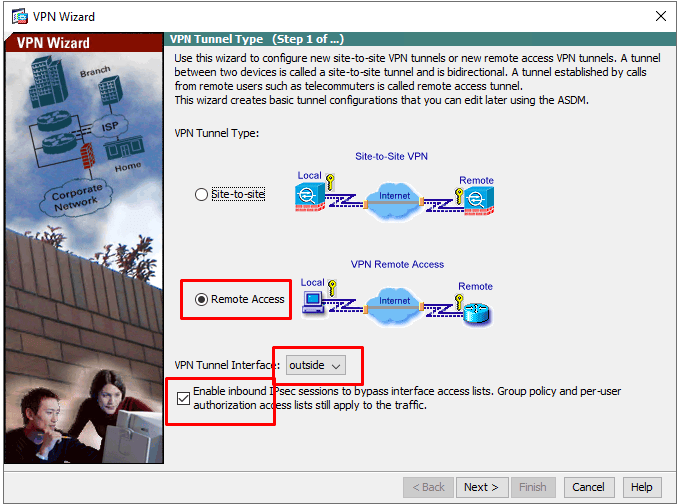
Note: Group policies and per-user authorization lists will still apply.
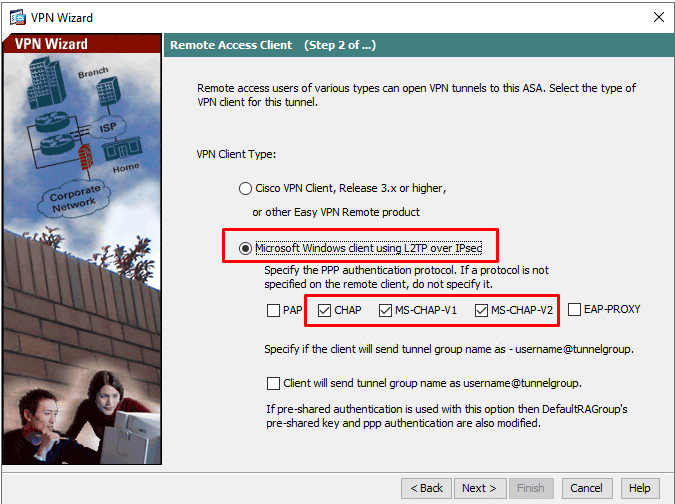
2.2 Configure Remote Access Clients
- Select Microsoft Windows client using L2TP over IPSec.
- Enable MS-CHAP-V2 and PAP as authentication protocols.
2.3 Choose VPN Client Authentication Method
- Select Pre-shared Key and input it.

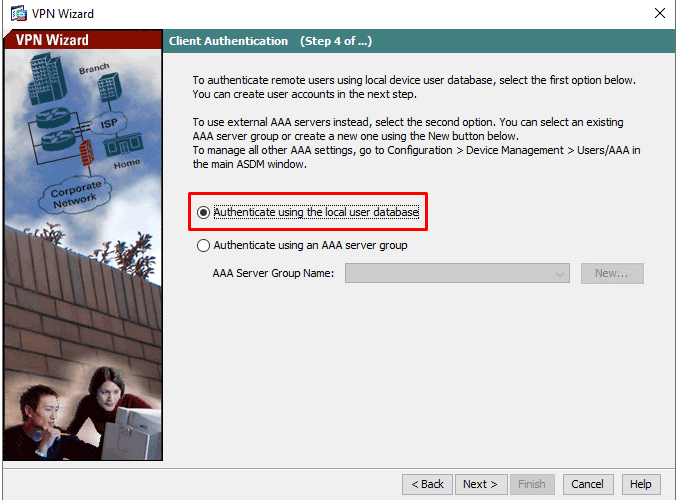
2.4 Set User Authentication
- Choose Authenticate using the local user database for authenticating remote users.
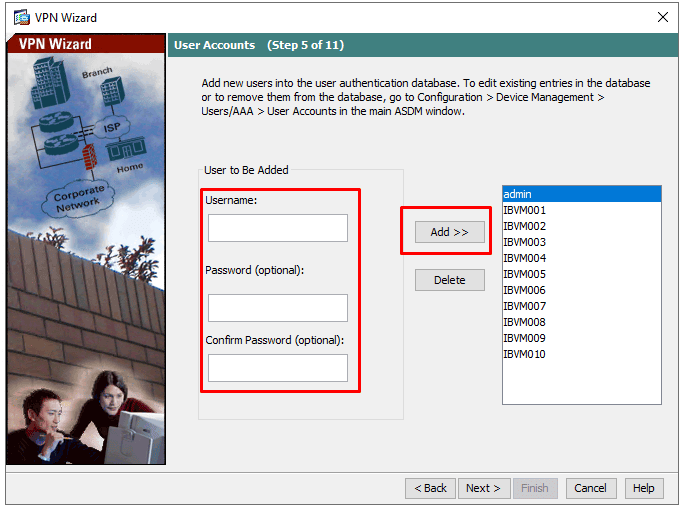
2.5 Add VPN User Account
- Create a new username and password inside the user database.
- You will use this account to log in from the client side.
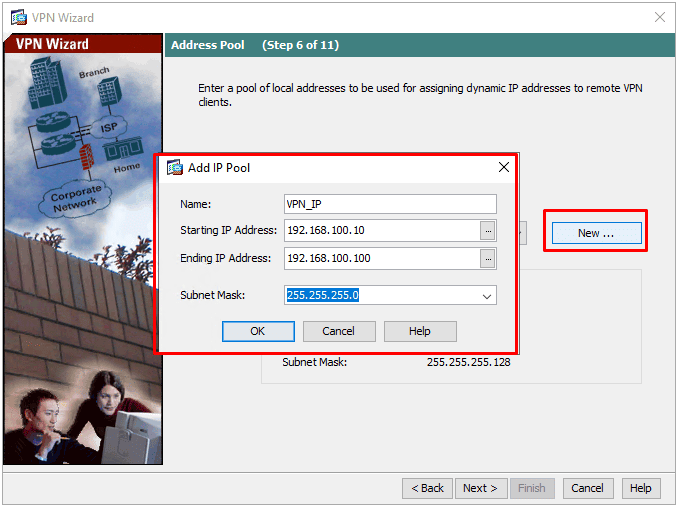
2.6 Configure Address Pool
- Create a pool of IP addresses for remote VPN clients.
- Example: 10.10.20.240 – 10.10.20.249 (adjust based on your internal network).

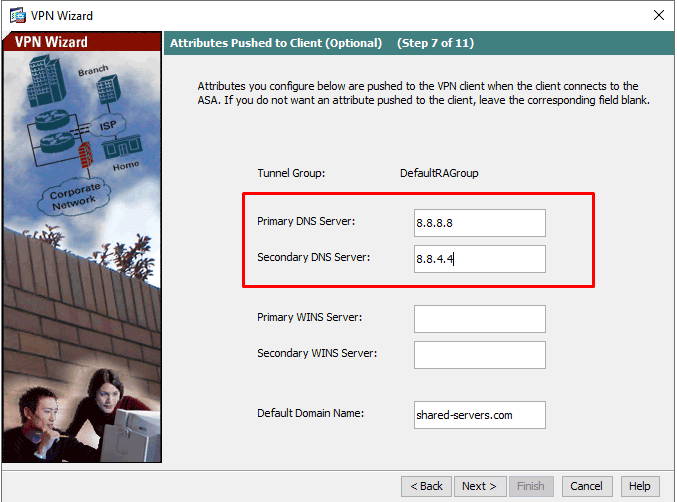
2.7 Client Attributes
- Leave this section empty (no additional attributes needed).
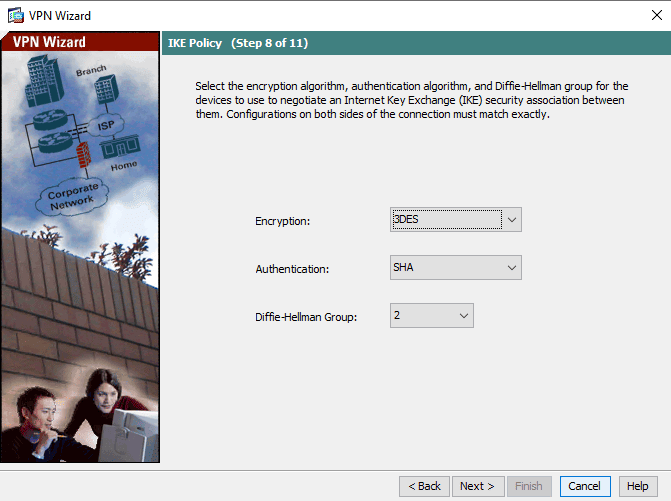
2.8 IKE Policy (Default)
- Encryption: 3DES
- Authentication: SHA
- Diffie-Hellman Group: 2
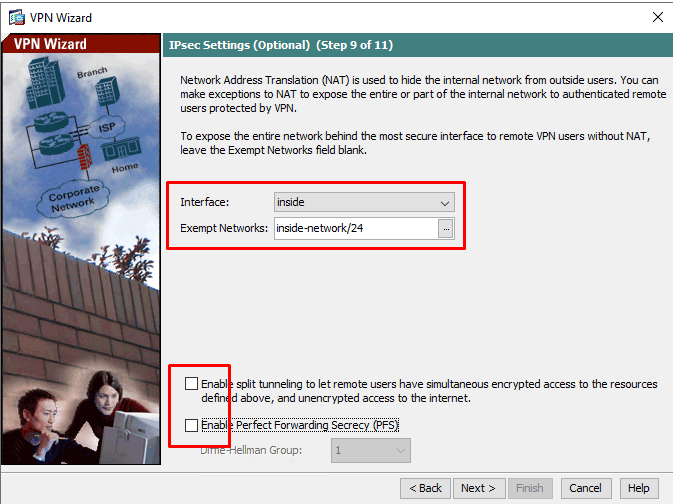
2.9 IPSec Settings (Default)
- Uncheck: Enable split channeling...
- Uncheck: Perfect Forwarding Secrecy (PFS)
2.10 Confirm and Finish
- Review the summary information.
- Click Finish to complete the VPN Wizard setup.
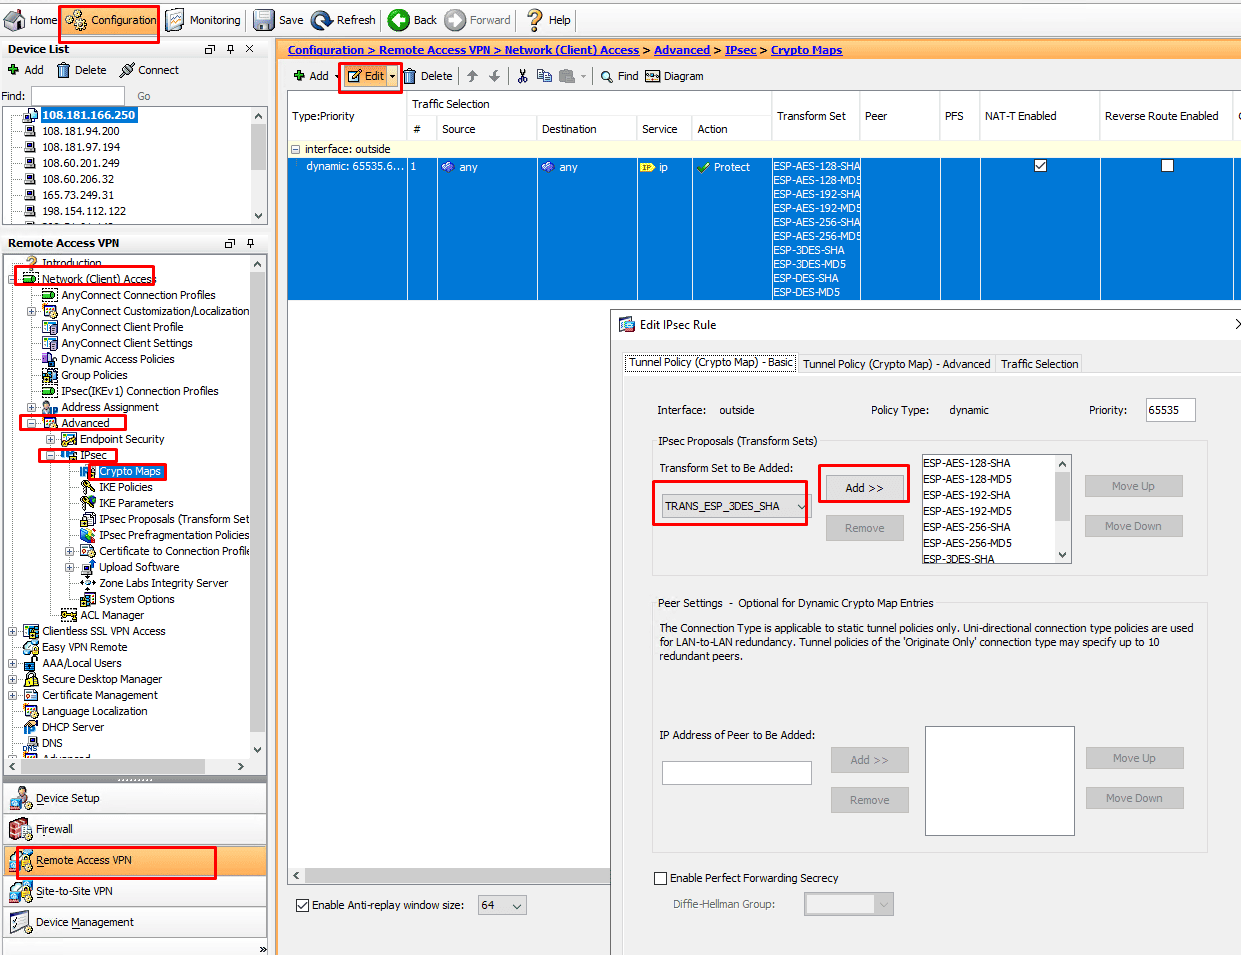
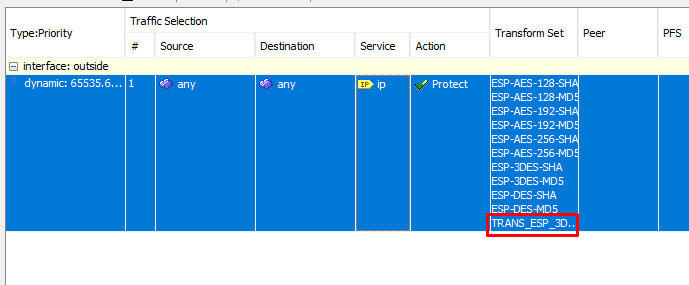
Step 3: Add Transform Set
- Navigate to: Configuration > Remote Access VPN > Network (Client) Access > Advanced > IPSec > Crypto Maps
- Click Edit IPSec Rules.
- Add: TRANS_ESP_3DES_SHA
- Click OK to save.
Step 4: Save the Running Configuration
- Save your changes to the firewall flash memory.
- This ensures the VPN configuration persists after a reboot.
Step 5: VPN Setup Complete
You have successfully set up a Remote Access VPN on your Cisco ASA5500 firewall using Cisco ASDM.
Remote Windows clients can now securely connect to your network using the pre-shared key and user credentials you configured.
Related Keywords:
Cisco ASA5500 remote access VPN, Cisco ASA ASDM VPN setup, remote access VPN Cisco ASA step by step, Cisco ASA VPN wizard tutorial, Cisco ASA firewall VPN configuration, Cisco ASA5500 IPsec VPN setup, configure VPN on Cisco ASA5500, Cisco ASA L2TP over IPSec setup, remote VPN client configuration ASA, Cisco ASDM VPN setup guide