


How to Add Domain and Create New Email Account in MailEnable
Introduction
If you are setting up MailEnable for the first time, you will need to add a mail domain (PostOffice) and then create new email accounts for users. This step-by-step tutorial is designed for beginners, so you can follow along easily and complete the setup.
Steps to Add Domain and Email
Step 1: Open Messaging Manager
To start, log in to your MailEnable server.
- Locate the Messaging Manager in the left-hand navigation panel.
- Right-click on the Messaging Manager to open the available options.
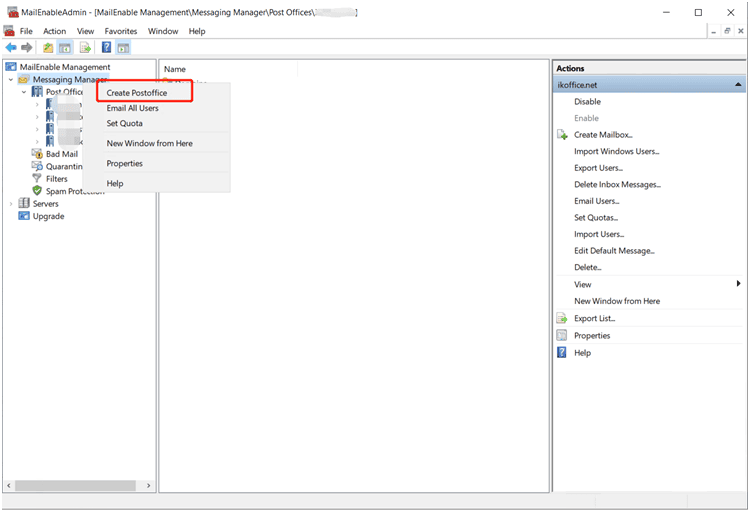
This is the starting point for adding a new PostOffice (mail domain).
Step 2: Create a New PostOffice (Mail Domain)
- Select Create PostOffice from the right-click menu.
- A dialog box will appear asking you to enter a PostOffice Name.
- Example: If your domain is
example.com, you can enterexample.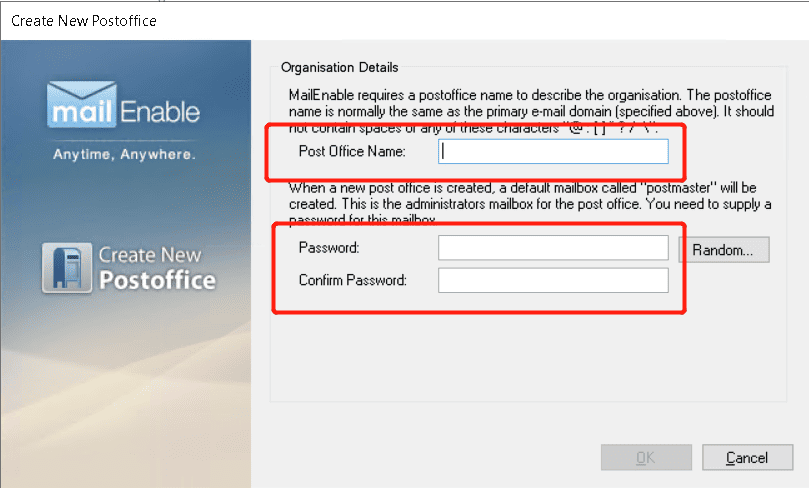
- Example: If your domain is
- Click OK to confirm.
This step is important because the PostOffice is essentially the email domain where your new email accounts will be created.
Step 3: Add a New Domain to the PostOffice
- After creating the PostOffice, right-click on it.
- Select New Domain.
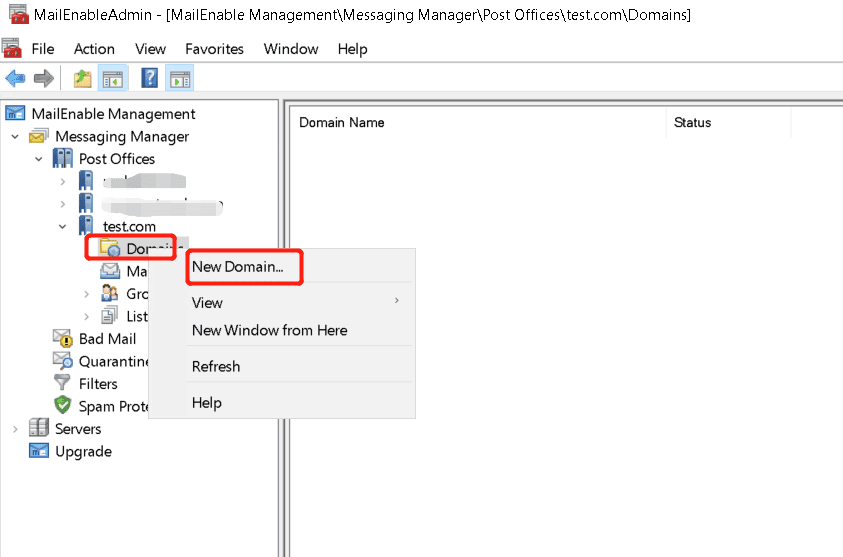
- Enter the full domain name (e.g.,
example.com). - Click OK.
Now, your email domain is successfully added and ready to host mailboxes.
Step 4: Create a New Mailbox (Email Account)
To make a new email account, follow these steps:
- Select the domain you just created.
- Right-click on Mailboxes under the domain.
- Click New Mailbox.
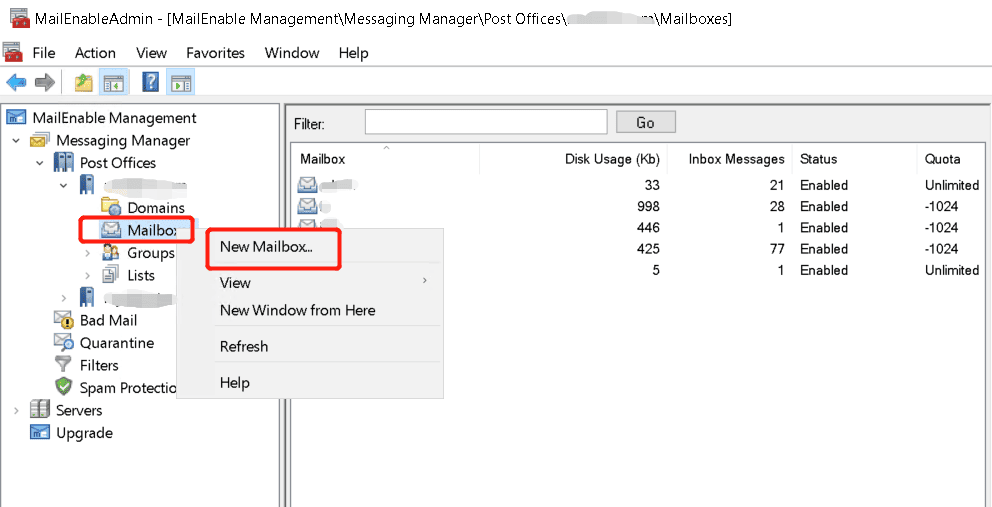
Step 5: Enter Email Account Information
In the new mailbox dialog, enter the following:
- Mailbox Name: This will be the username before the “@” (e.g.,
john). - Password: Enter a secure password for the mailbox.
- Mailbox Type: Choose the type of mailbox you need (e.g., Standard Mailbox).
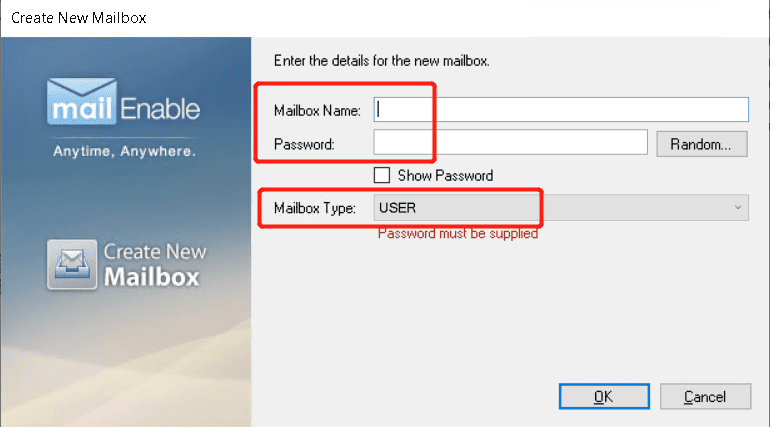
Click OK to save the new mailbox.
Step 6: Verify the New Email Account
To confirm the setup:
- Try logging in with the newly created email address (e.g.,
john@example.com). - Use the password you assigned in the previous step.
If login is successful, your new email account is ready to use.
Conclusion
With these steps, you have learned how to:
- Create a PostOffice (mail domain) in MailEnable.
- Create email accounts under that domain.
- Successfully make a new email account that users can access.
This process allows you to manage multiple email domains and accounts efficiently on your MailEnable server.
create new email account, new mail create, make a new email account, email account create new account, mail create new account, email domain, create email account, create email, new email account, make a mail account