


How to Configure DKIM and DMARC Email Signing in SmarterMail
Learn how to configure DKIM keys and DMARC records in SmarterMail to enable email signing and improve authentication. This step-by-step guide covers generating DKIM keys, adding TXT records in Microsoft DNS, creating DMARC records, and testing email delivery for secure and reliable email communication.
Step 1: Enable DKIM Signing in SmarterMail
Log on to Smartermail web interface as 'admin' or domain administrator.
Go to the Manage page of a specific domain.
Expand 'Advanced Settings' and click 'Mail Signing', make sure 'Enable DKIM Signing' is checked.
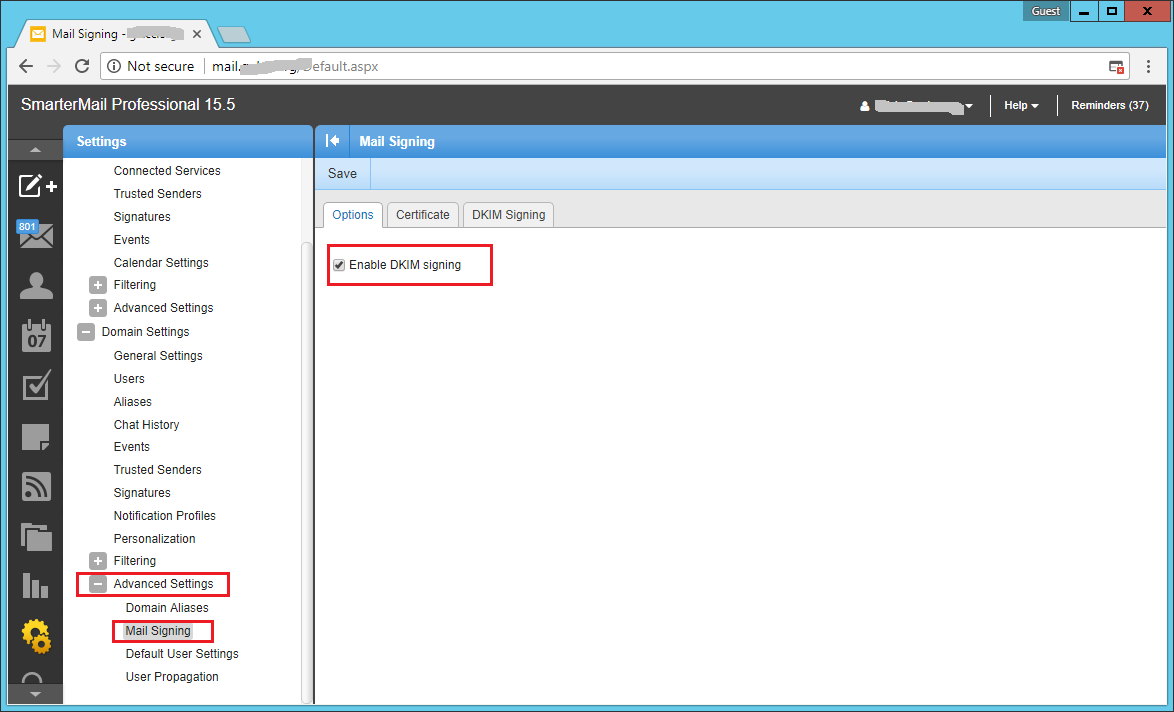
Click 'Certificate' and type 'default' as the selector, make sure the key size is set to 2048, then click 'Generate Key'. The name and the value of the new TXT record will be generated. Click 'Save' to store the DKIM key in the mail server. You may also generate the DKIM key elsewhere and paste it here. It is important to have the same key in the name servers of the domain and the mail server.
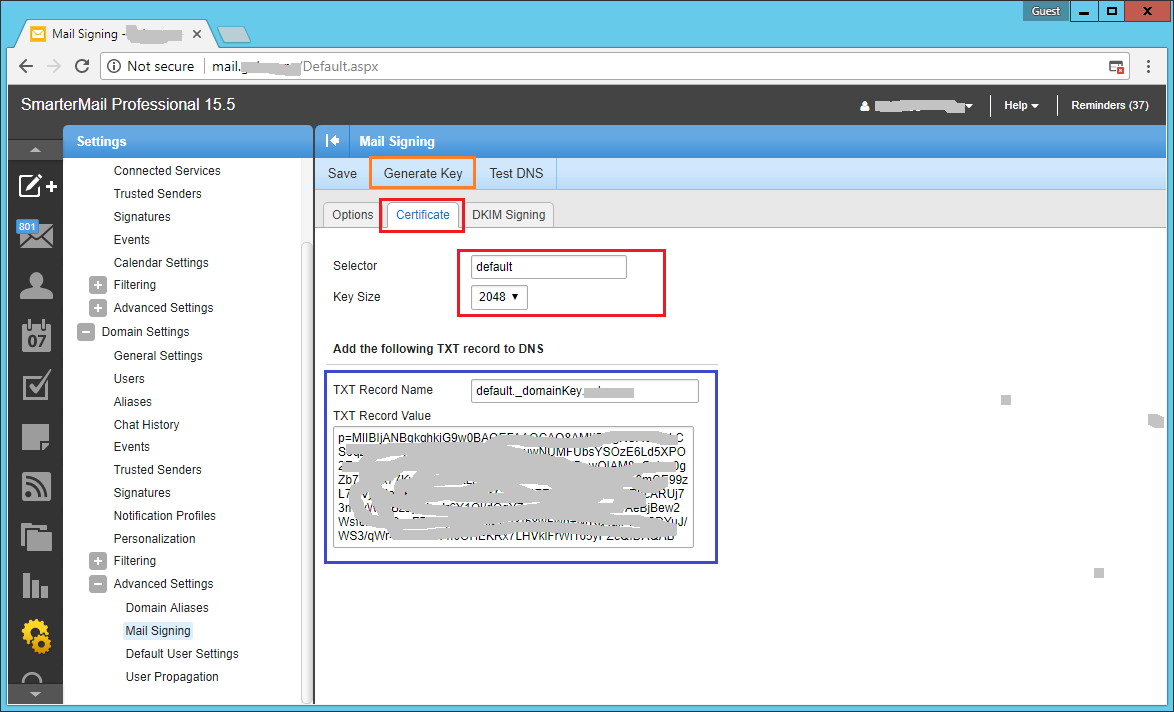
Step 2: Create TXT Records for DKIM in DNS
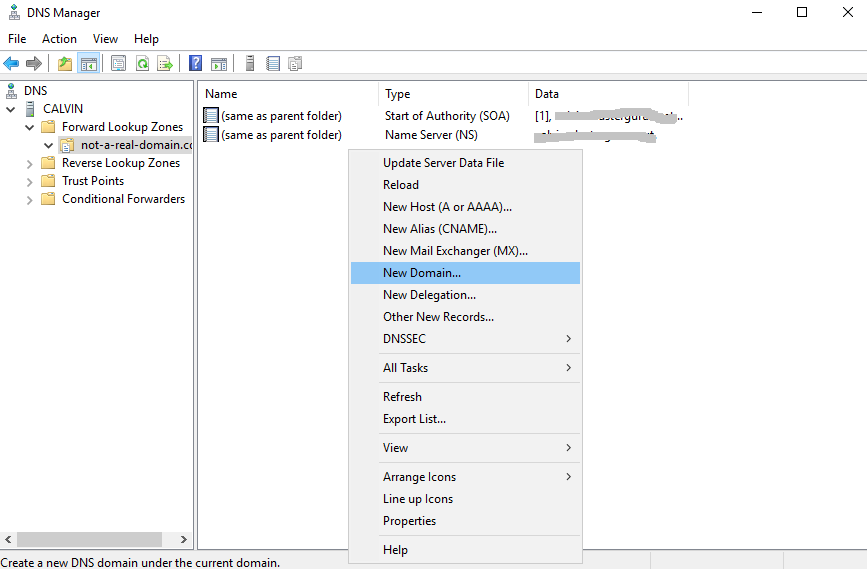
Go to the DNS server and then click the domain name to create new TXT records. Right-click the domain name in the left panel or the empty area in the right panel, then click 'New Domain'.
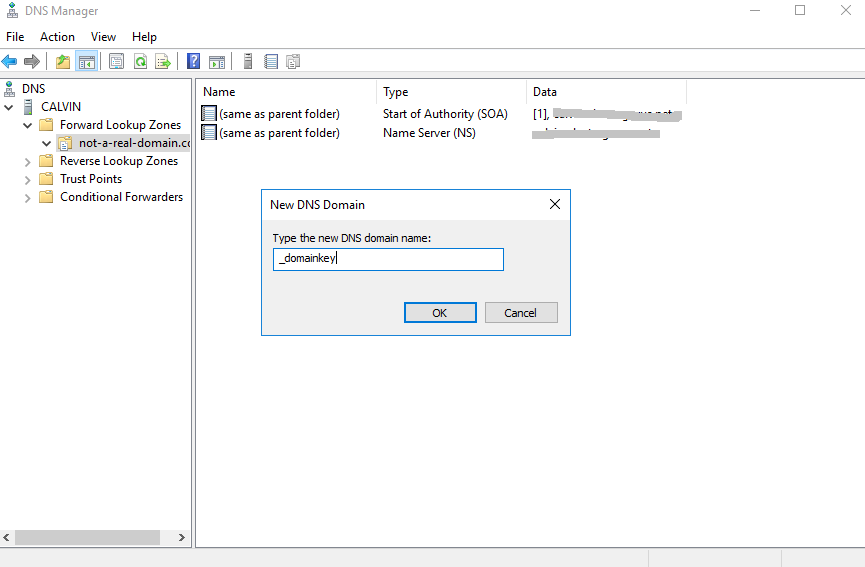
Type "_domainkey" as the name of the new domain.
Enter the new domain, right-click the empty area to create a new TXT record.
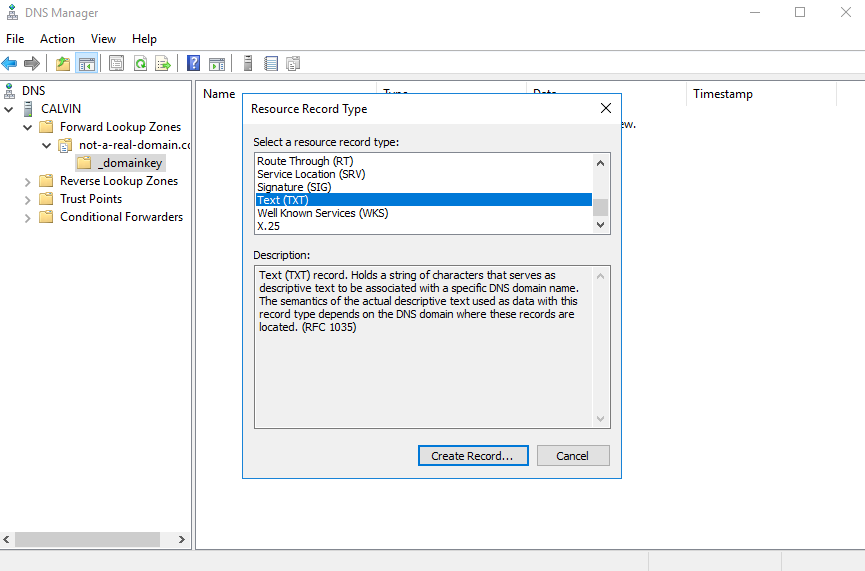
Create a no-name TXT record with the value "o=
". This is for policy for the domain. "o=" means some e-mails coming from this domain are signed.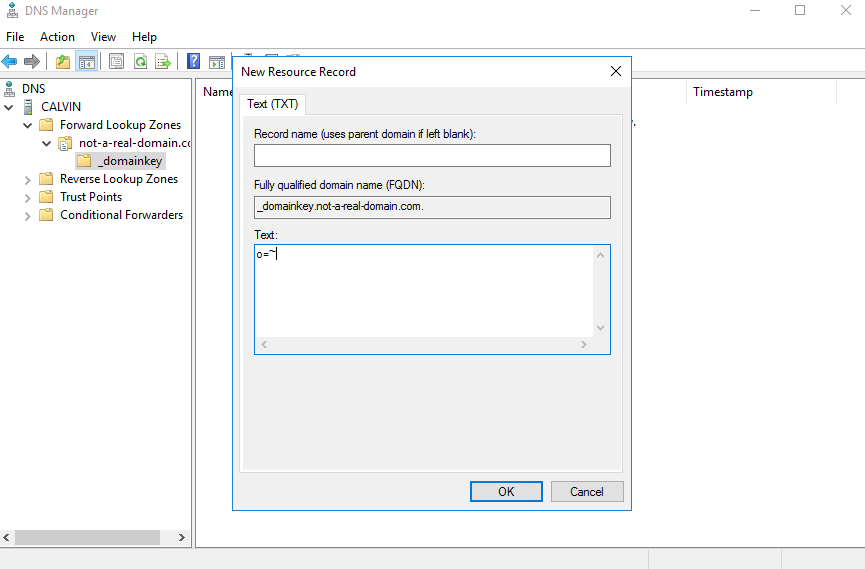
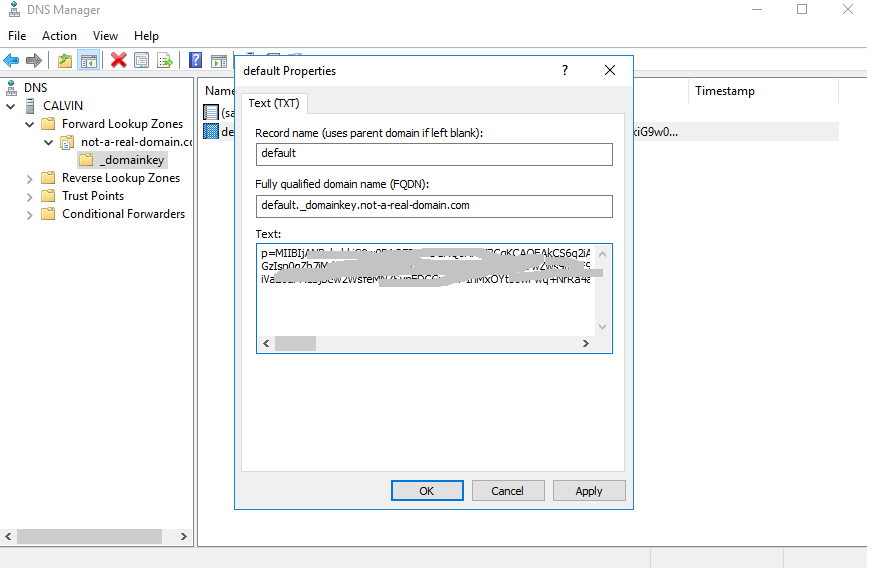
Create another TXT record with the name of "default". Then paste the TXT record value from Step 1.4. However, there is a length limit for the value, for being be to save the whole value, split the value into multiple lines.
Step 3: Create DMARC Record
Move back to the top-level domain, then create a new TXT record named "_dmarc". The email addresses to be included in the record value must be valid ones.Record name must be _dmarc ; Record value: v=DMARC1; p=reject; sp=reject; rua=mailto:user@domain.com; ruf=mailto:user@domain.com; rf=afrf; pct=100; ri=86400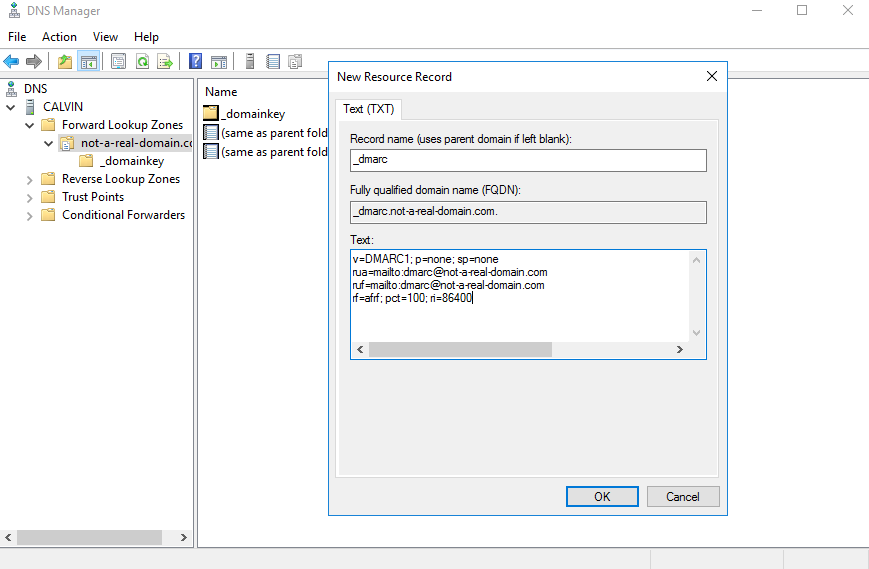
Step 4: Email Delivery Test
Send an email to your Gmail account. When the email is received, view the original email content, and you should see something like the following.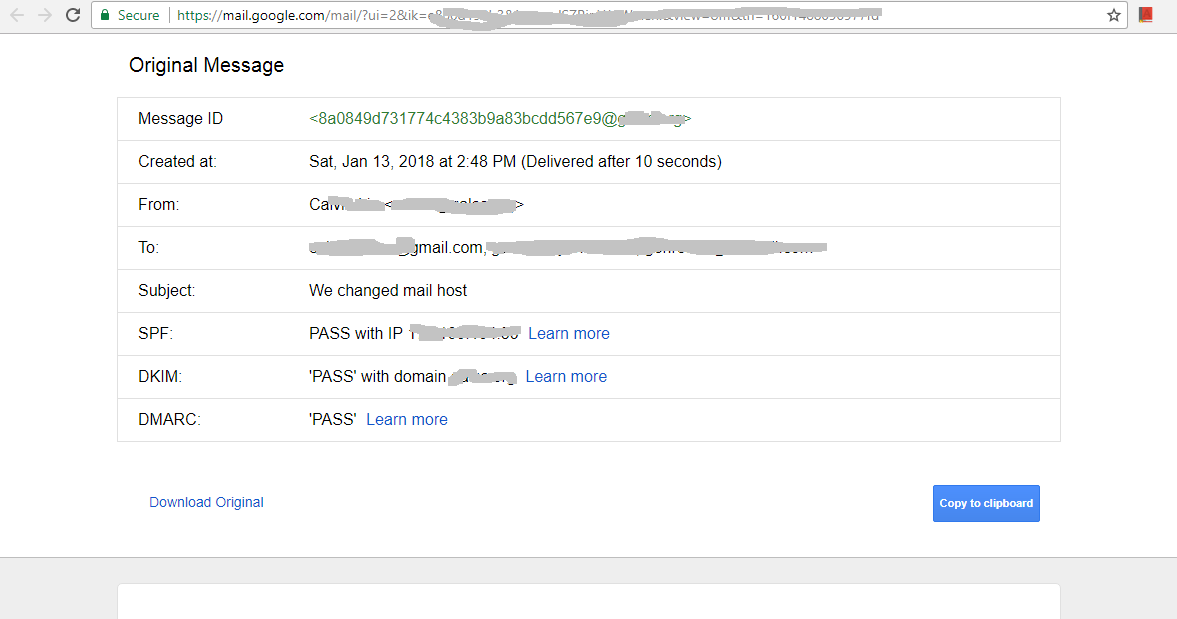
SmarterMail DKIM setup, SmarterMail DMARC configuration, SmarterMail email signing, DKIM key SmarterMail, DMARC record SmarterMail, SmarterMail DNS TXT record, configure DKIM DMARC SmarterMail, SmarterMail email authentication