


How to Enable ASP.NET in IIS
Learn how to enable ASP.NET in IIS for Windows Server. This beginner-friendly guide shows step-by-step how to enable ASP.NET 3.5, 4.0, and 4.5 to host your ASP.NET websites.
Introduction
To host ASP.NET websites on a Windows server, you must first enable ASP.NET in IIS. Without enabling the correct ASP.NET versions, your websites may not run properly.
Why Enable ASP.NET?
- Web Hosting: Required for hosting ASP.NET applications.
- Compatibility: Different websites may depend on older versions (e.g., 3.5) or newer versions (4.0/4.5).
- IIS Integration: ASP.NET features integrate directly with Internet Information Services (IIS).
Steps to Enable ASP.NET on Windows
Step 1: Open Server Manager
- Log in with Administrator privileges.
- Launch Server Manager from the Start Menu or taskbar.
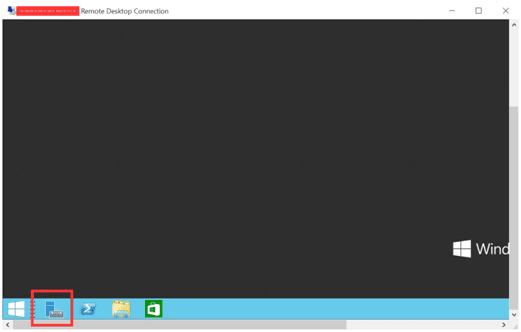
- Click Add Roles and Features.
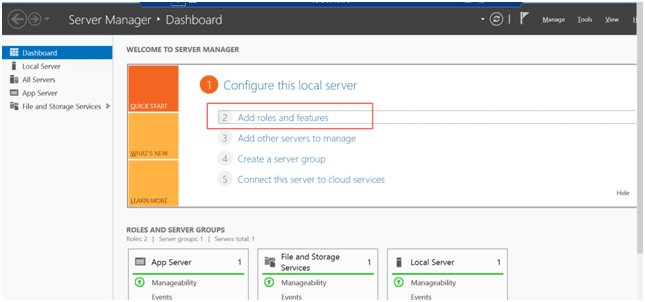
Step 2: Choose Installation Type
- In the wizard, under Installation Type, select Role-based or feature-based installation.
- Click Next.

Step 3: Select Server
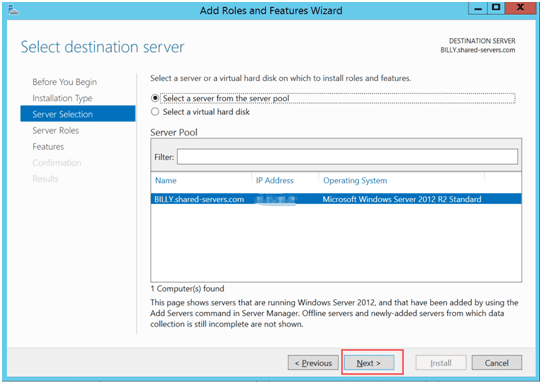
- Under Server Selection, choose Select a server from the server pool.
- Highlight your server → click Next.
Step 4: Add Server Roles
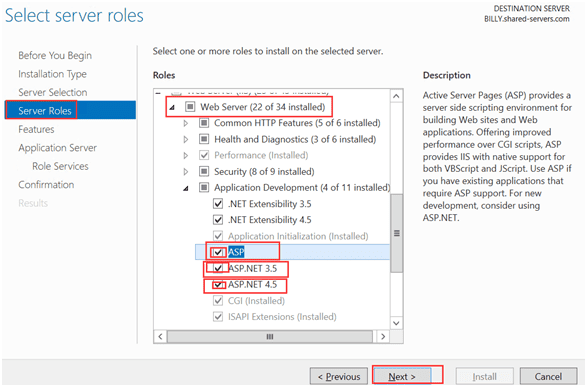
- Expand Web Server.
- Under Application Development, check the following:
- ASP
- ASP.NET 3.5
- ASP.NET 4.5
- Related sub-features (ISAPI Extensions, ISAPI Filters).
- Click Next.
Step 5: Add Features
- Under Features, select:
- .NET Framework 3.5 Features
- .NET Framework 4.5 Features
- Ensure ASP.NET 4.5 is checked.
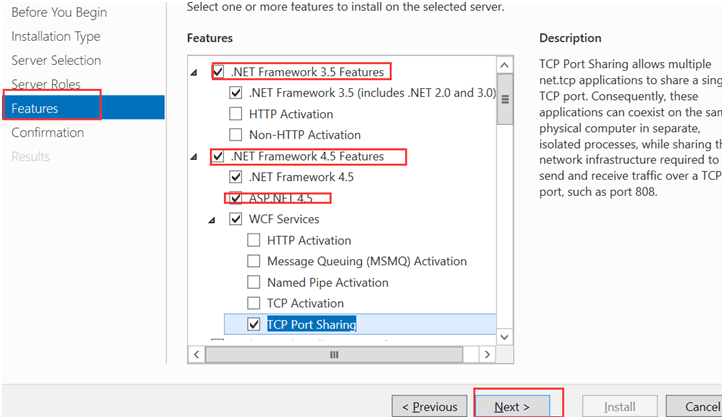
2. Under Windows Process Activation Service, enable .NET Environment.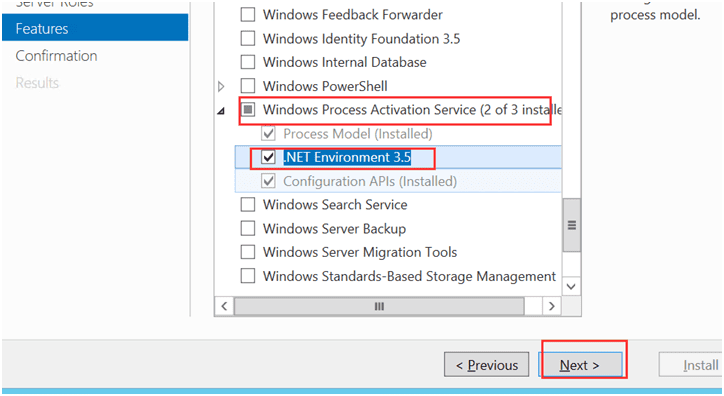
3. Click Next.
Step 6: Confirm and Install
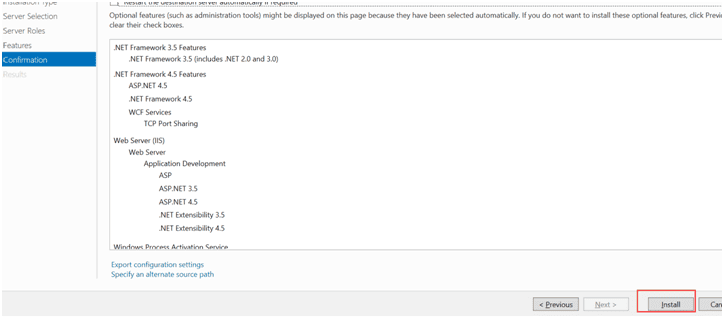
- Review the summary of selected roles and features.
- Click Install.
- Wait until installation completes, then click Close.
ASP.NET 3.5, 4.0, and 4.5 are now enabled.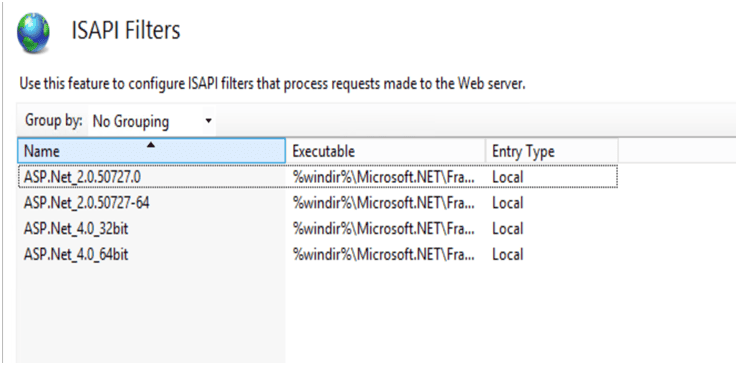
Troubleshooting Tips
- If installation fails, ensure Windows Server has access to Windows Update (needed for .NET Framework 3.5).
- Check Server Manager → Manage → Add Roles and Features again to verify selections.
Keywords:
enable asp net, enable asp net in iis, iis, asp net
Outline