


How to Install and Configure SmarterMail
Learn how to install and configure SmarterMail on Windows Server step by step. This beginner-friendly guide covers downloading the installer, setting up the admin account, configuring DNS, SMTP authentication, password requirements, and opening necessary ports for email services.
Preconditions
Before starting, make sure your system meets the following requirements:
- Windows Server 2012 R2 64-bit or higher
- Microsoft .NET Framework 4.7 or higher
- Microsoft Internet Information Services (IIS) installed
How to Install and Configure SmarterMail
Step 1: Install SmarterMail
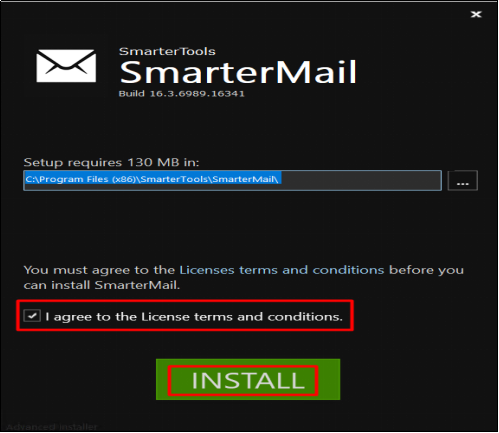
Run the SmarterMail installer
Double click SmarterMail16_Setup.exe file
Choose Create a new site
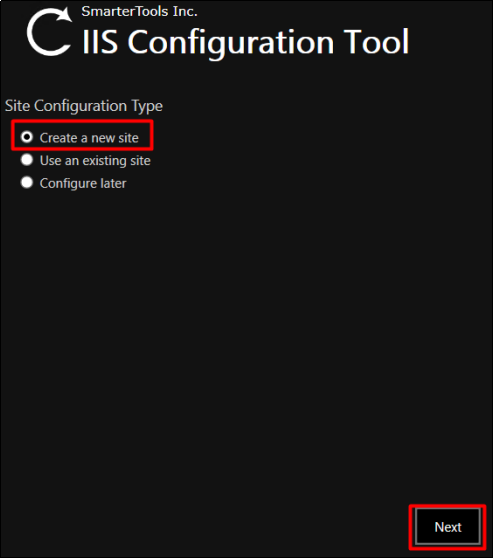
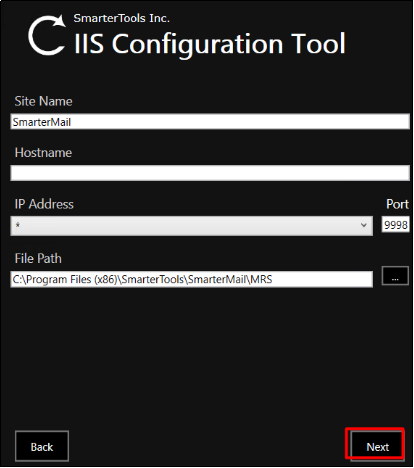
Click Next: The Port part can be modified, but 9998 is generally used by default.
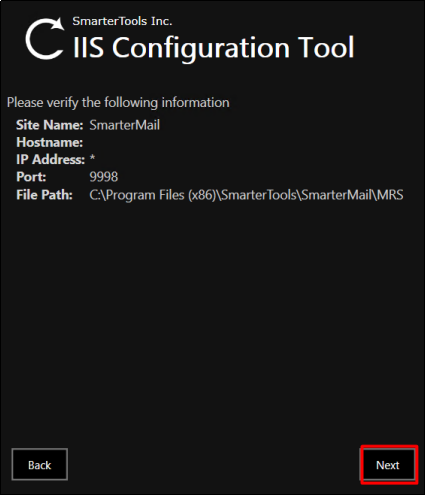
Click Next
Step 2: Configure SmarterMail
(Once the installation is complete, it will automatically jump to the configuration page)
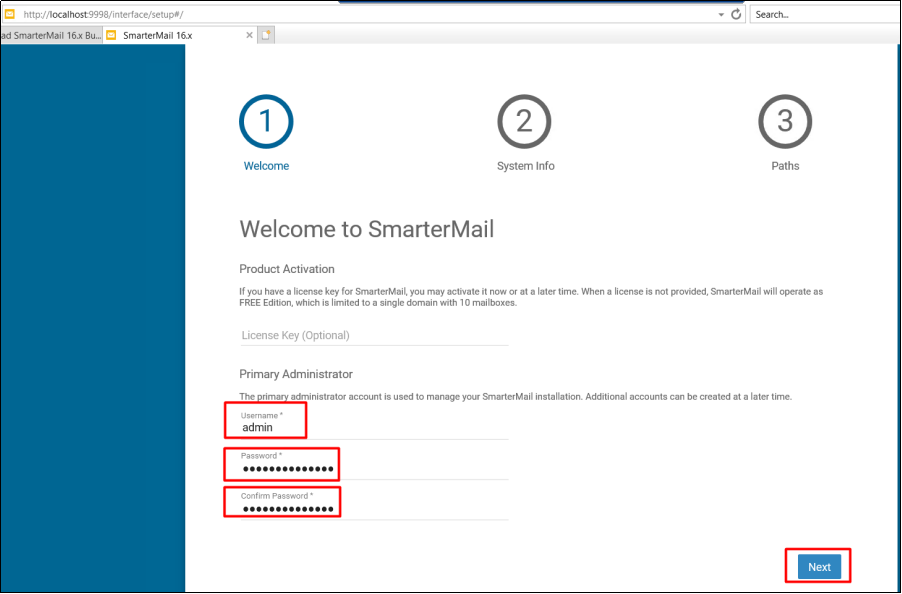
Set up the administrator account “admin” to log in to SmarterMail
Configure the server DNS
Hostname: mail.yourdomain.com
Primary DNS Server IP: 8.8.8.8
Secondary DNS Server IP: 8.8.4.4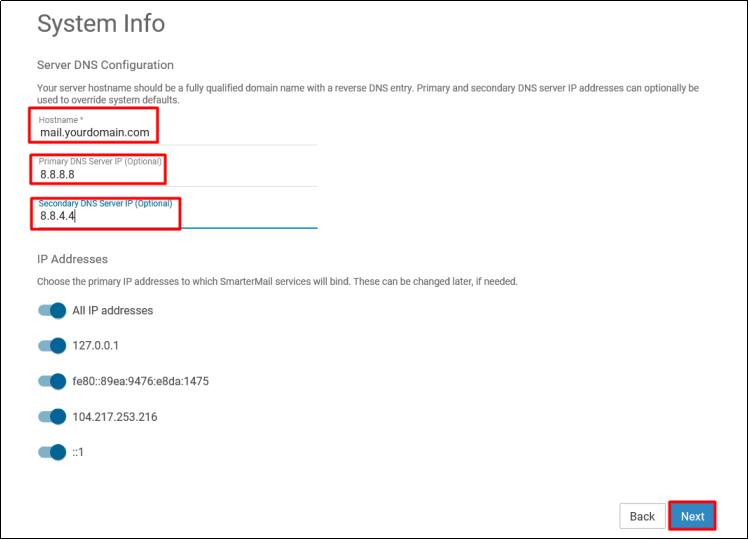
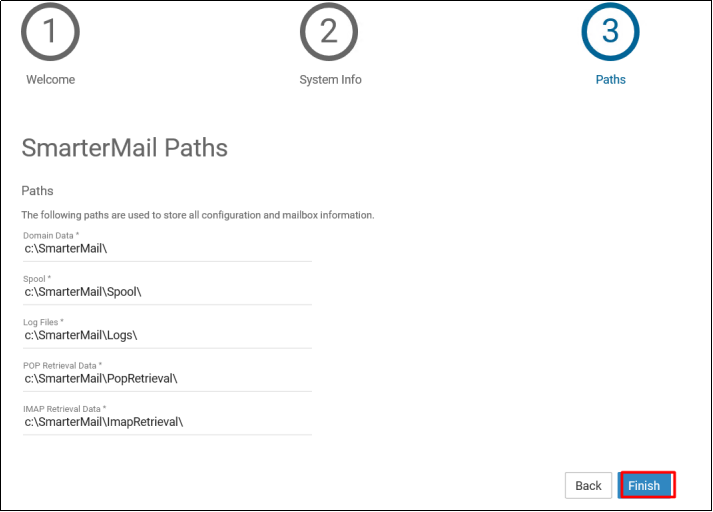
Disable relay
To prevent your server from becoming an open relay server, which can cause IP abuse problems, please disable the relay feature.
Click Settings ->protocols. Locate the Allow Reply option. Choose Nobody.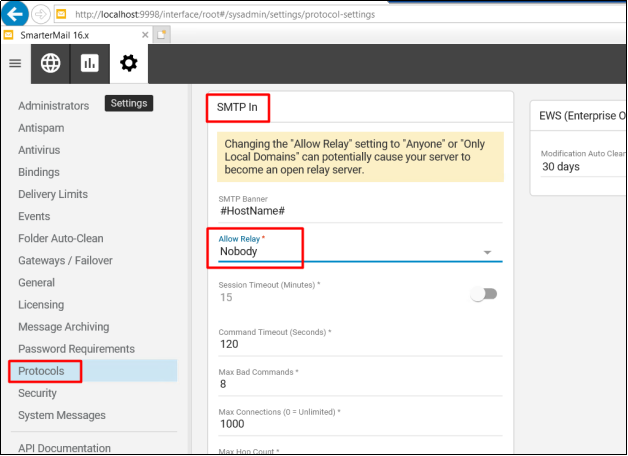
Set up authentication
Scroll down to the bottom of the page from the previous step.
Change “Require Auth Match” to “Email Address”
Enable "Allow relay for authenticated users" and "domain's SMTP auth setting for local deliveries" as the screenshot shows.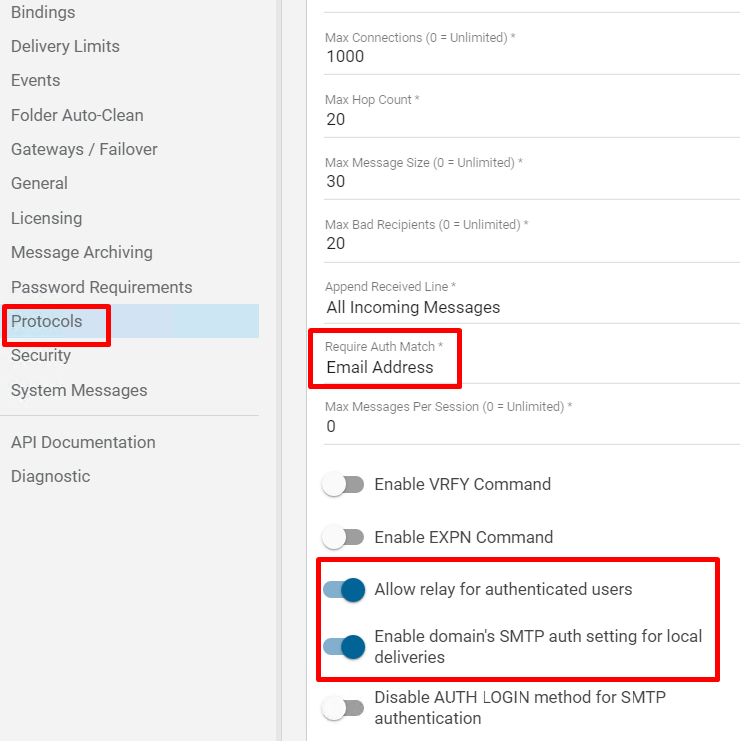
Save all changes.
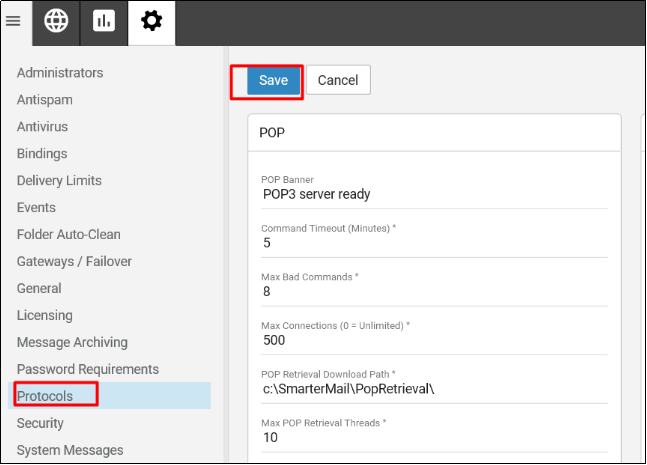
Specify password requirements
Click Settings ->Password Requirements. Locate the options and enable all the requirements.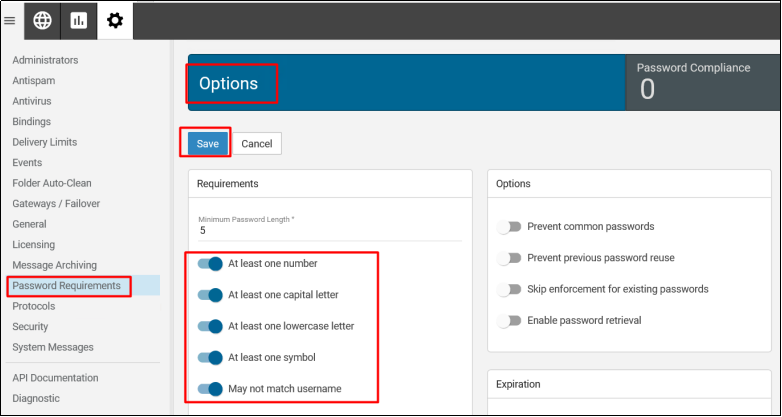
Set up SMTP authentication
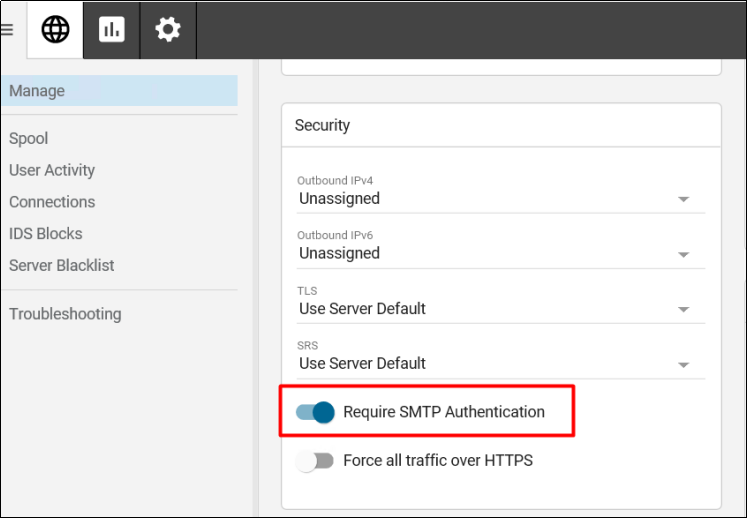
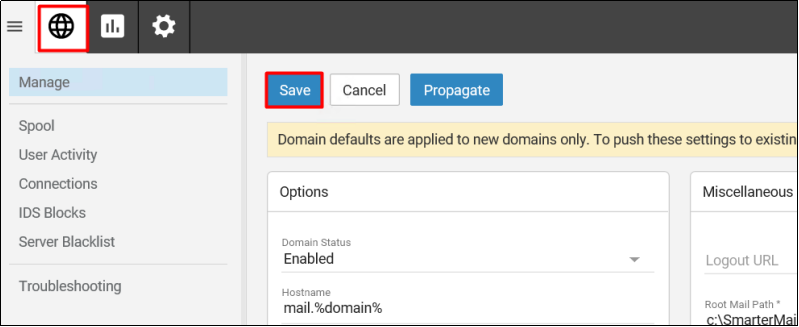
Click Manage-> Domain Defaults. Scroll down to the bottom of the page from the previous step. Enable Require SMTP Authentication. Save all changes.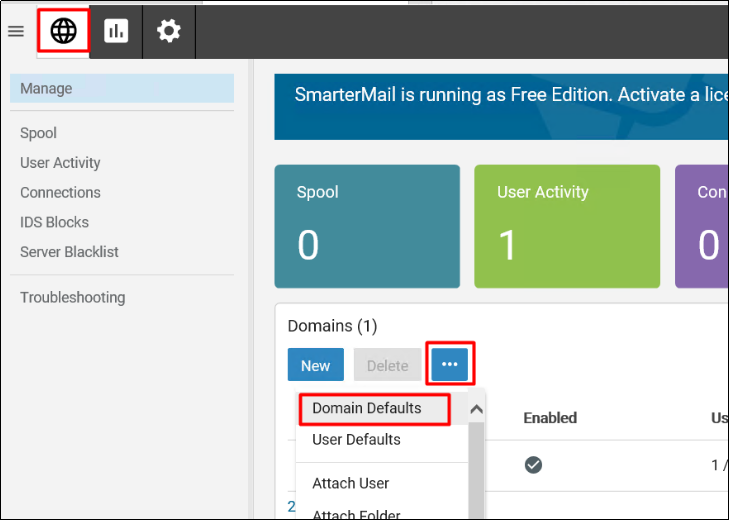
Open ports for all IPs
If your server has more than 1 IP. All IPs must be listening to the following ports:
SMTP(25), POP(110), IMAP(143), Submission Port(587)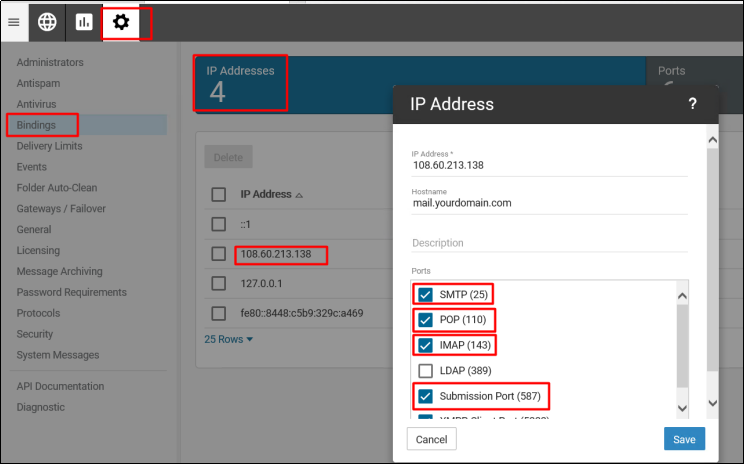
Step 3: Login SmarterMail
After completing all the above steps, SmarterMail has been successfully installed and configured.
The login URL is http://IP:9998. Please log in to SmarterMail using the account “admin” you set up in step 2.1.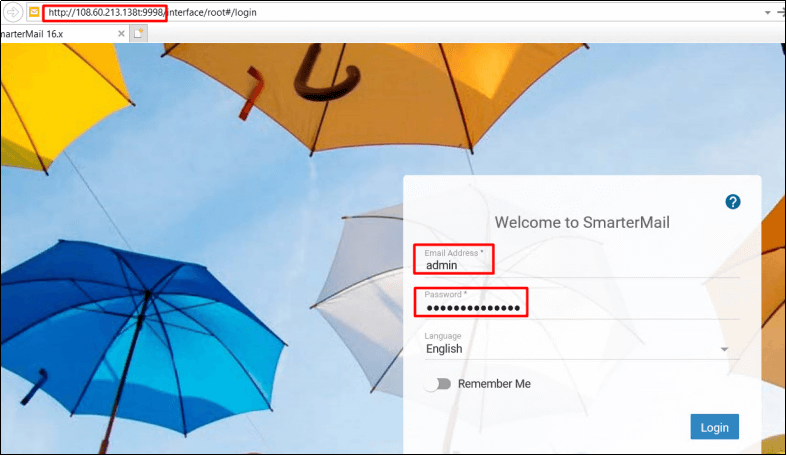
SmarterMail installation, SmarterMail setup, SmarterMail configuration, Windows email server, SMTP setup, POP3 IMAP setup, admin account SmarterMail, Windows Server email setup