


How to Install a DNN Website
Introduction
DNN (DotNetNuke) is one of the most popular open-source CMS platforms for building dynamic websites on Windows servers. It is widely used in DNN hosting and DotNetNuke website hosting environments.
If you’re new and wondering “how to install DotNetNuke?”—this tutorial is for you. We’ll guide you step by step through downloading DotNetNuke Community Edition, setting up your hosting environment, configuring the database, and running the installer.
By the end, you’ll have a fully working DNN website ready for use.
Steps to Install DotNetNuke Website
Step 1: Download DotNetNuke
- Visit the official DNN Software website: DotNetNuke Community Edition Download.
- Click Download to download the latest version (e.g., DNN 9.x).
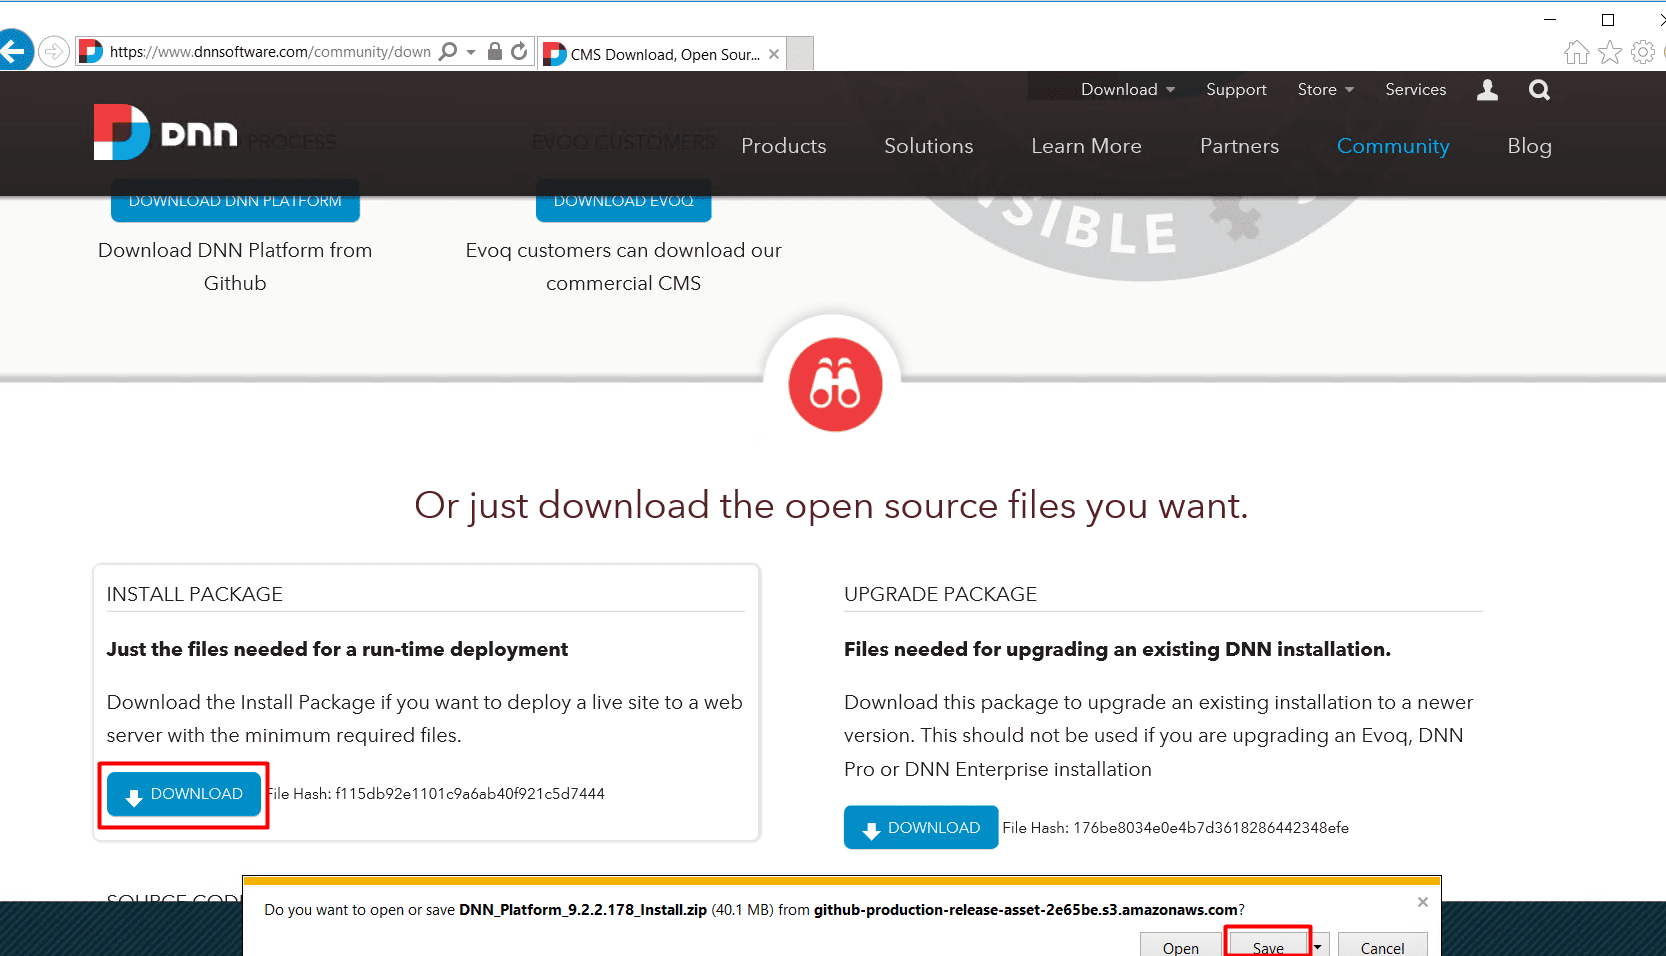
- If you’re using a hosting panel like SolidCP, keep the downloaded ZIP file ready for upload.
This is your starting point for the DNN install guide.
Step 2: Add Your Domain
First of all, you should add your domain and subdomain (if you have one) to Websitepanel. Here are tutorials:
Log in to WebsitePanel
- Open your browser and go to your WebsitePanel login URL.
- Enter your username and password, then click Login.
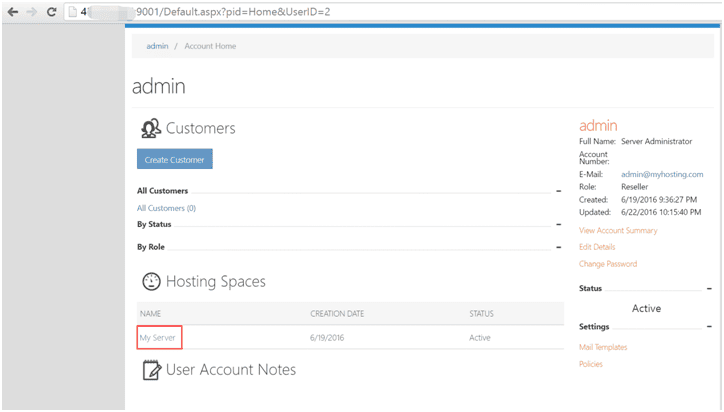
- On the dashboard, click My Server under the Hosting Spaces tab. Please note that “My Server” is the default hosting space name; your account may display a different name.
Add a New Domain
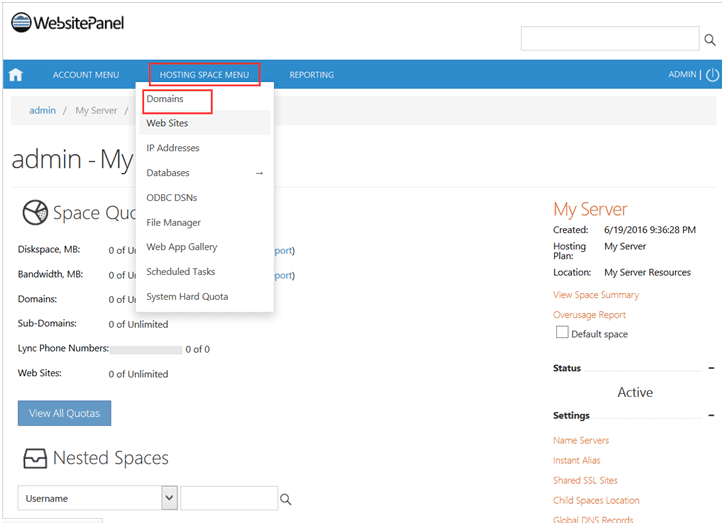
- In the left-hand Hosting Space Menu, click Domains.
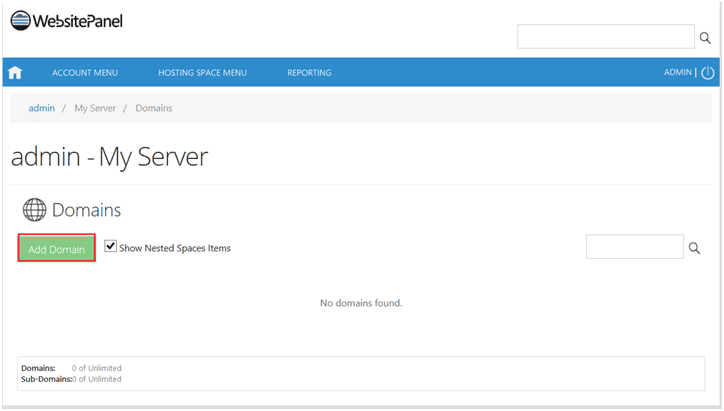
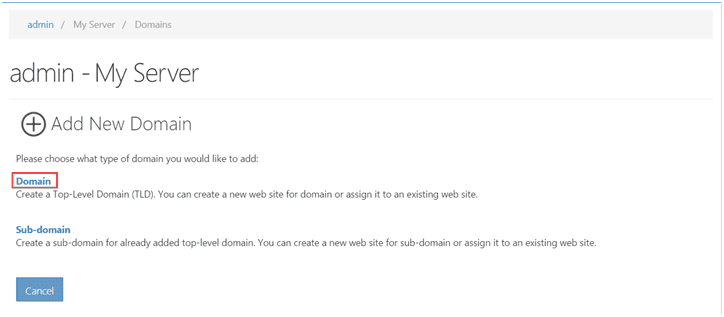
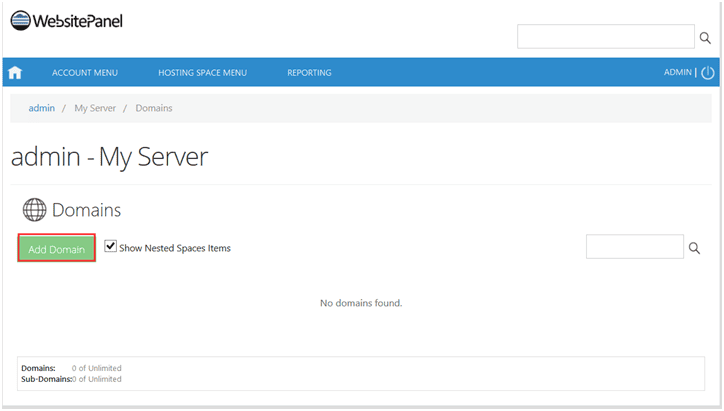
- Click Add Domain.
- In the Add New Domain screen, select Domain:
- Enter your domain name (e.g.,
example.com). - Check the box Create Web Site to automatically create a website for the domain.
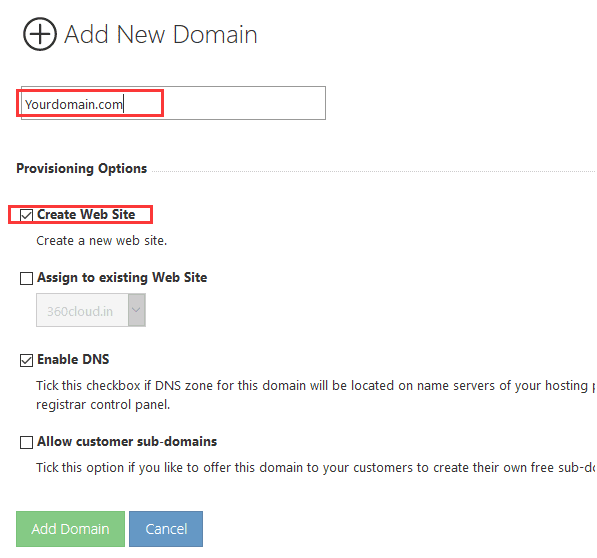
- Enter your domain name (e.g.,
- Click Add Domain.
- Your new domain is now added to WebsitePanel and ready to use.
- In the left-hand Hosting Space Menu, click Domains.
Add a Subdomain
- In the same Domains section, click Add Domain again.
- Choose Sub-domain as the type.
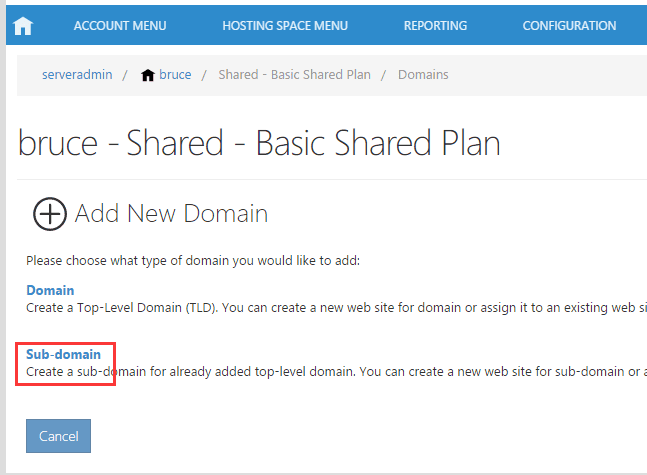
- Enter your desired subdomain name (e.g.,
blog). - From the dropdown, select the top-level domain (e.g.,
example.com). - Click Add Domain.
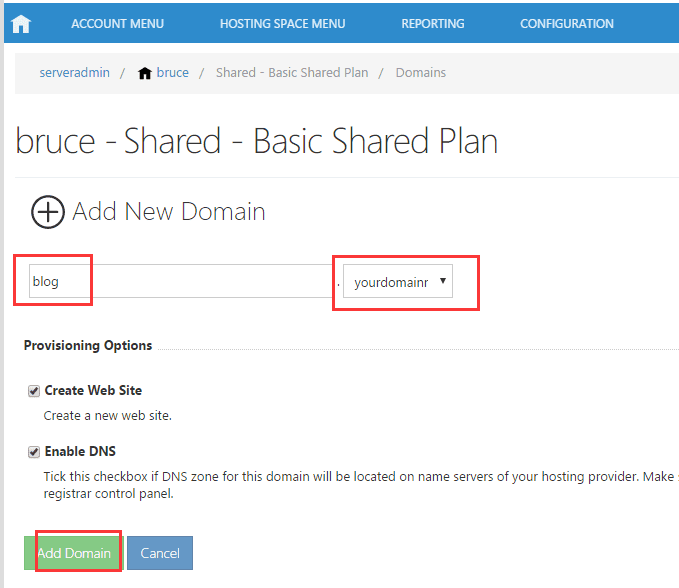
- The subdomain (e.g.,
blog.example.com) is now created and linked to your hosting space.
- Verify Domain and Subdomain
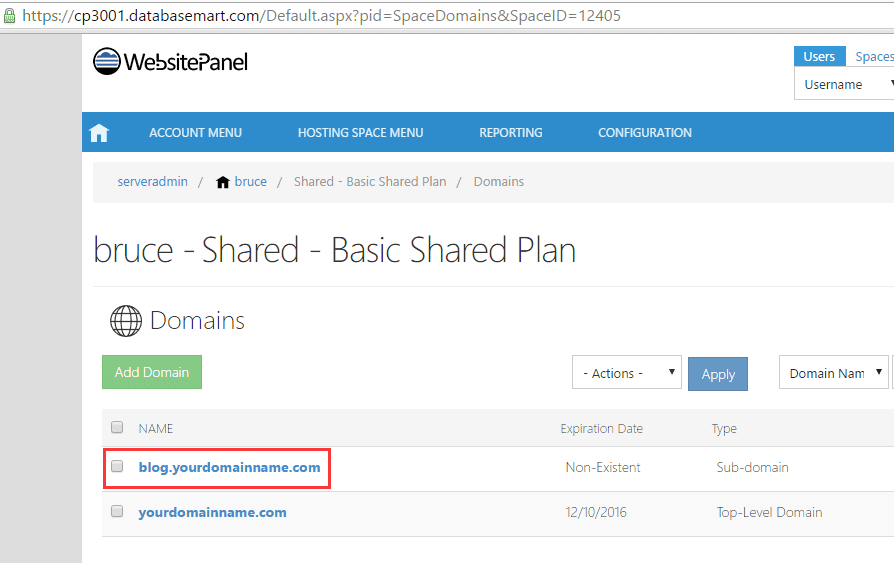
- Go back to the Domains list in WebsitePanel.
- You should now see both your domain and subdomain.
- Both are ready to configure further for hosting your website content.
Step 3: Create a Website
Then we go to create a website in Websitepanel.
- Log in to WebsitePanel
- Open your WebsitePanel login page in your browser.
- Enter your username and password, then click Login.
- Go to Domains
On the Hosting Space Menu, click Domains.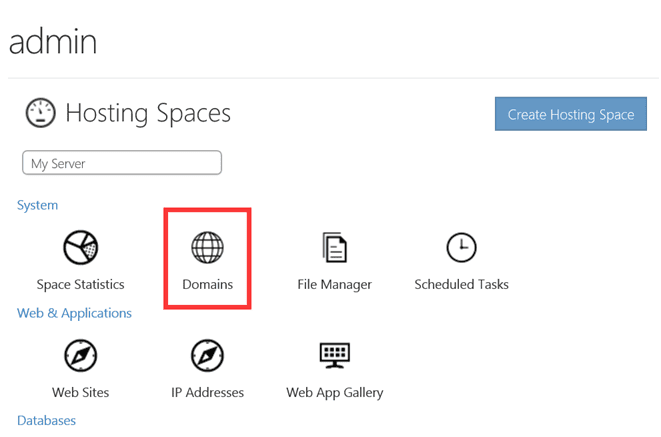
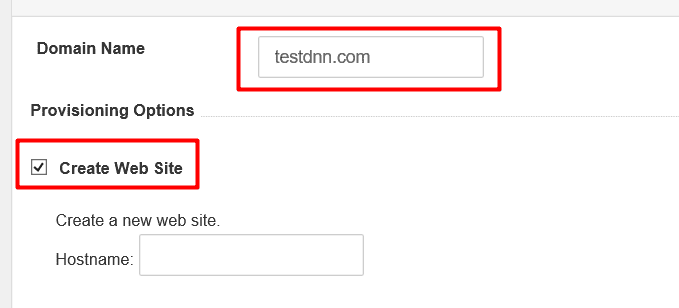
- Add Your Domain and Create a Website
- Click Add Domain. Enter your domain name. Check the box Create Web Site.
- Click Add Domain to confirm.
- Verify Website Creation
- Under the Web Sites section in WebsitePanel, you should now see your newly created domain.
- This means a website hosting space has been successfully created for your domain.
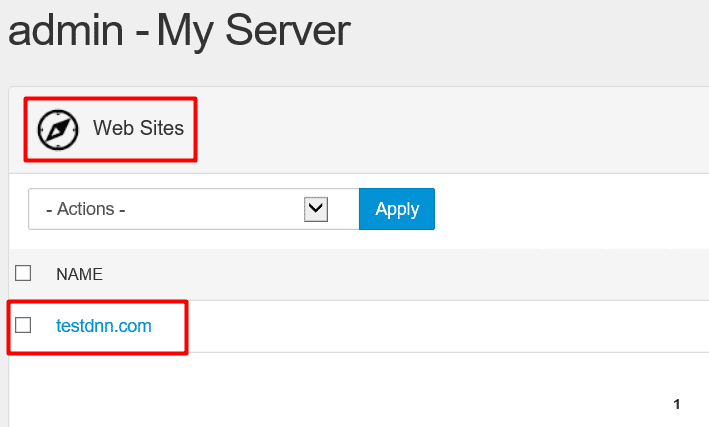
This will set up the hosting environment for your DotNetNuke hosting.
Step 4: Upload and Extract DNN Install Files
You now need to place the DNN installation package in your website root directory.
- Create an FTP Account
Create an FTP account (guide: How to Create FTP Account in WebsitePanel) - Upload via FTP
- Upload the DNN install files to:
C:\HostingSpaces\admin\yourdomain.com\wwwroot(guide: How to Upload Download Files with FTP) - Copy & Paste install files to “
C:\HostingSpaces\admin\yourdomain.com\wwwroot” if you use VPS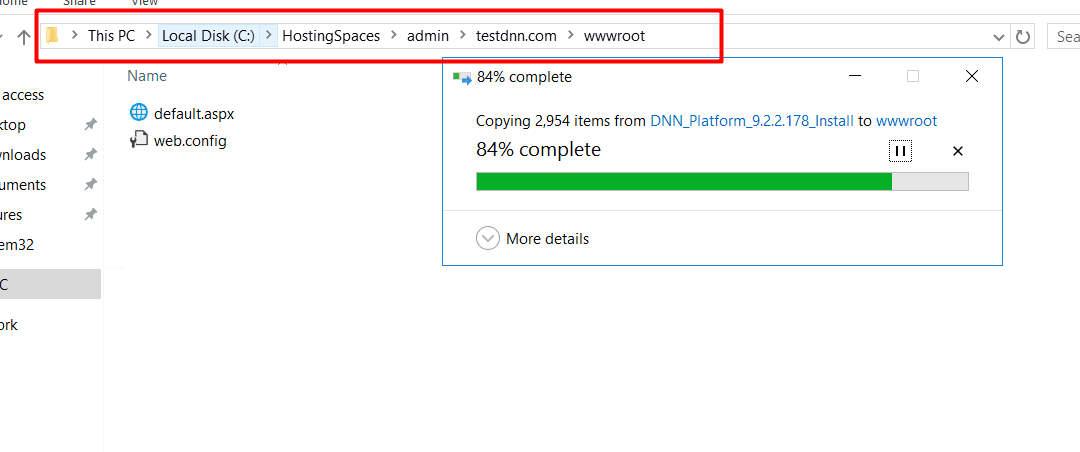
- Upload the DNN install files to:
Step 5: Create SQL Database and User
DNN requires a SQL Server database. Follow this tutorial: How to Create SQL Server Database in WebsitePanel.
Make note of your Database Name, Username, and Password. You’ll need these during installation.
Step 6: Configure Database Connection
- Go to your DNN website root folder.
- Open the
web.configfile. - Update the connection string with your SQL Server hostname, database name, username, and password.
- Replace
127.0.0.1with the remote SQL Server hostname or IP if you’re using a remote SQL server.

Always back up your originalweb.configfile before making edits. - Replace
Step 7: Modify Your Local Hosts File
If your domain does not yet resolve to the correct server IP, you can temporarily map it in your local hosts file:
Path: C:\Windows\System32\drivers\etc\hosts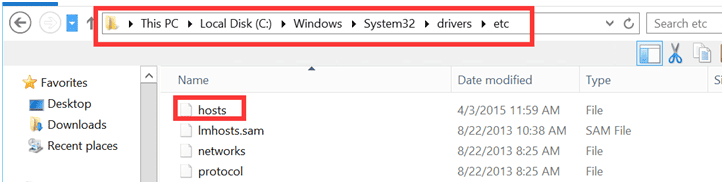
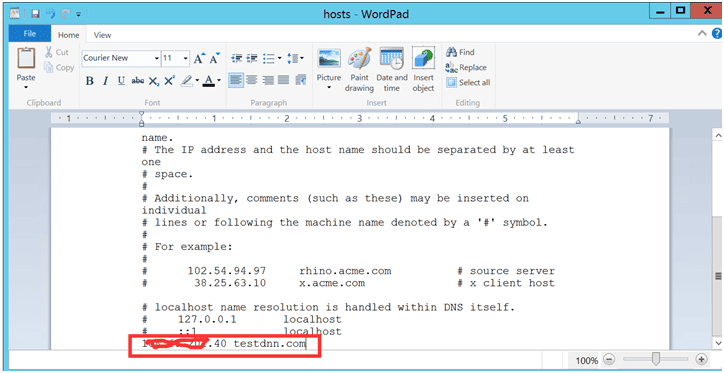
This ensures you can run the DNN installer in your browser.
Step 8: Update Website Settings
For DNN to work properly, your website settings should have:
- Write permissions enabled
- Dedicated application pool
- ASP.NET 4.0 Integrated Pipeline mode enabled
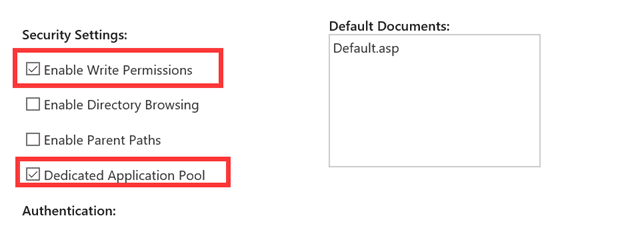
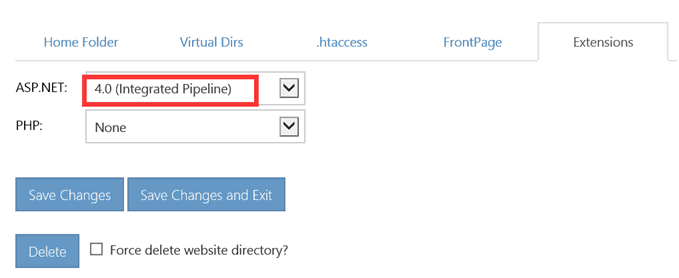
These settings are required in most DNN hosting environments.
Step 9: Run the DNN Installer
- Open your browser and visit your domain name (e.g.,
http://yourdomain.com). - The DotNetNuke installation page will appear.
- Enter the following details:
- Database Name (from Step 4)
- Database Username & Password
- SQL Server hostname or IP (replace
127.0.0.1if using a remote SQL server)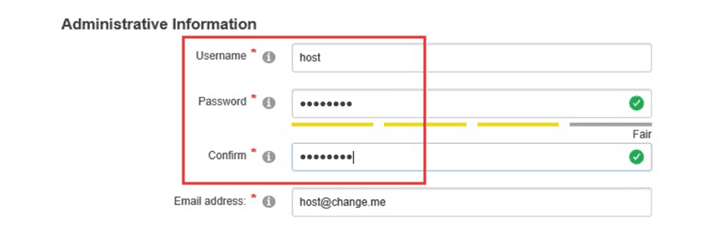
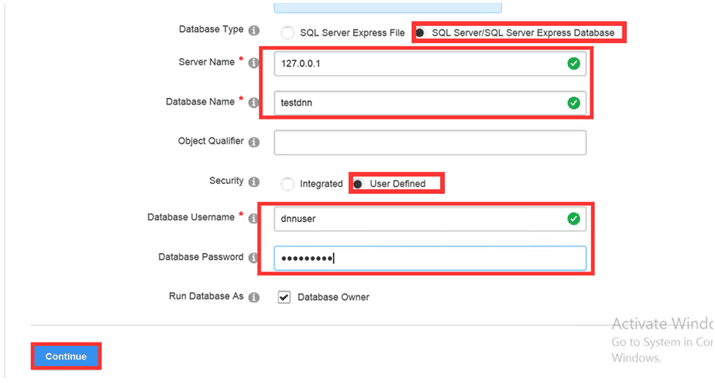
Click Install and wait for the process to complete.
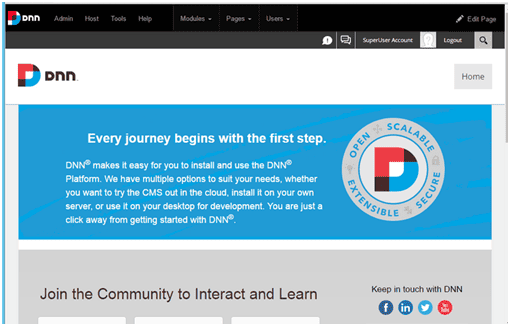
Once the installation completes, you can log in to your new DNN website. You now have a working CMS running on your DotNetNuke hosting environment.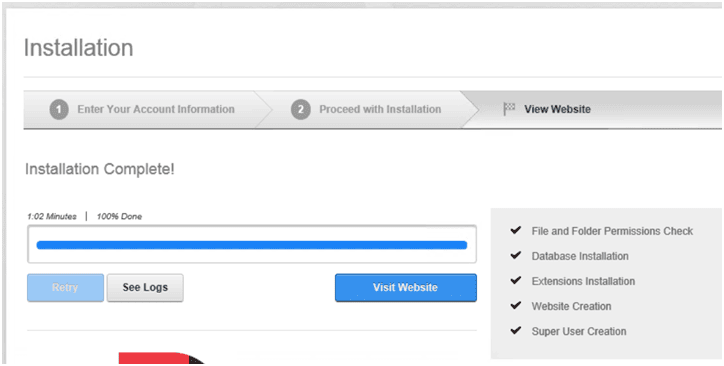
Conclusion
Installing DNN may sound complicated, but by following this DNN install guide, even beginners can set up a fully functional DotNetNuke website.
With just a few steps—download, upload, configure the database, and run the installer—you’re ready to enjoy all the features of DNN web hosting.
If you’re looking for DotNetNuke hosting providers, make sure they support:
- SQL Server
- ASP.NET 4.0 (Integrated Pipeline)
- Dedicated application pools
Now you know how to install DotNetNuke and can confidently launch your site with DNN hosting.
dnn install guide, how to install dotnetnuke, dotnetnuke community edition download, dnn, dotnetnuke, dotnetnuke hosting, dnn hosting, dnn website hosting, dnn download, dnn web hosting, dotnetnuke download