


How to Access Server IPMI Console via IPMI
Introduction
IPMI (Intelligent Platform Management Interface) allows you to remotely manage and monitor your dedicated or GPU servers. This beginner-friendly guide walks you through accessing the console using a browser and Java environment.
Step 1: Download and Install Java
IPMI access requires Java to run. If Java is not installed, download and install it first:
Download JRE
⚠️ Make sure to install JRE, not just JDK.
Step 2: Access IPMI via Browser
- Open Google Chrome or Firefox.
- Enter the IPMI IP address provided (example:
http://x.x.x.xorhttps://x.x.x.x). - Fill in the username and password when prompted.
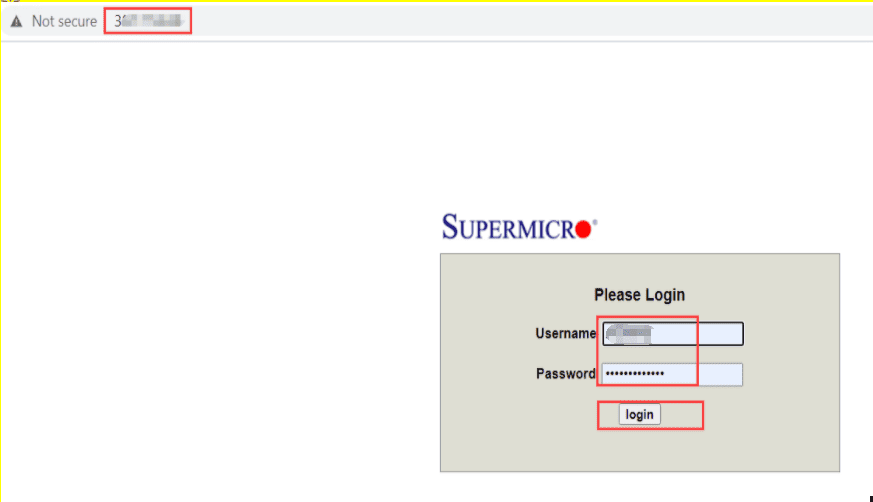
Step 3: Launch IPMI Console
3.1 Click ‘Launch Console’
After logging in, click the Launch Console button to start the launch IPMI session.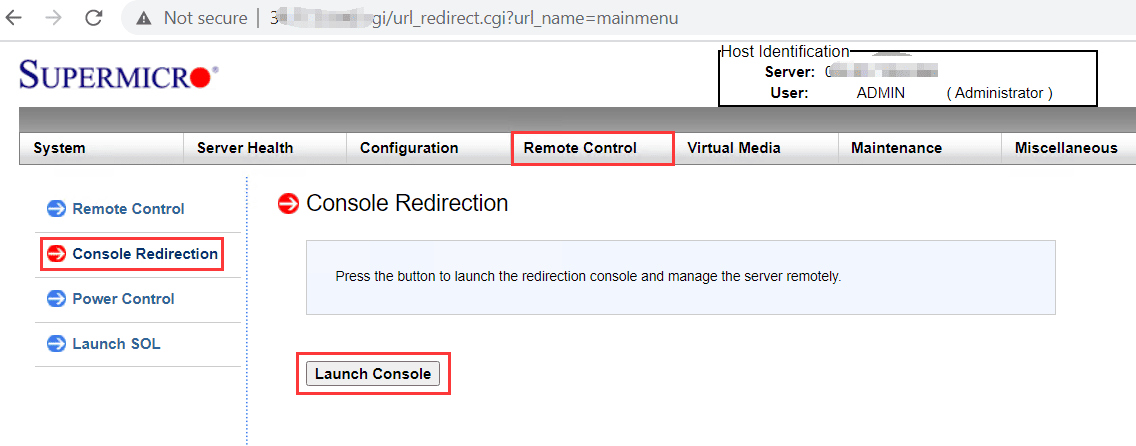
3.2 Open the IPMI Console
A. Dedicated IPMI
- If your IPMI IP is like
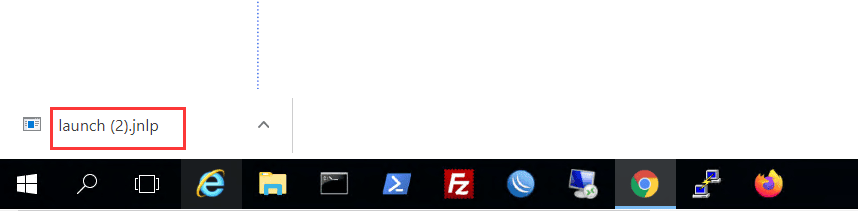
http://x.x.x.xorhttps://x.x.x.x, it is dedicated IPMI for dedicated server management or GPU server remote console management. - Click the Launch.jnlp file downloaded from the browser.
B. Shared IPMI
- If your IPMI IP is like
http://x.x.x.x:portorhttps://x.x.x.x:port(example:http://45.35.14.12:3480), it is shared IPMI. - Steps for Shared IPMI:
- Open the downloaded .jnlp file.
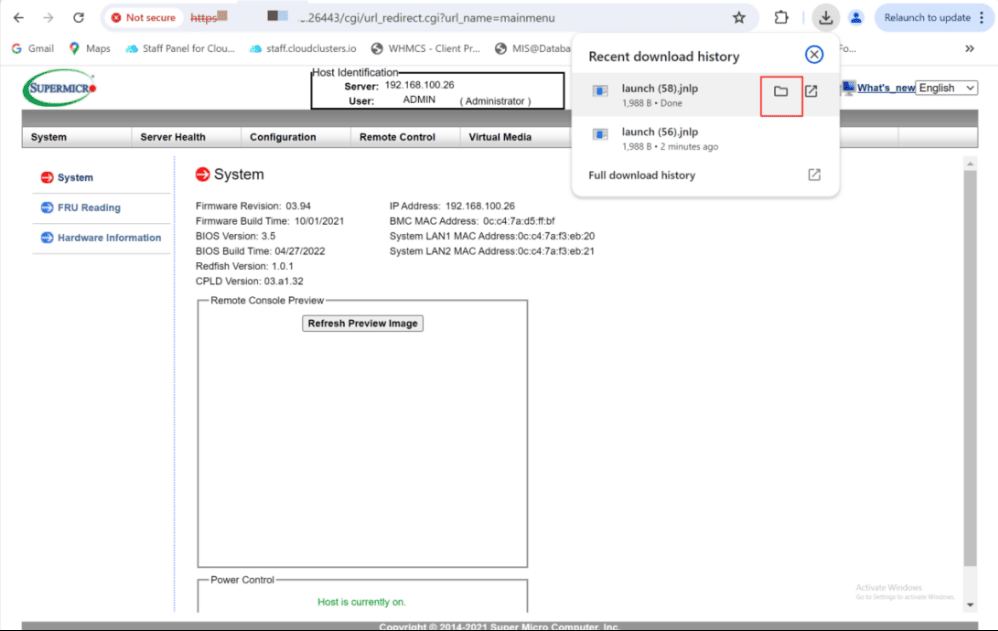
- Edit the .jnlp file according to the new ports provided in the IPMI login details.
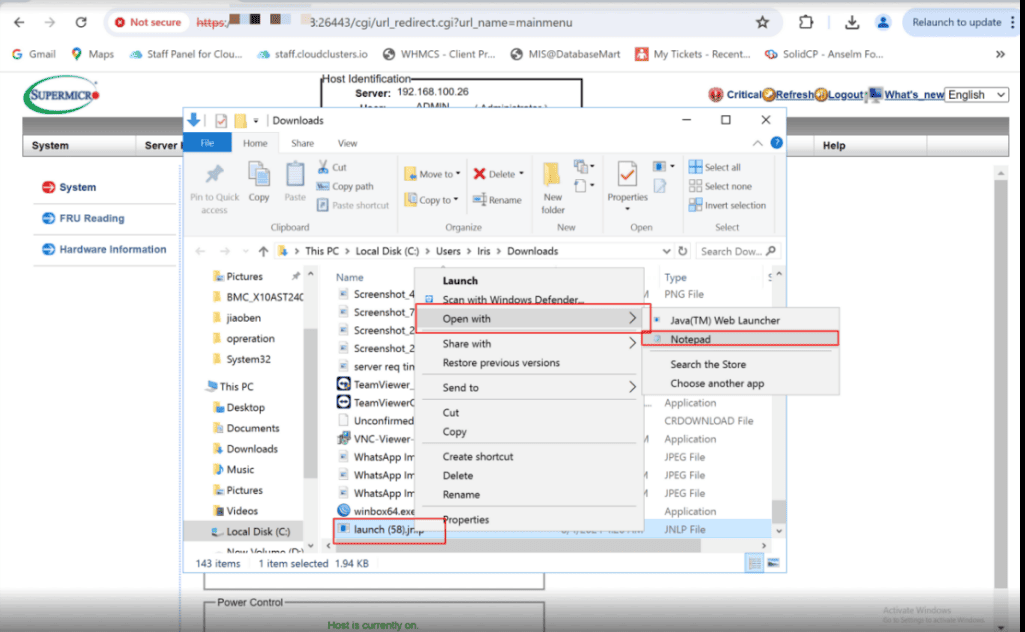
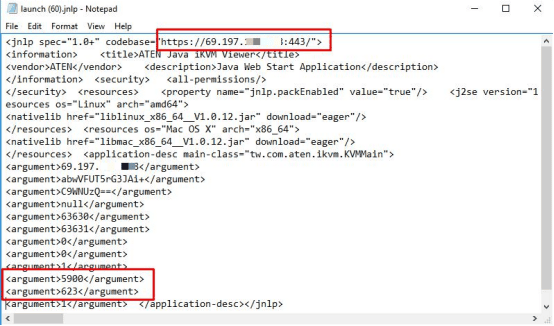
- Save the file and double-click the updated .jnlp to launch the console.
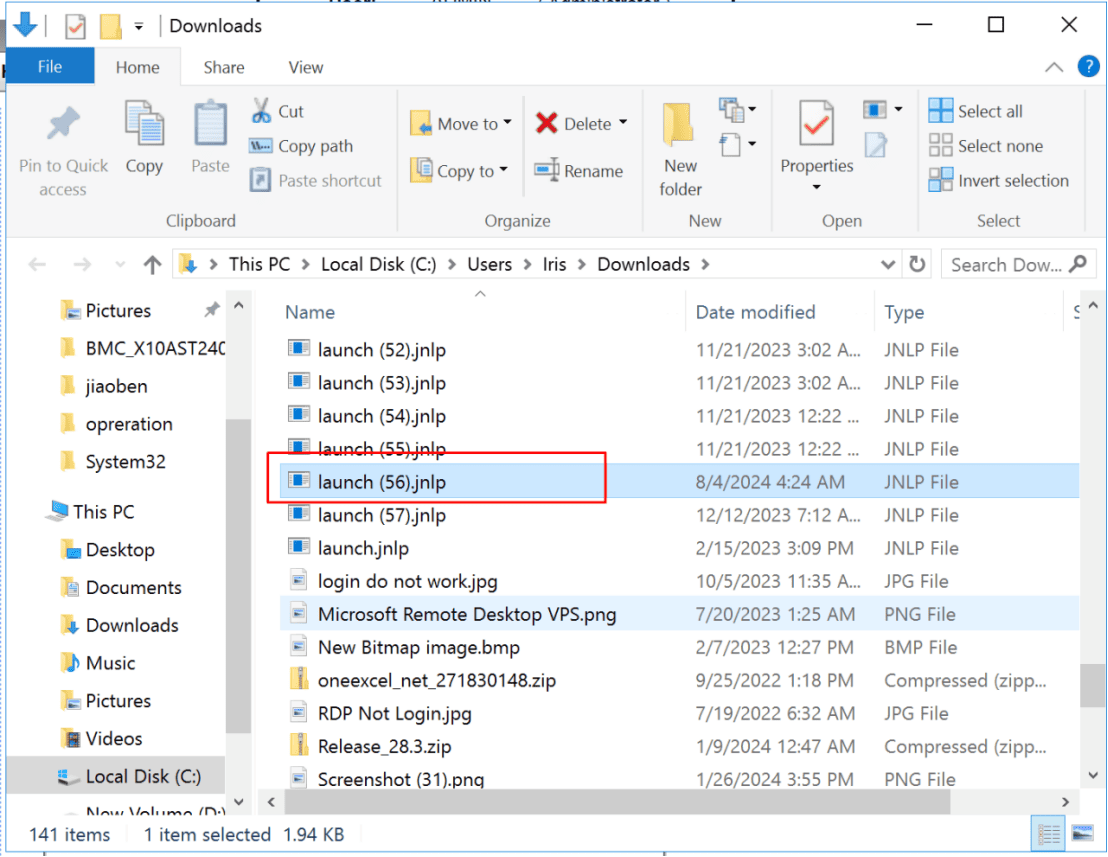
⚠️ Note: Shared IPMI works best with Chrome or Firefox.
- Open the downloaded .jnlp file.
Step 4: Troubleshooting
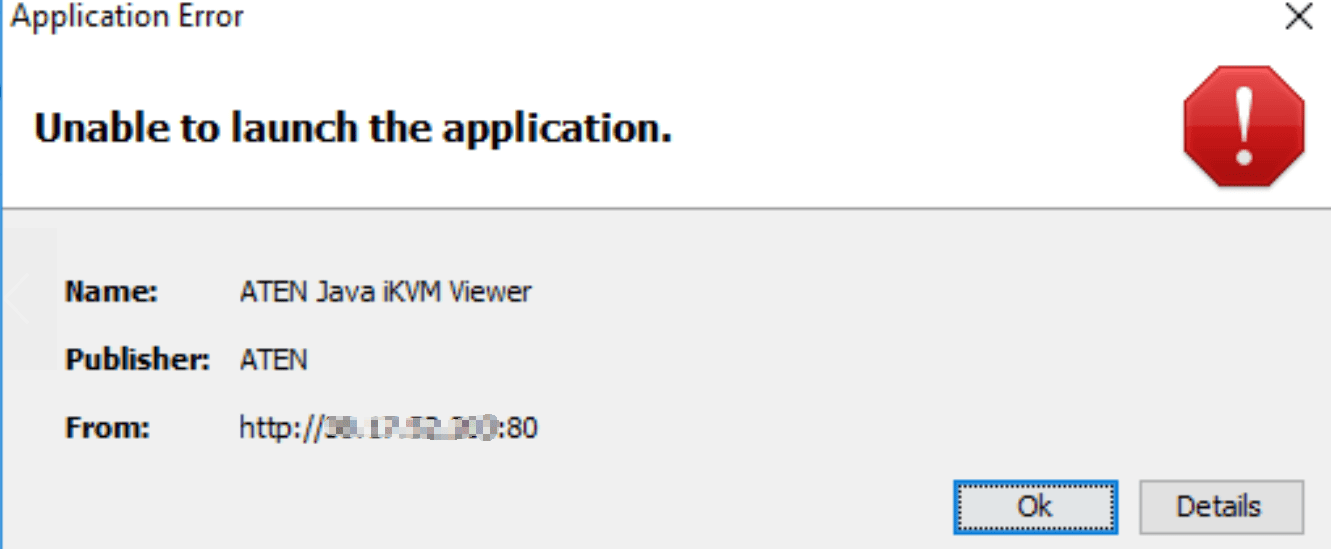
4.1 Application Error
- If you see “Application Error”, it may be due to an outdated JRE.
- Install the latest JRE (step 1) and repeat steps 2–3.
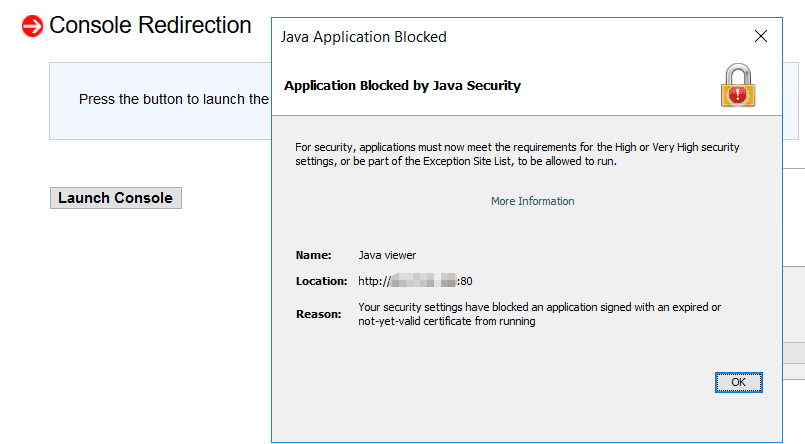
4.2 Java Application Blocked
- If you see “Java Application Blocked”, add the IPMI site to the Java trust list:
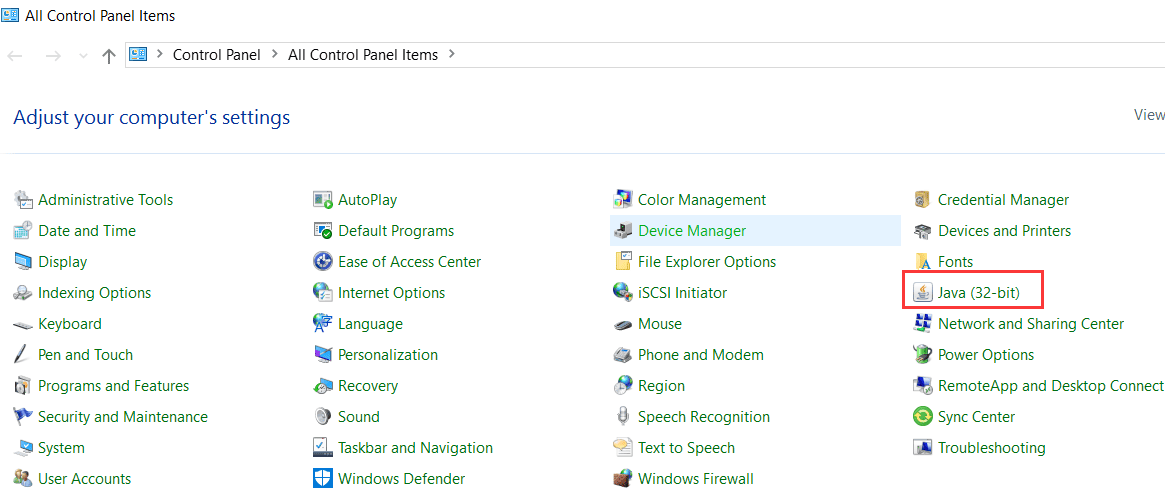
- Open Java Control Panel
- Go to Security → Edit Site List
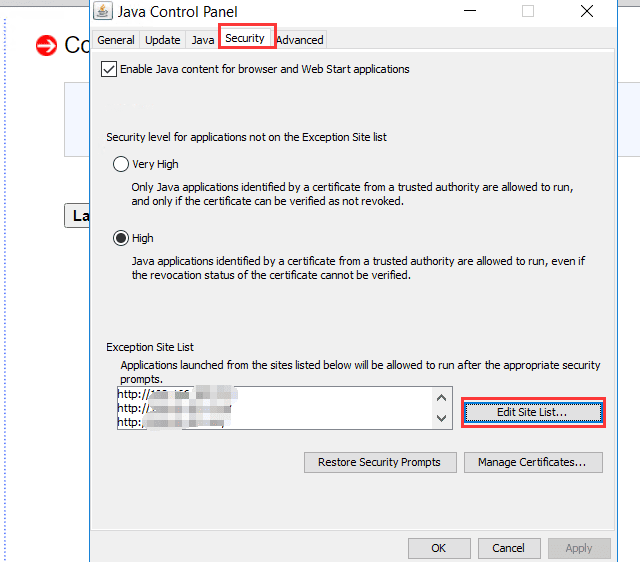
- Add the IPMI URL
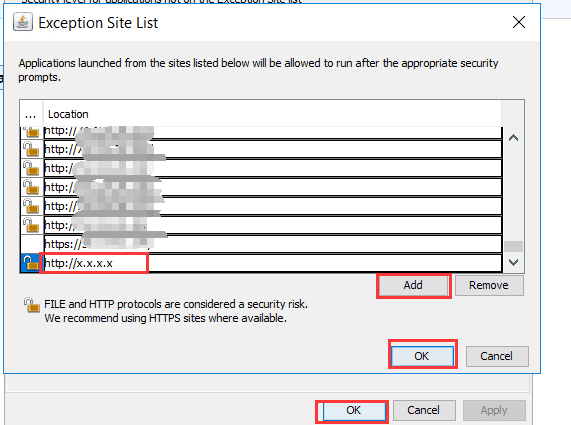
- Relaunch the console
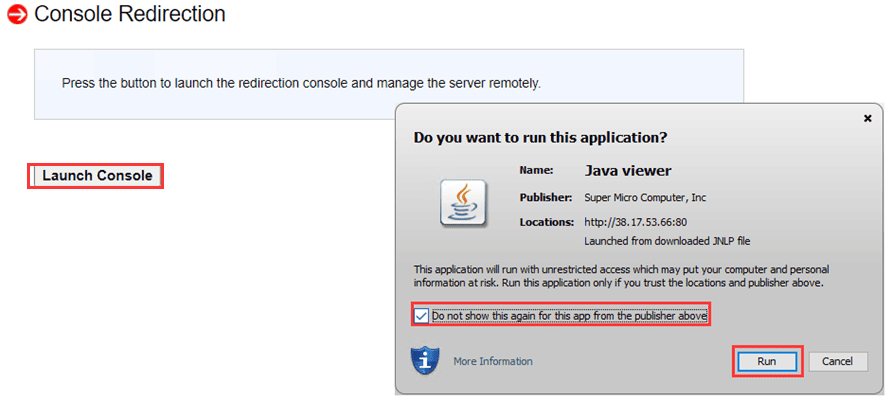
- Open Java Control Panel
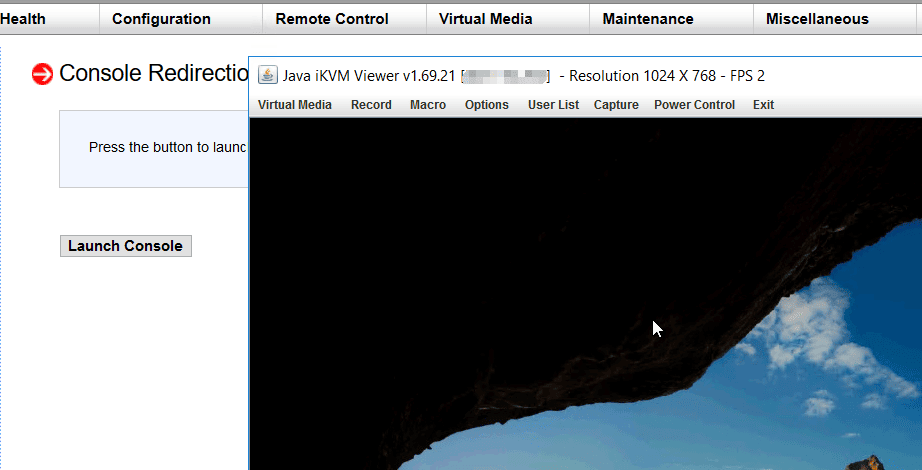
4.3 Normal Console Access
- Once launched, you can manage your server remotely via Ubuntu IPMI or Windows IPMI as if you were physically on-site.
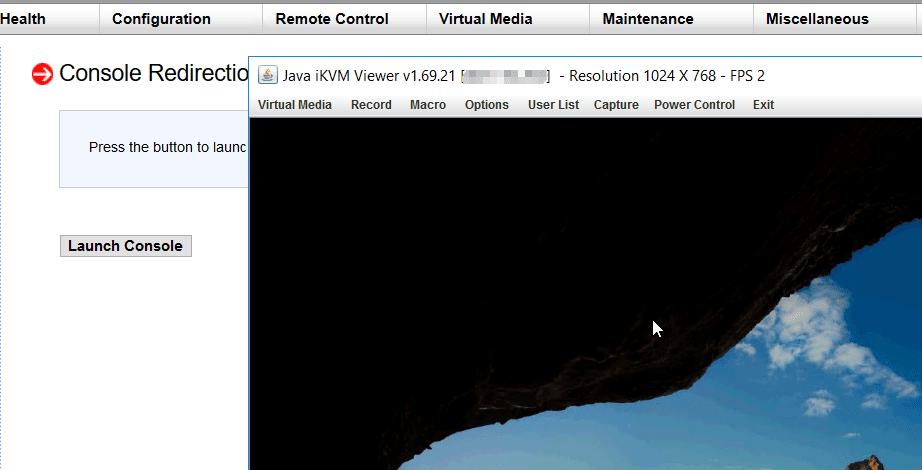
Outline