


How to Configure SSL/TLS to Secure SmarterMail
Learn how to secure SmarterMail using Let's Encrypt SSL. Step-by-step guide to configure SSL/TLS, enable HTTPS, and protect your email communications easily.
Step 1: Export the SSL certificate to a PFX certificate file
1. Open up IIS Services Manager and click Server Certificates
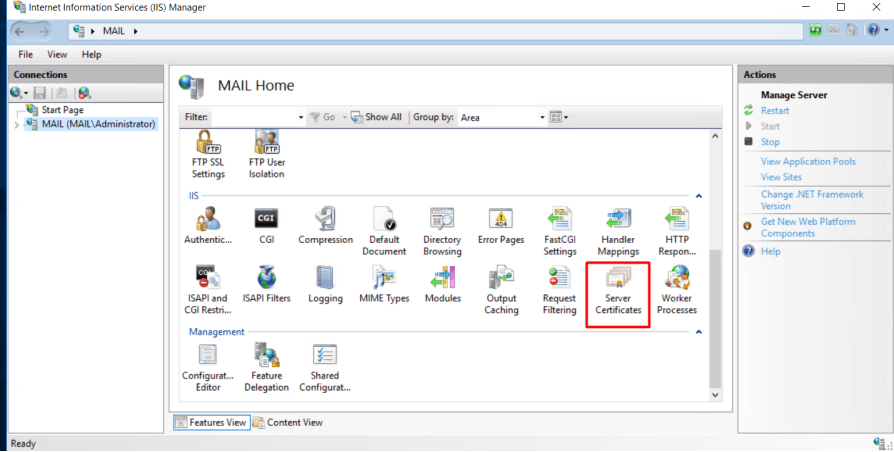
2. Export the SSL certificate to a PFX certificate file
Select the SSL certificate and click Export.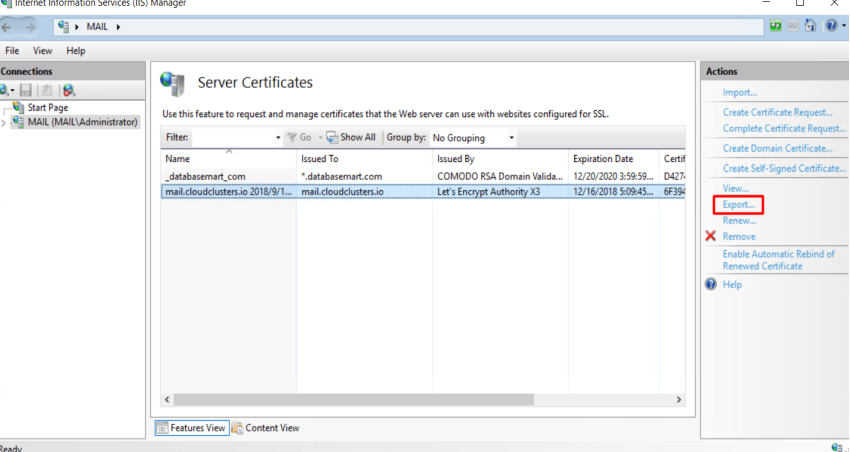
Enter in the path where you would like the certificate saved, file name and password such as C:\SSL\mail.cloudclusters.io_test.pfx and click OK.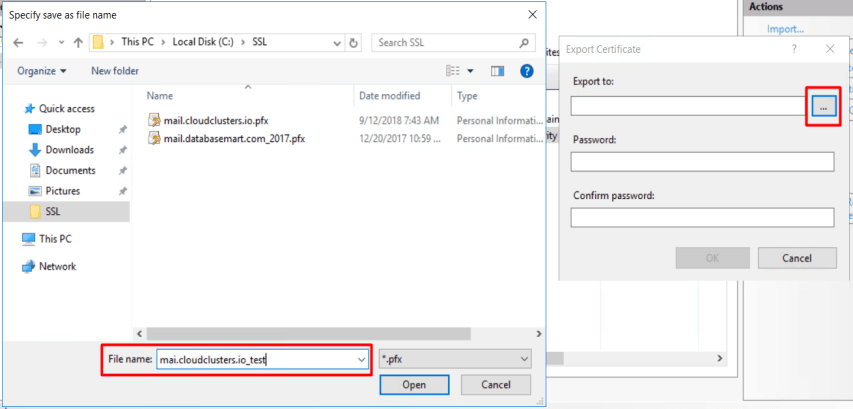
Step 2: Configure SSL/TLS to Secure SmarterMail
1. Add ports to listen over SSL or TLS
Log in to SmarterMail, click Bindings and Ports, then New some ports.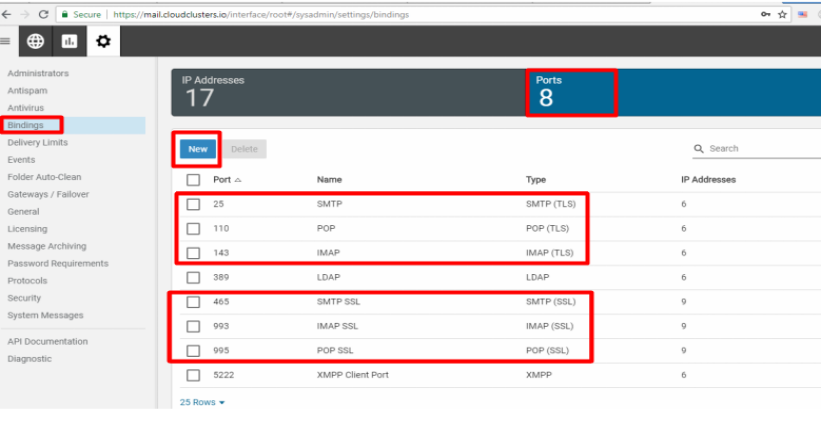
Select Protocol, Encryption, enter the Certificate path and Password, select the IP Address for the port to listen on,then click Save(Using similar steps as above, complete other ports configuration).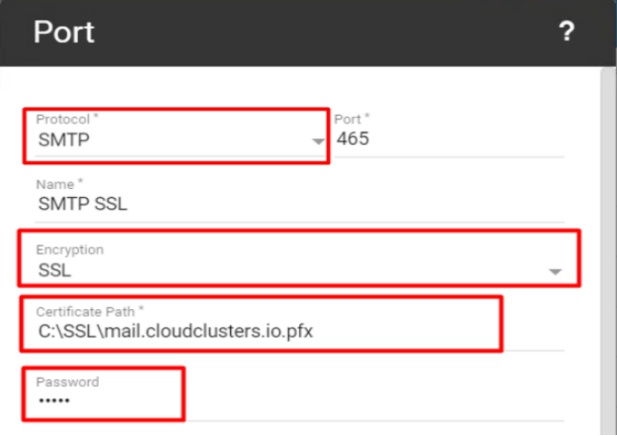
2. Check the Ports
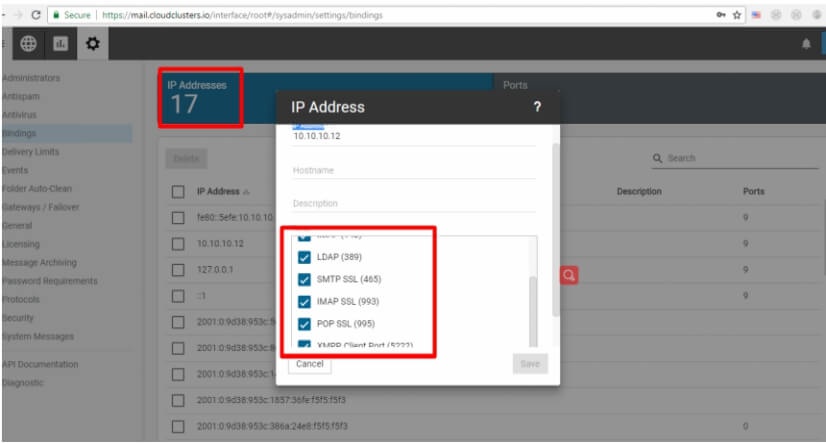
3. Enable TLS in SMTP Out rule
Click Protocols and enable TLS.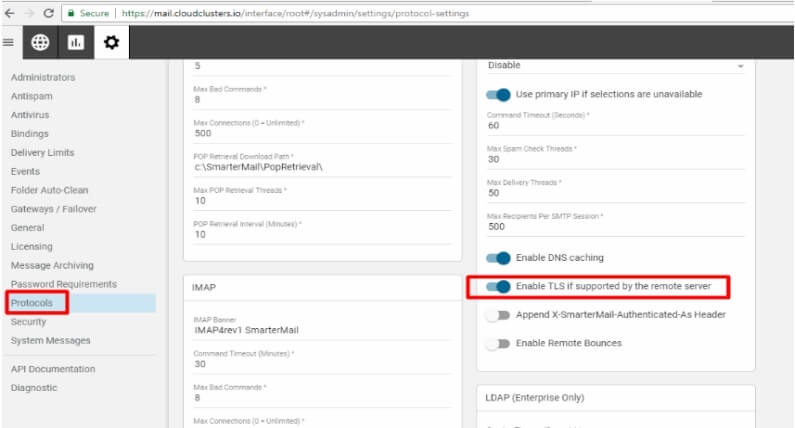
4. Open Autodiscover and Force all traffic over HTTPS
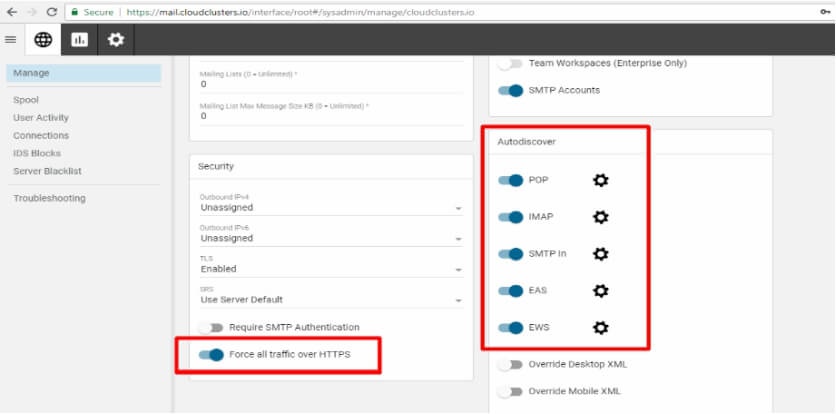
Step 3: Done
Your SmarterMail server is now secured with Let's Encrypt SSL and configured to use SSL/TLS for all email communications.
SmarterMail SSL, Let's Encrypt SSL, secure SmarterMail, SmarterMail TLS, email encryption, SmarterMail HTTPS