


VPN Setup: How to Install VPN on Windows Server
This article explains how to install and set up a VPN on Windows Server. First, install the Remote Access role with the VPN role service through Server Manager or PowerShell. Next, start the VPN configuration wizard and configure RRAS with VPN access and IP address assignment. Then, open the required firewall ports for your VPN protocol. After that, enable VPN access for the users who need it. Finally, test the connection from a client PC using the server's public IP or hostname and a VPN-enabled account.
Prerequisites
- A Windows Server 2016 or 2019 server
- Administrator rights
- Static public IP (recommended)
- Basic understanding of Server Manager and firewall configuration
Steps to Install VPN on Windows
Step 1: Install the VPN Role (Remote Access)
Option 1: Install via Server Manager
- Open Server Manager.
- Go to Manage > Add Roles and Features.
- Select Role-based or feature-based installation.
- Choose your server.
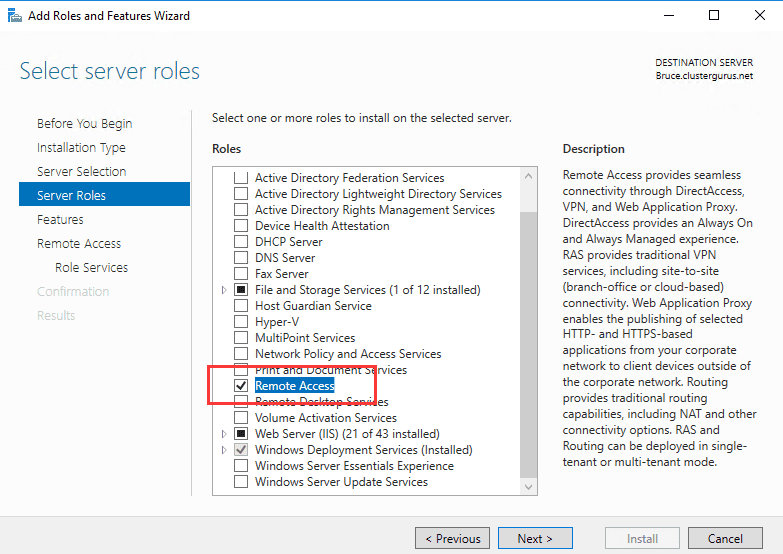
- Under Server Roles, select Remote Access.
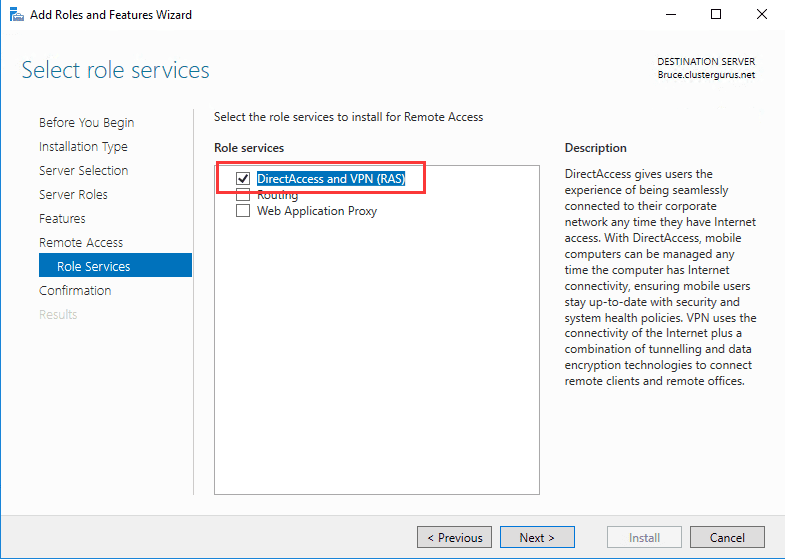
- Under Role Services, select DirectAccess and VPN (RAS).
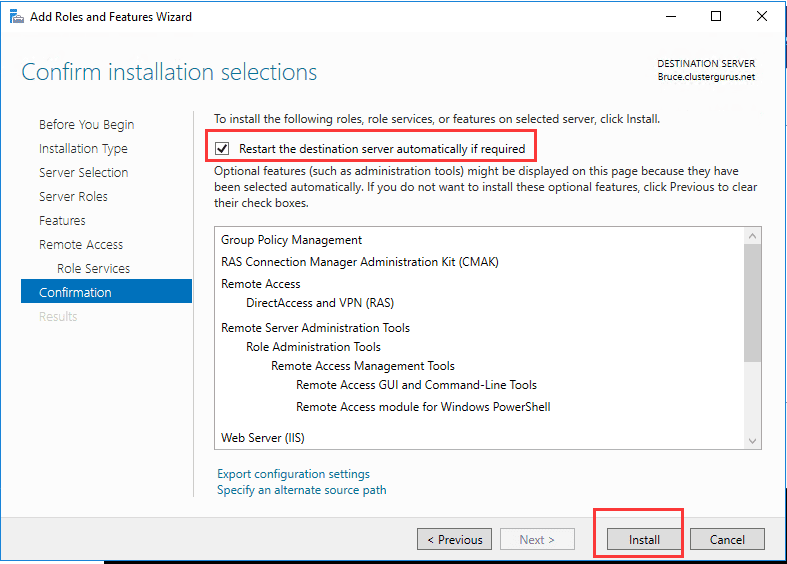
- Proceed with the default settings and click Install.
Option 2: Install via PowerShell
Install-WindowsFeature RemoteAccess -IncludeManagementTools
Install-WindowsFeature DirectAccess-VPN -IncludeManagementTools
Step 2: Start the VPN Configuration Wizard
- In Server Manager, click Notifications.
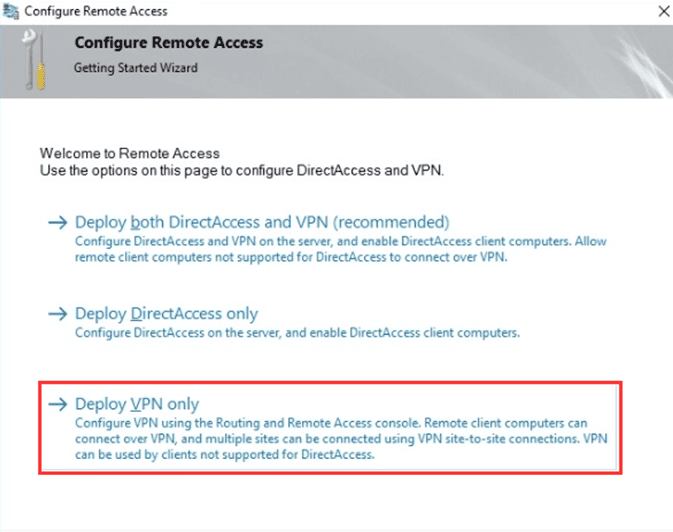
- Select Open the Getting Started Wizard.
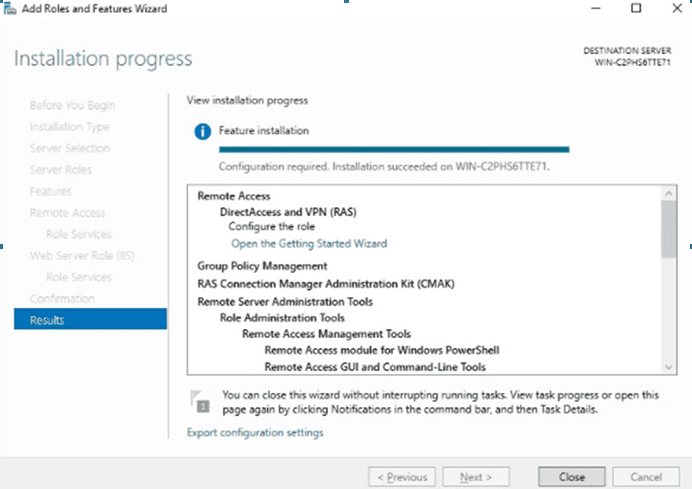
- Choose Deploy VPN only to start VPN setup.
Step 3: Configure VPN with RRAS
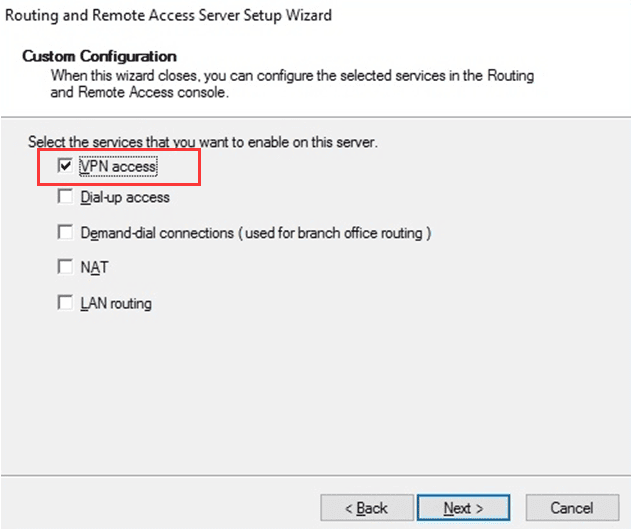
- Select Custom configuration.

- Check VPN Access.
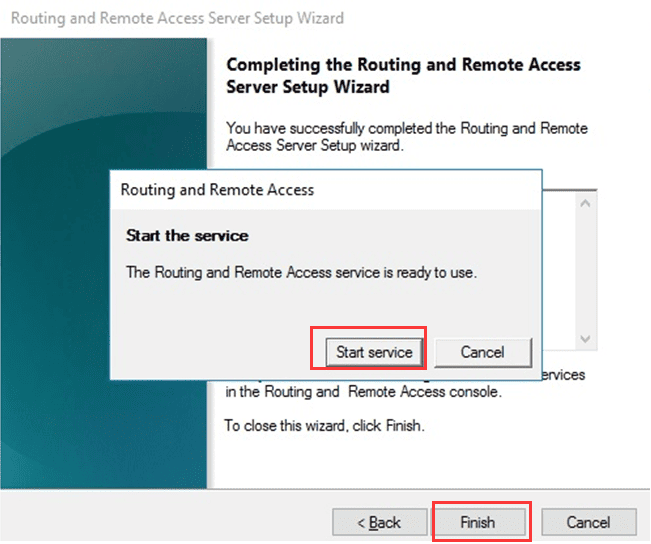
- Finish the wizard and start the RRAS service.
Step 4: Configure Routing and Remote Access
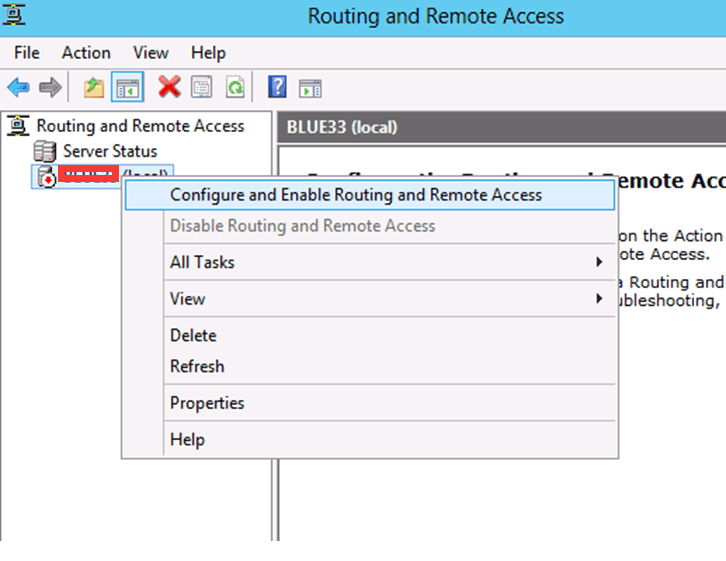
- Open the RRAS Management Console.
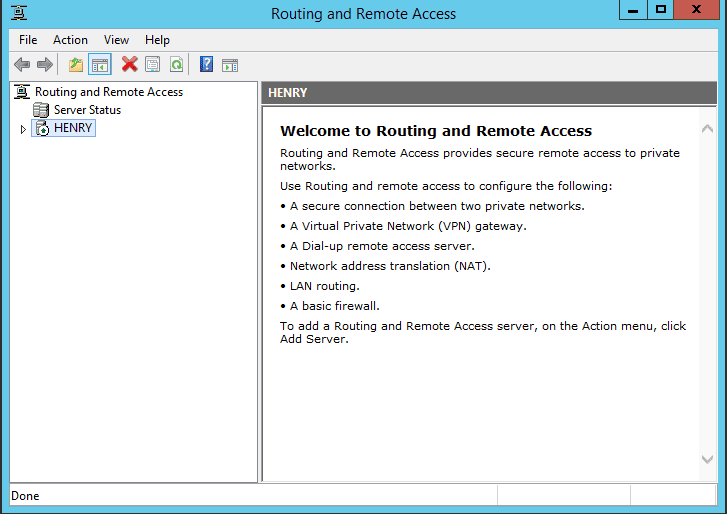
- Right-click your server name > Configure and Enable Routing and Remote Access.
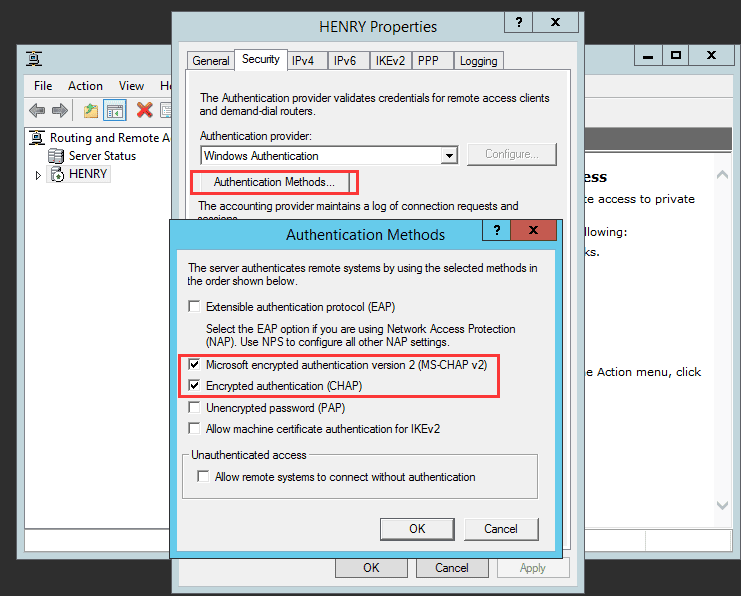
- Complete the wizard to enable VPN.
Configure IP Address Assignment
- With DHCP: IPs are automatically assigned.
- Without DHCP:
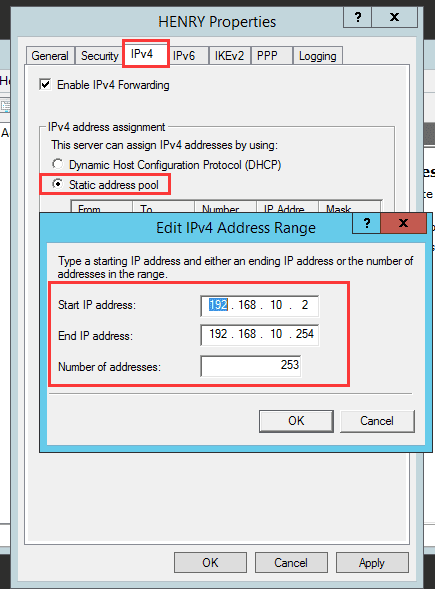
- Go to RRAS > Properties > IPv4.
- Enable the Static address pool and define an IP range.
Step 5: Open Required Firewall Ports
To allow VPN traffic, make sure these ports are open and forwarded:
- PPTP VPN: TCP 1723 + GRE (Protocol 47)
- L2TP over IPsec VPN: UDP 1701, 500, 4500
- SSTP VPN: TCP 443
- IKEv2 VPN: UDP 500, 4500
Step 6: Enable VPN Access for Users
- On Standalone Server:
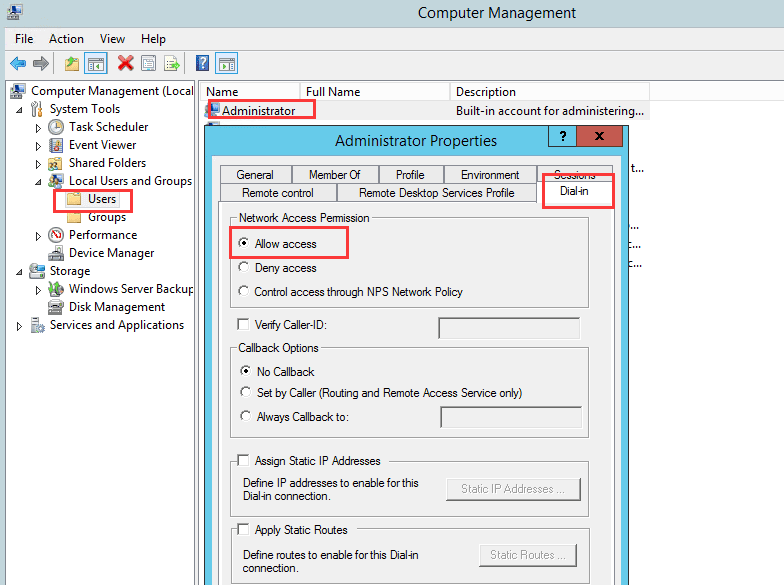
- Open Computer Management > Local Users and Groups.
- Right-click user > Properties > Dial-in tab.
- Select Allow access.
- On Active Directory Domain:
- Open Active Directory Users and Computers.
- Right-click user > Properties > Dial-in tab.
- Select Allow access.
Step 7: Test the VPN Connection
- On a client PC, create a new VPN connection.
- Enter the server’s public IP or hostname.
- Log in with a user account enabled for VPN access.
- Confirm that the connection is successful.
Conclusion
By following this tutorial, you have installed and configured a VPN server on Windows Server 2016 or 2019 using Remote Access and RRAS. Your VPN can now handle connections over PPTP, L2TP/IPsec, SSTP, or IKEv2.
This VPN setup guide for Windows Server ensures secure remote connections for users and is a reliable way to manage remote access.
Tip: For stronger security, use SSTP or IKEv2 VPN protocols with a valid SSL certificate instead of PPTP.
Outline