


How to Install Joomla Website - Joomla Hosting
This guide is written for beginners, so even if you’re new to Joomla web hosting, you’ll be able to follow along easily.
What is Joomla?
Joomla is a free and open-source content management system (CMS) for building websites and online applications.
- Written in PHP
- Supports MySQL, MS SQL, and PostgreSQL
- Offers features like blogs, news, multilingual support, caching, and more
- The second most used CMS after WordPress
With the right Joomla hosting provider, you can create dynamic websites with thousands of free and premium extensions.
How to Install a Joomla Website?
Step 1: Download Joomla
- Visit the official Joomla website: Joomla Download Page
- Click Download Joomla 3.5.1 to download the latest Joomla installation package.
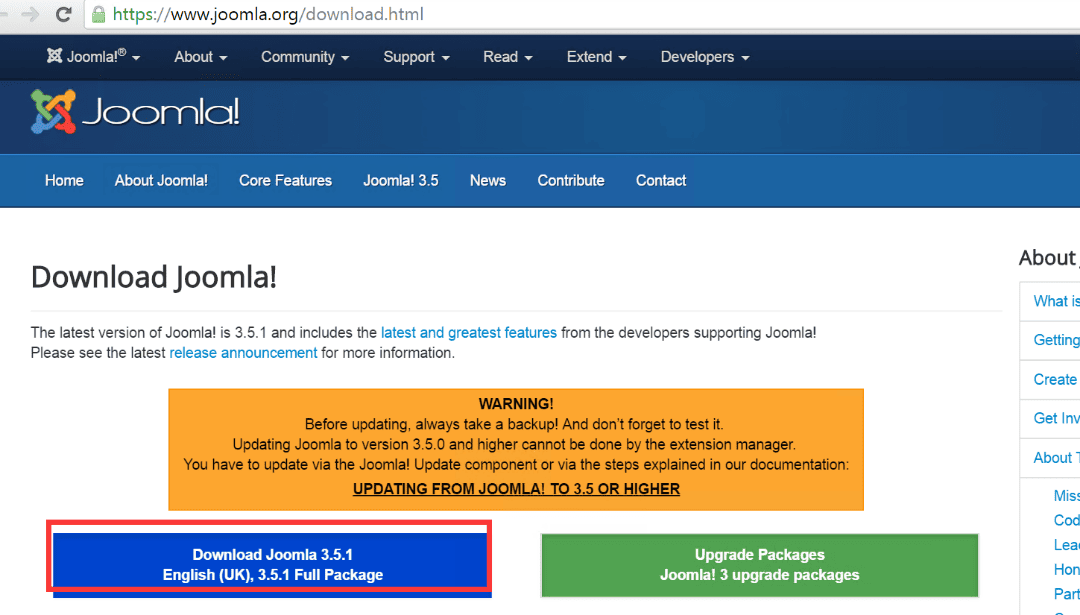
This package contains all the files needed for your Joomla web install.
Step 2: Add Domain & Create Website
- Use WebsitePanel to add your domain (e.g., yourjoomlasite.com) and create a new website container. Refer to Steps 2 and 3 of this article to add a domain and create a website.
Step 3: Upload Joomla Files
- Connect via FTP or copy files directly to the server.
- Paste the extracted Joomla files into:
C:\HostingSpaces\admin\yourjoomlasite.com\wwwroot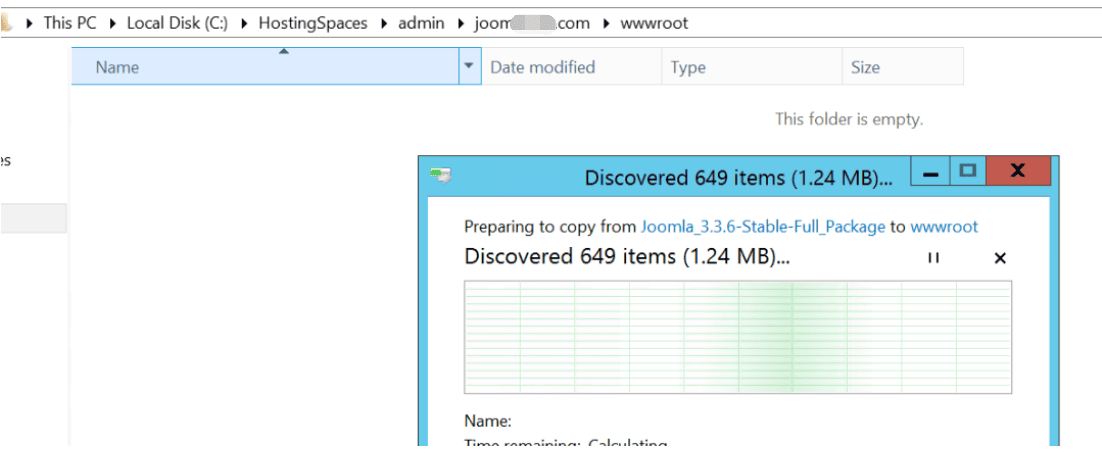
Step 4: Create MySQL Database & User
Follow this tutorial: How to Create SQL Server Database in WebsitePanel.
Step 5: Update the Host File (Optional)
If your domain doesn’t resolve yet:
Open C:\Windows\System32\drivers\etc\hosts
Map your domain name to the server’s IP address.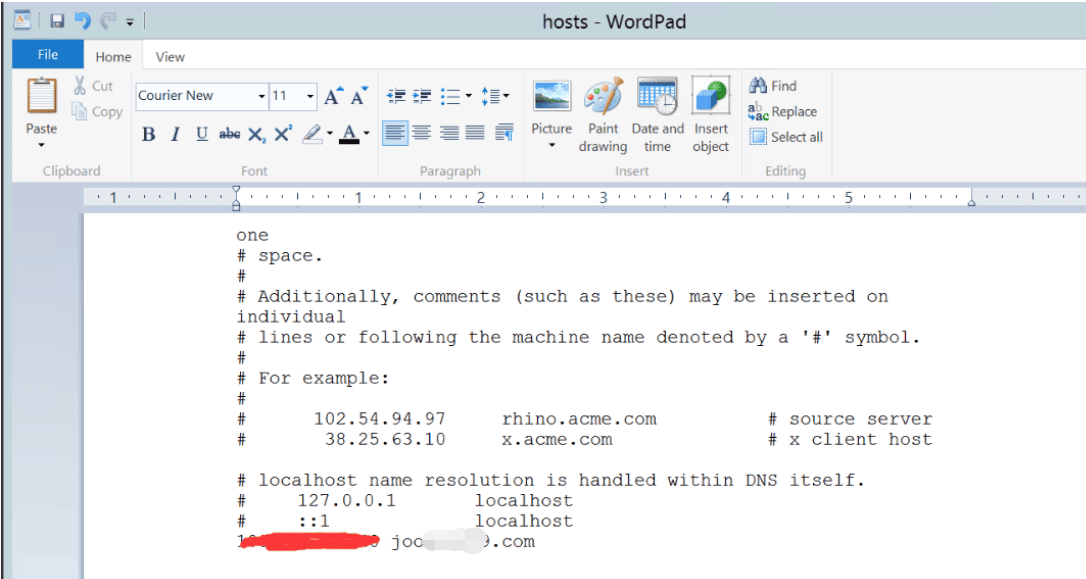
Step 6: Configure PHP Settings
- Locate your
php.inifile. - Set:
register_globals = offThis ensures Joomla runs securely.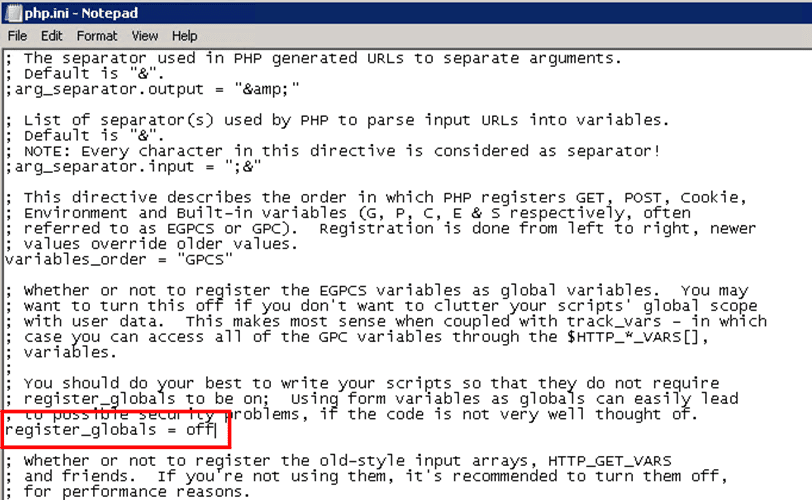
Step 7: Adjust Website Settings
Check Enable Write Permissions and Dedicated Application Pool. Set Default Document to Default.asp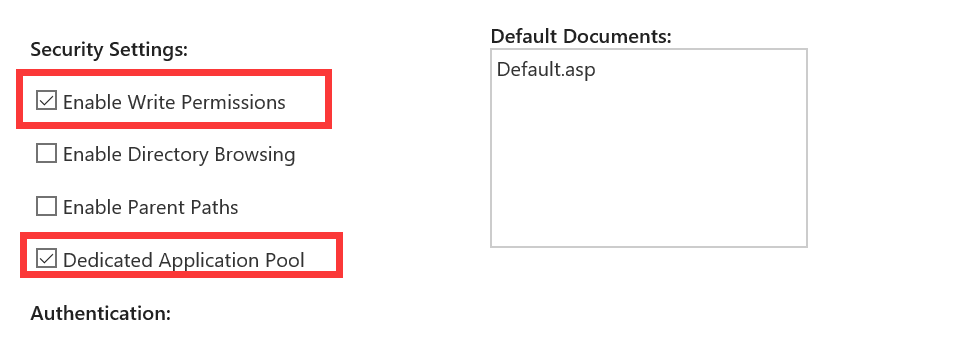
Make sure ASP.NET 4.0 Integrated Pipeline is selected. Under the PHP option, select 5.x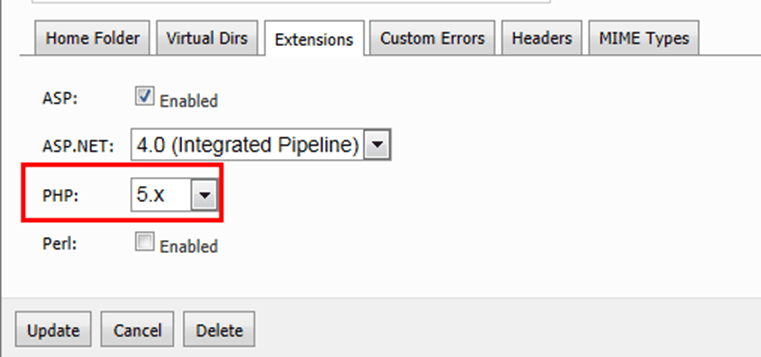
Step 8: Run the Joomla Installation
Open your browser and go to your domain, e.g., http://yourjoomlasite.com. You’ll see the Joomla web install wizard. Select language.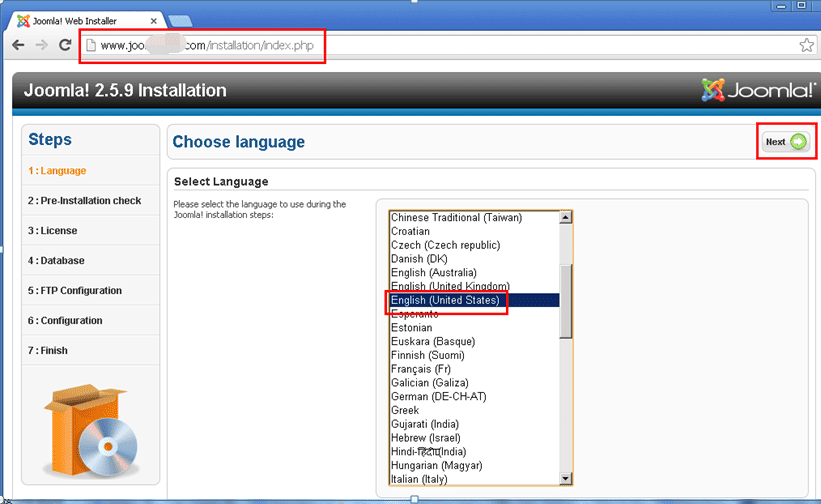
Input Database details (DB Name, User, Password, Host)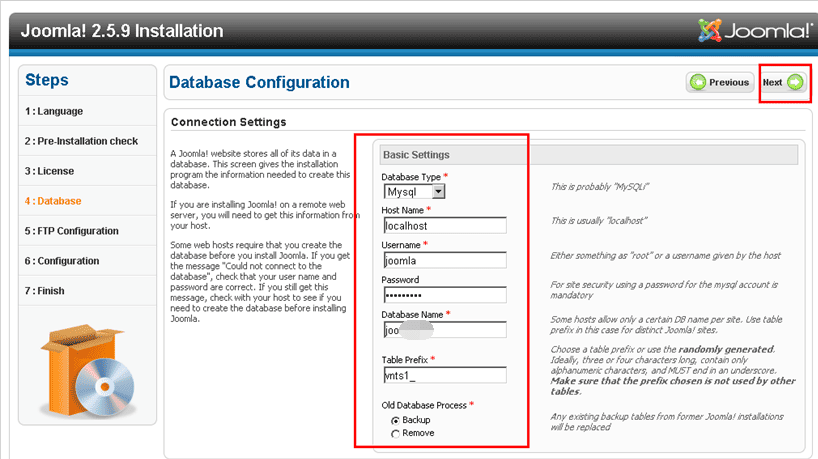
If the following page appears, Joomla has been successfully installed.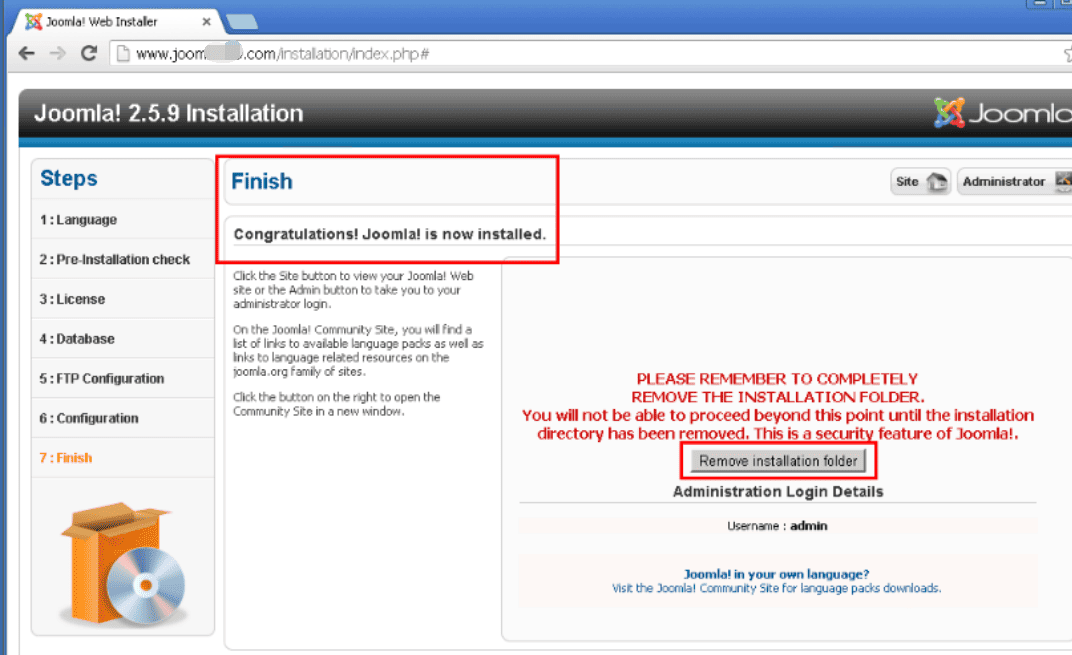
Step 9: Delete the Installation Folder
For security reasons, Go to your Joomla root folder. Delete the /installation directory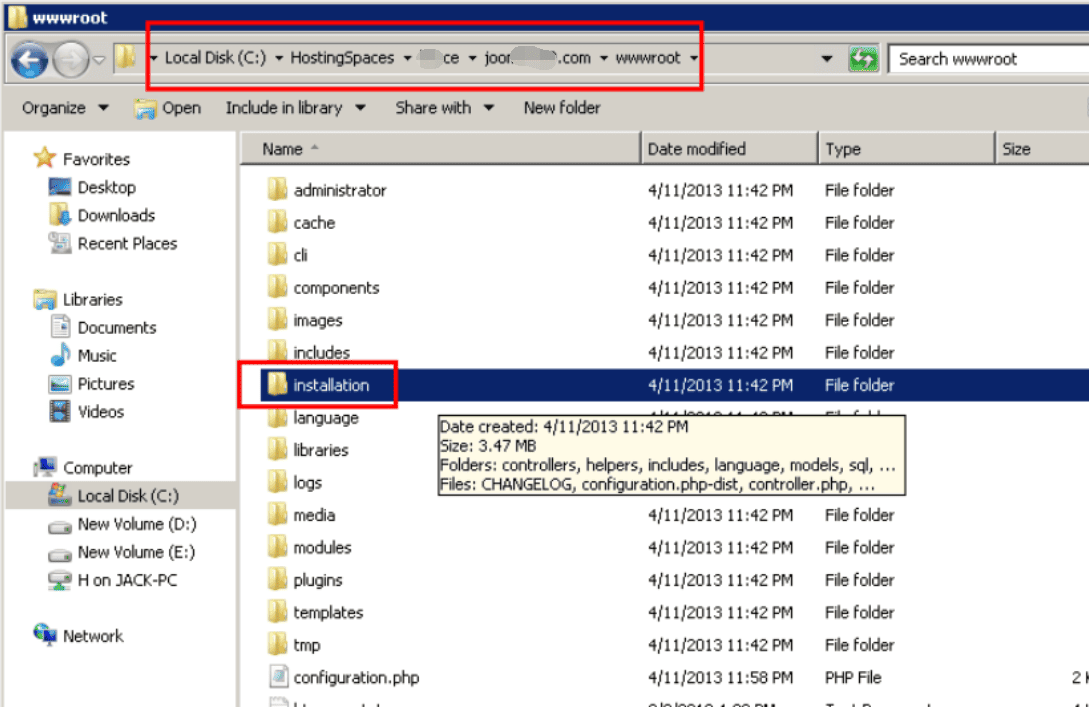
Conclusion
This beginner-friendly Joomla tutorial showed you how to:
- Download Joomla
- Set up the domain and hosting
- Upload files and configure PHP/MySQL
- Complete the Joomla installation steps
joomla web hosting, joomla hosting, joomla website hosting, joomla installation, joomla how to install, joomla tutorial, joomla web install, joomla installation steps