


How to install phpMyAdmin in Windows server?
If you are new to MySQL and looking for an easy way to manage your databases, phpMyAdmin is the best tool. This guide will show you how to install phpMyAdmin on Windows Server step by step, even if you are a beginner.
phpMyAdmin is a free web-based software written in PHP. It allows you to handle the administration of MySQL or MariaDB databases directly from your browser.
Step 1: Install PHP on Windows Server
To install phpMyAdmin, you need PHP first.
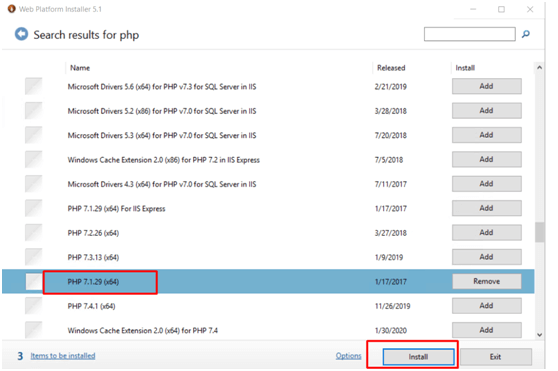
- Download and install PHP 7.1 (or newer) using Microsoft Web Platform Installer.
- Make sure PHP is properly configured with your web server (IIS or Apache).
Step 2: Download phpMyAdmin
- Go to the official phpMyAdmin website: phpMyAdmin Downloads
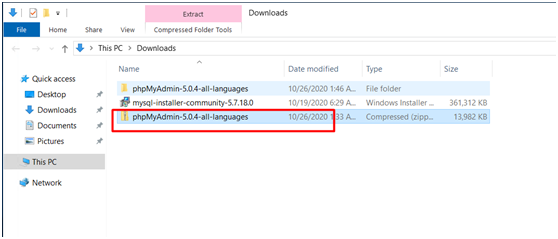
- Download the latest stable version (for example, phpMyAdmin 5.0.4).
- This version is compatible with PHP 7.1+ and MySQL 5.5+.
Step 3: Configure phpMyAdmin
- Extract the downloaded phpMyAdmin package.
- Inside the folder, rename "config.sample.inc.php" to "config.inc.php"
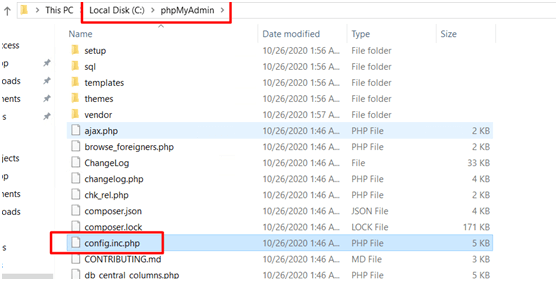
- Move the phpMyAdmin folder to your web root (for example,
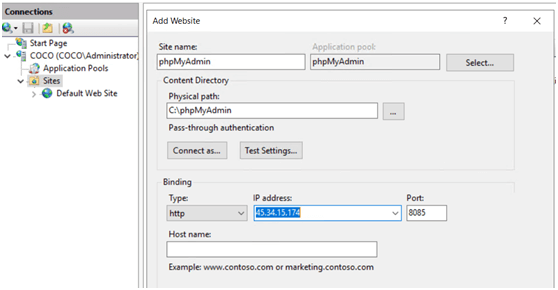
C:\inetpub\wwwroot\phpMyAdmin). - Create a new IIS or Apache website manually, pointing it to the phpMyAdmin folder.
Step 4: Open Port in Windows Firewall
To access phpMyAdmin from a browser, you need to open a port.
- Example: Open port 8085 in Windows Firewall.
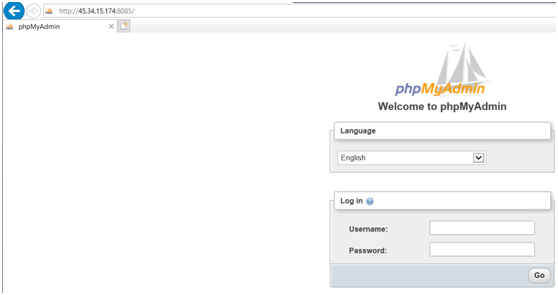
- Run the following test in your browser: http://
:8085/ 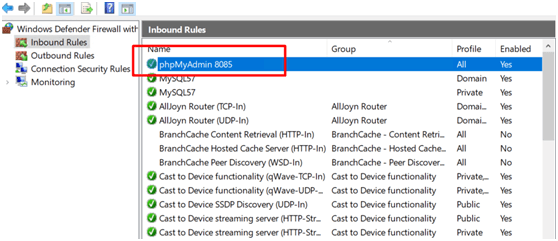
If everything is configured correctly, you will see the phpMyAdmin login page.
Step 5: Test phpMyAdmin Login
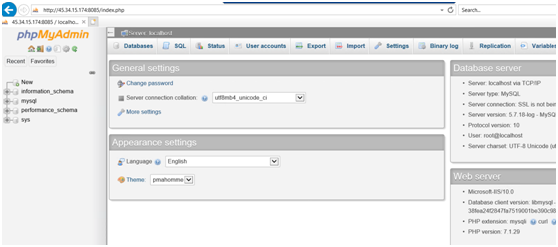
- Enter your MySQL root username and password
- Once logged in, you can start creating and managing databases.
install phpmyadmin, phpmyadmin installation tutorial, digitalocean phpmyadmin ubuntu 20.04, how to install phpmyadmin in ubuntu 20.04 step by step, how to install phpmyadmin on windows 10, install apache php mysql phpmyadmin windows 10, install phpmyadmin windows 10, install phpmyadmin windows server 2016, install phpmyadmin windows server 2019, phpmyadmin for windows 10, install apache php mysql phpmyadmin windows 10, install phpmyadmin windows server 2016, install phpmyadmin windows server 2019