


MailEnable SSL Installation——Beginner-Friendly Guide
Introduction
First, install SSL certificate on MailEnable webmail. Configure your SSL certificate to your mail domain in IIS.Now we can start.
Step-by-Step Installation Guide
Step 1: Configure SSL in MailEnable
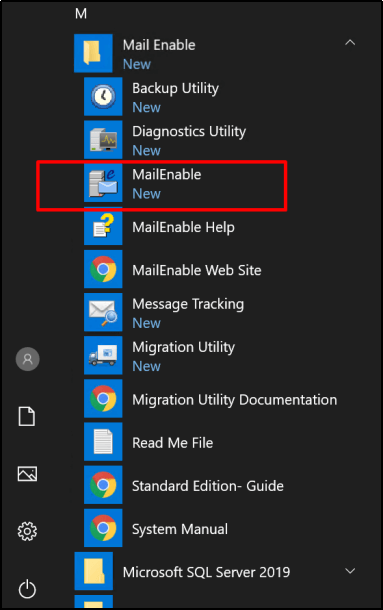
- Open the MailEnable Administration Console.
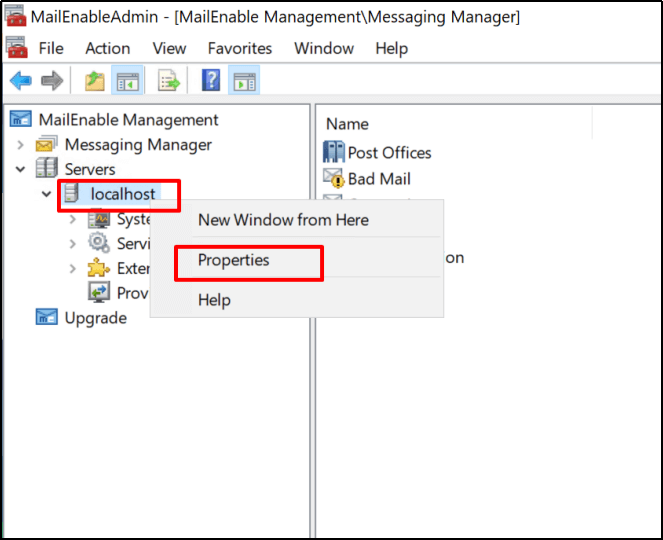
- Right-click Server > localhost and select Properties.
- Go to the SSL tab, select your installed certificate, and click Apply → OK.
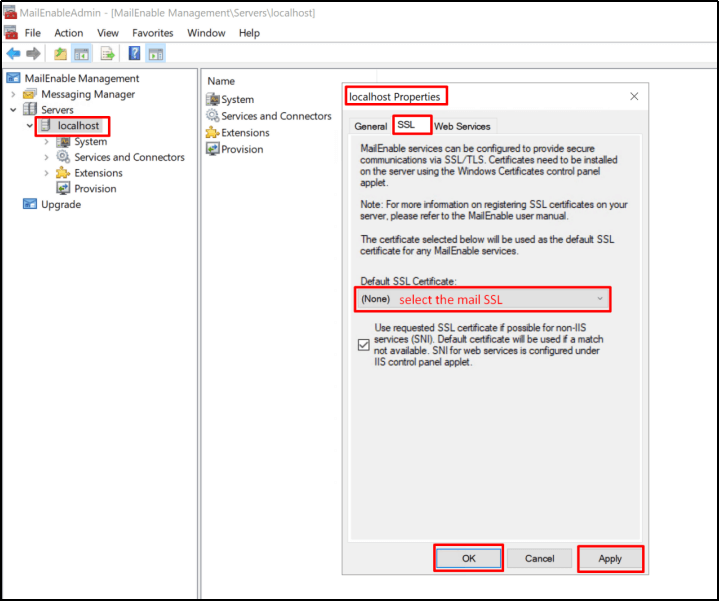
This step enables MailEnable SSL setup and ensures all mail traffic is encrypted for a secure email server.
Step 2: Enable SSL for Mail Services
Configure SMTP (Outgoing Mail)
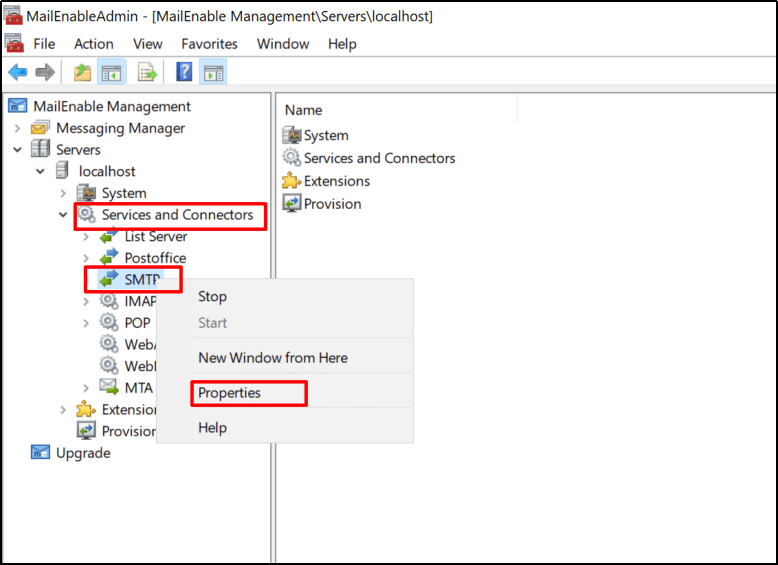
Go to Services and Connectors > SMTP, right-click, and select Properties.
In the Inbound tab, check Allow clients to establish secure sessions via STARTTLS.
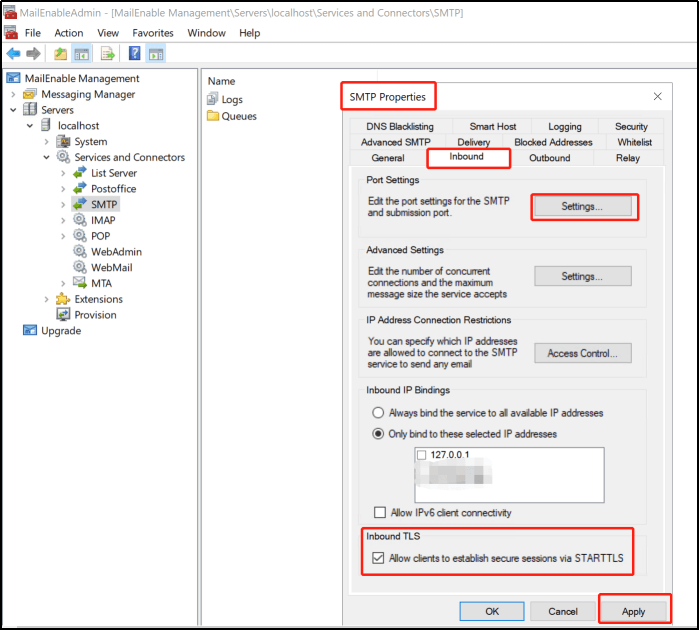
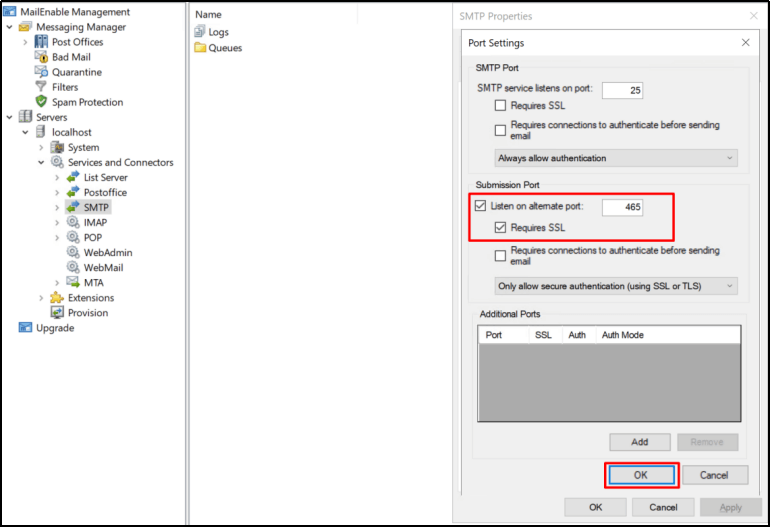
Click Apply, then Port Settings, and set the SSL port to 465.
Restart the SMTP service to activate MailEnable SMTP SSL.
Configure IMAP (Incoming Mail)Right-click IMAP, select Properties.
Check Also listen on alternate port: 993 and Requires SSL.
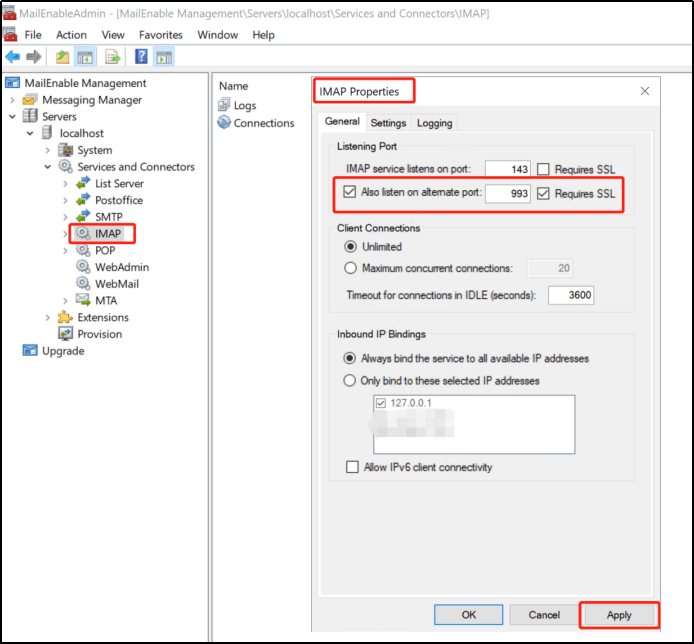
Restart the IMAP service to enable MailEnable IMAP SSL.
Configure POP3 (Incoming Mail)
- Right-click POP, select Properties.
- Check Also listen on alternate port: 995 and Requires SSL.
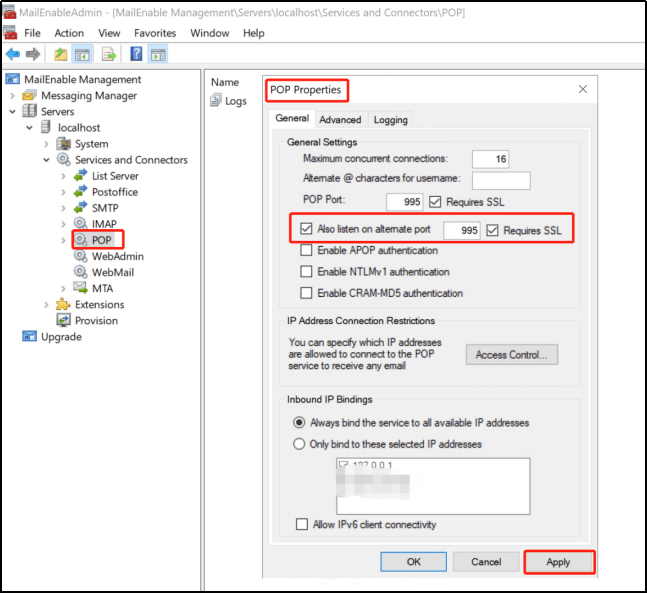
- Restart the POP service to enable MailEnable POP3 SSL.
Check the SMTP Outbound TLS setting and IMAP setting.
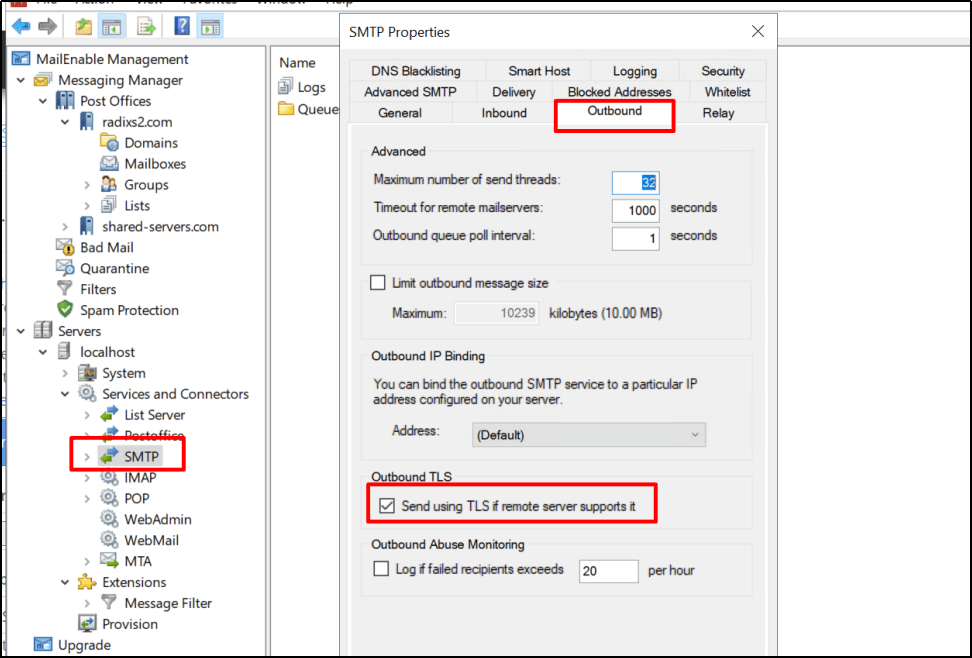
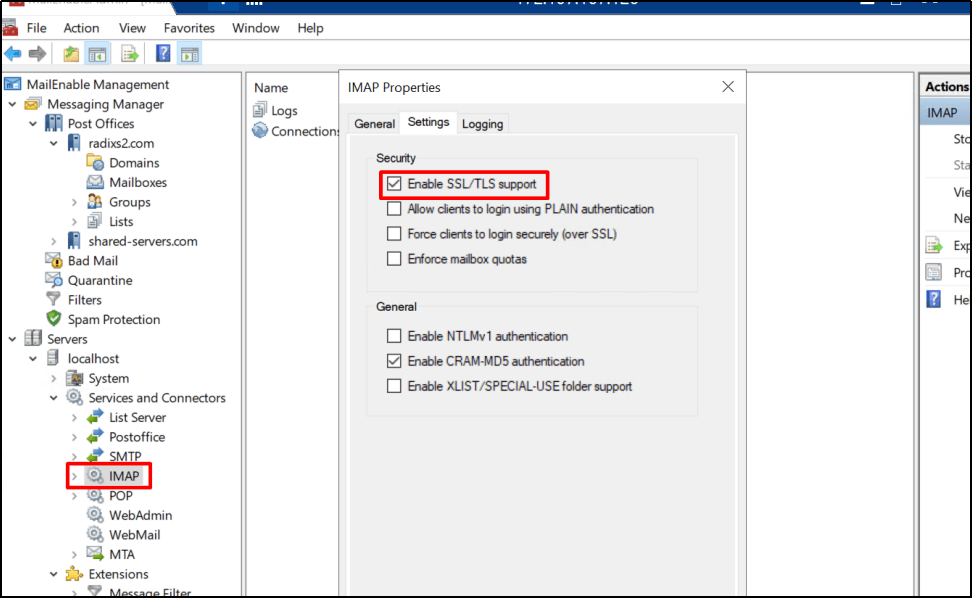
Now your encrypted email setup is ready on your email server secureserver net.
Step 3: Test Your SSL Configuration
- Use an SSL-supported email client such as Outlook, Thunderbird, or eM Client.
- Enter these SSL-enabled ports:
- SMTP: 465
- IMAP: 993
- POP3: 995
- Send a test email to Gmail or another secure email provider to verify encryption.
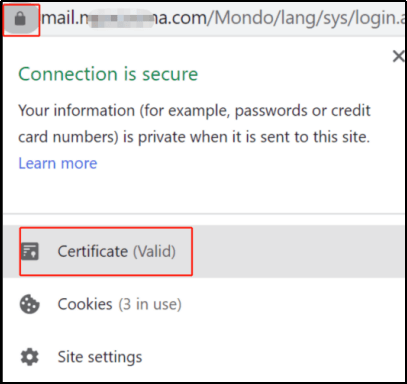
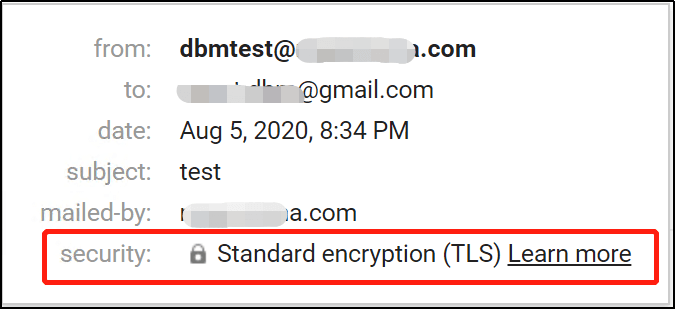
You can also test a free secure mail setup before going live.
Beginner Tips
✅Certificate Permissions: Ensure the MailEnable service account (IME_SYSTEM) has read access to the certificate.
✅Port Settings: Enable STARTTLS on SMTP port 465 for security.
✅Firewall Settings: Allow connections through ports 465, 993, and 995.
By following this beginner guide MailEnable SSL, you can successfully perform MailEnable SSL installation on your email server secureserver net, providing encrypted email and a fully secure email experience for your users. This setup ensures email server encryption for both incoming and outgoing emails.
email server secureserver net, encrypted email, secure email, free secure mail, MailEnable SSL installation, MailEnable SSL setup, MailEnable SMTP SSL, MailEnable IMAP SSL, MailEnable POP3 SSL, email server encryption, beginner guide MailEnable SSL