


How to Install WordPress on ISPConfig
Introduction
If you are new to building websites, WordPress is one of the best choices. It’s a free, open-source content management system (CMS) that lets you create blogs, business sites, or online stores with ease. In this guide, we’ll walk you through how to download WordPress, install WordPress on ISPConfig, and set up your WordPress website step by step — perfect for beginners.
Steps to Install WordPress in ISPConfig
Step 1: Create a Website in ISPConfig
- Open your browser and go to your ISPConfig control panel URL (usually
https://yourserver:8080). - Log in with your admin username and password.
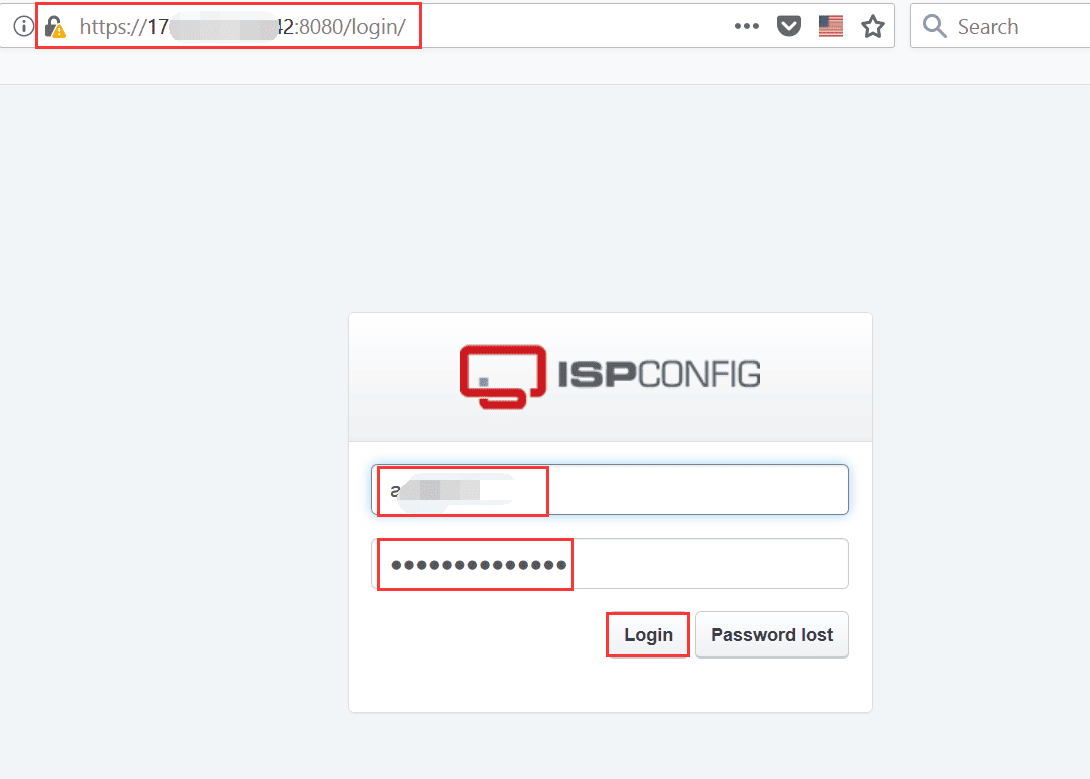
- Navigate to
Website > Add new website. - Fill in details such as:
- Domain: Your website’s domain (e.g.,
example.com) - IP Address: Choose the server IP
- PHP Settings: Make sure PHP support is enabled (select PHP-FPM or FastCGI for best performance).
- Domain: Your website’s domain (e.g.,
- Save changes.
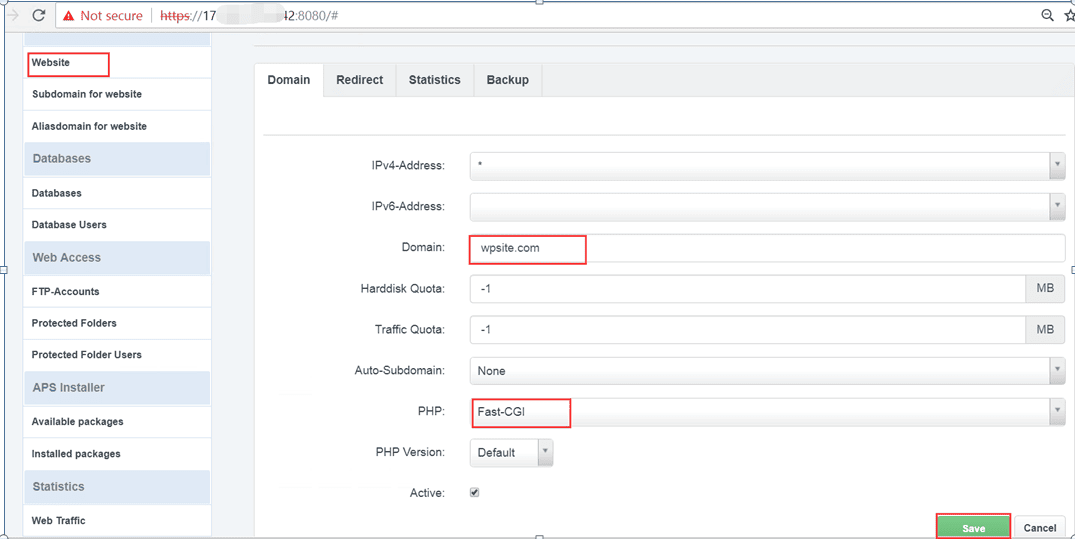
At this point, your website space is created and ready to host WordPress.
Step 2: Create a MySQL Database
- In ISPConfig, go to
Databases > Add new Database. - Enter:
- Database name: e.g.,
wp_site - Database user: e.g.,
wp_user - Password: Set a secure password (keep it safe, you’ll need it later).
- Database name: e.g.,
- Save changes.
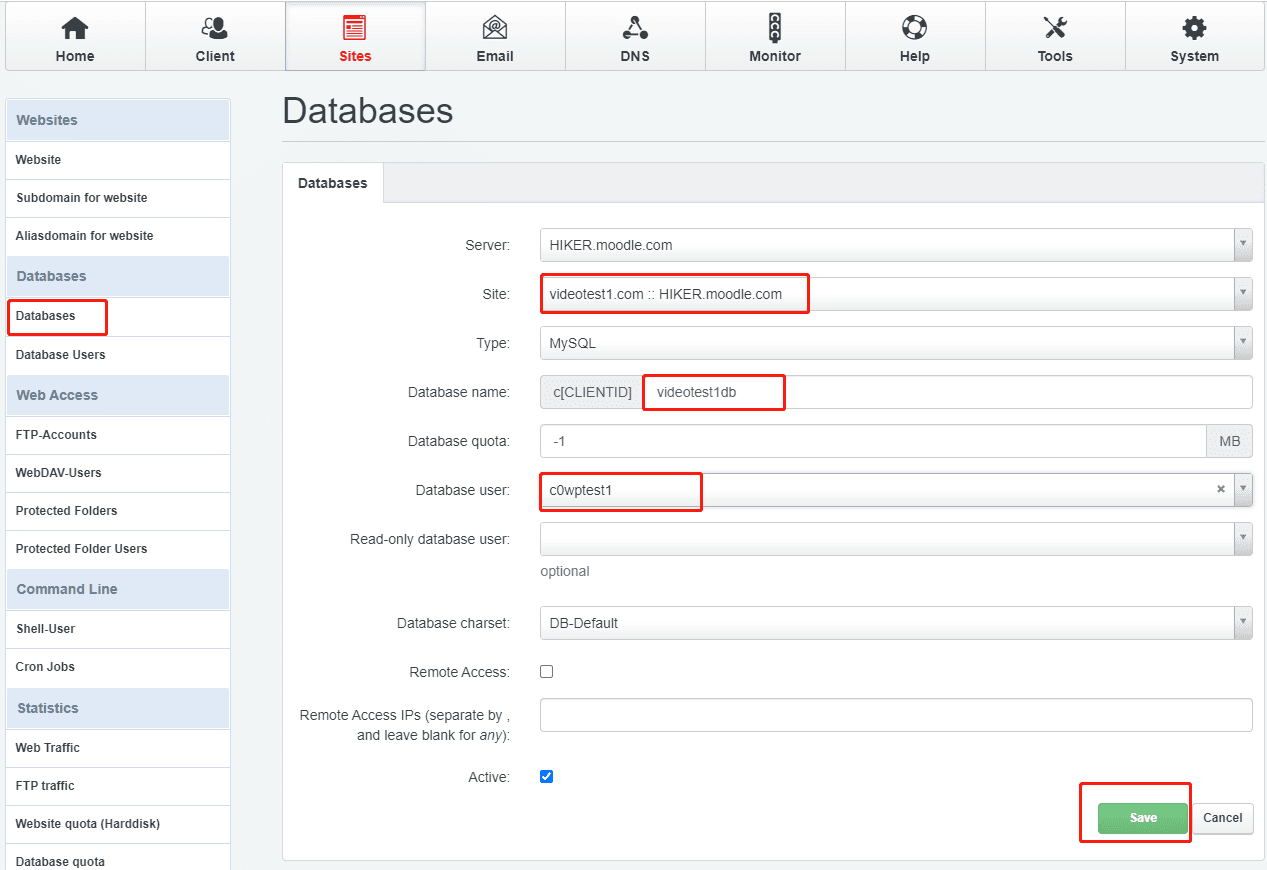
Now you have a database that WordPress will use to store your site content.
Step 3: Download and Upload Files
Download WordPress
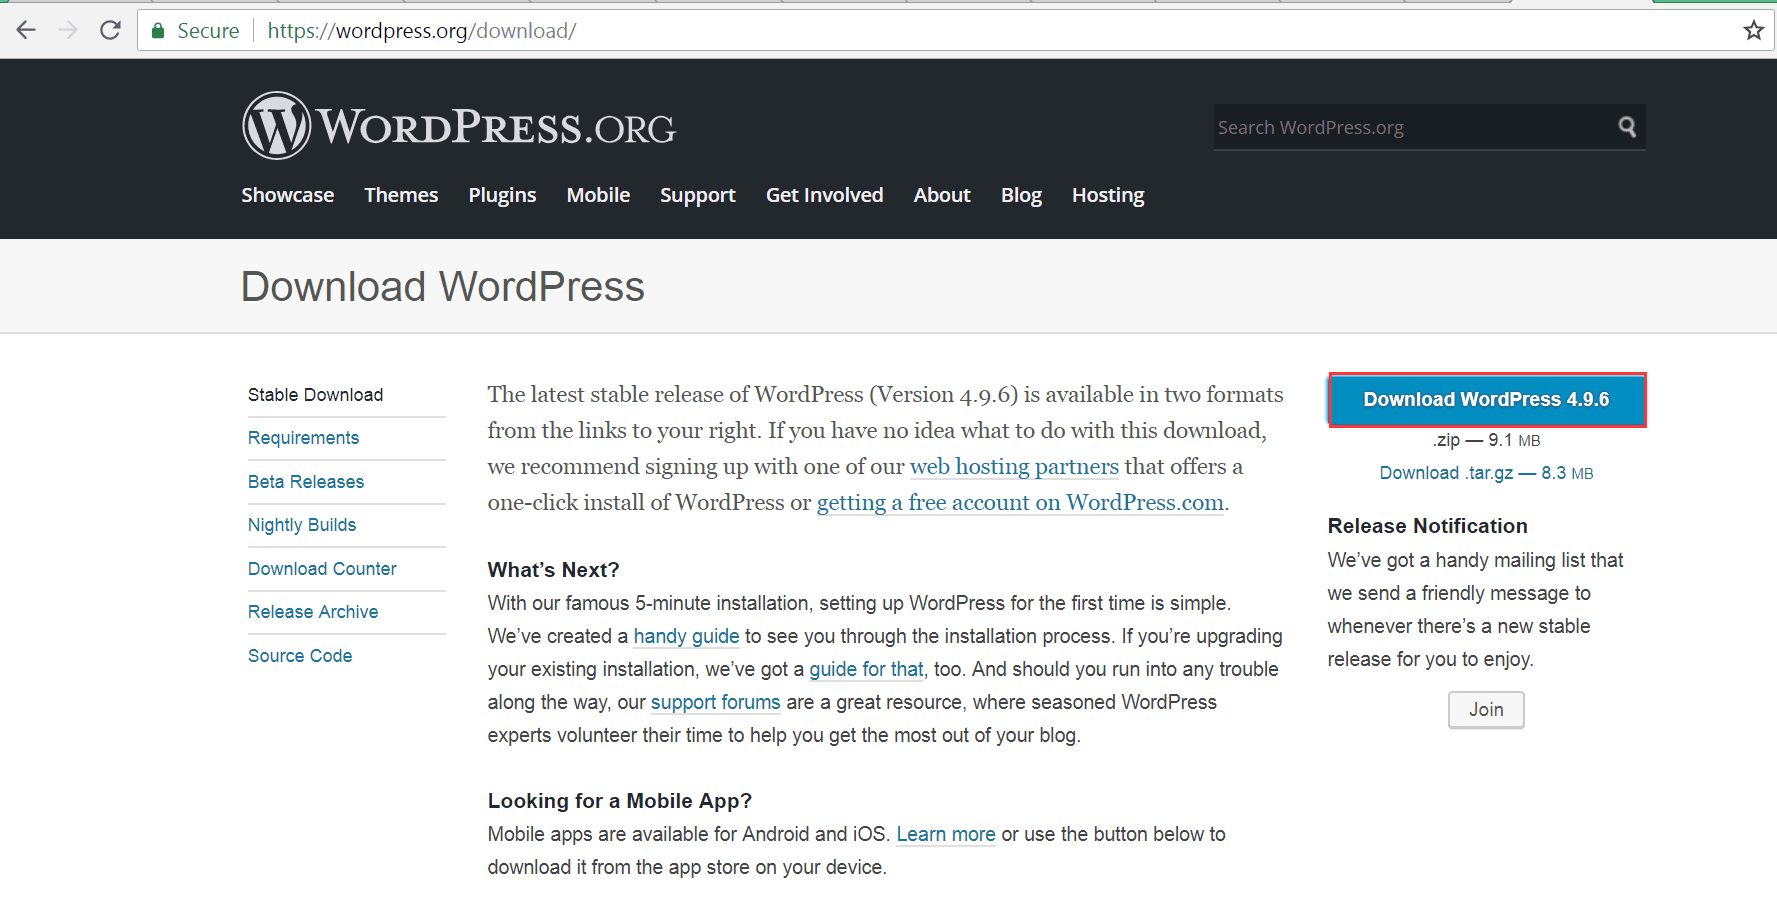
- Visit the official WordPress site: https://wordpress.org/download/
- Download the WordPress ZIP file to your computer.
- Extract (unzip) the downloaded file.
Upload WordPress to Server
In the FTP-Accounts section of ISPConfig, create an FTP account by filling in the required details (Website, Username, Password, etc.), then save the changes.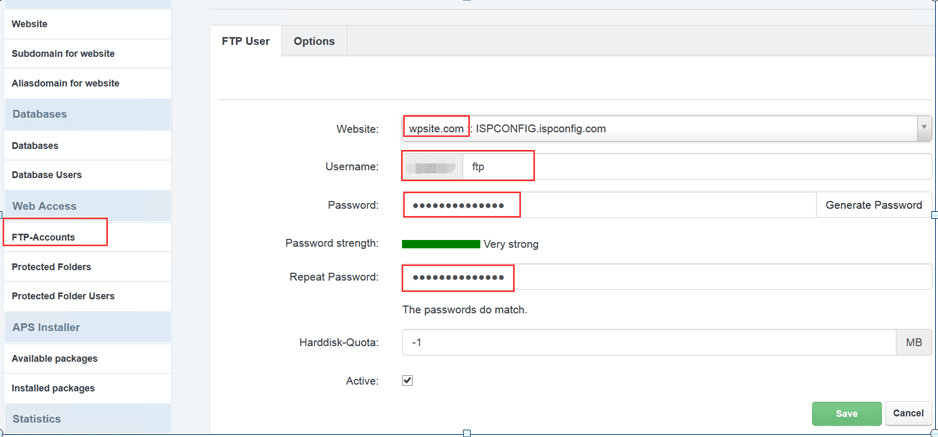
Open FileZilla Client and connect using the FTP account you created in ISPConfig.
- Host: Your server IP or domain
- Username: Your FTP username
- Password: Your FTP password
- Navigate to your website’s root folder (usually
/web/example.com/). Delete the defaultindex.htmlfile (to avoid conflicts).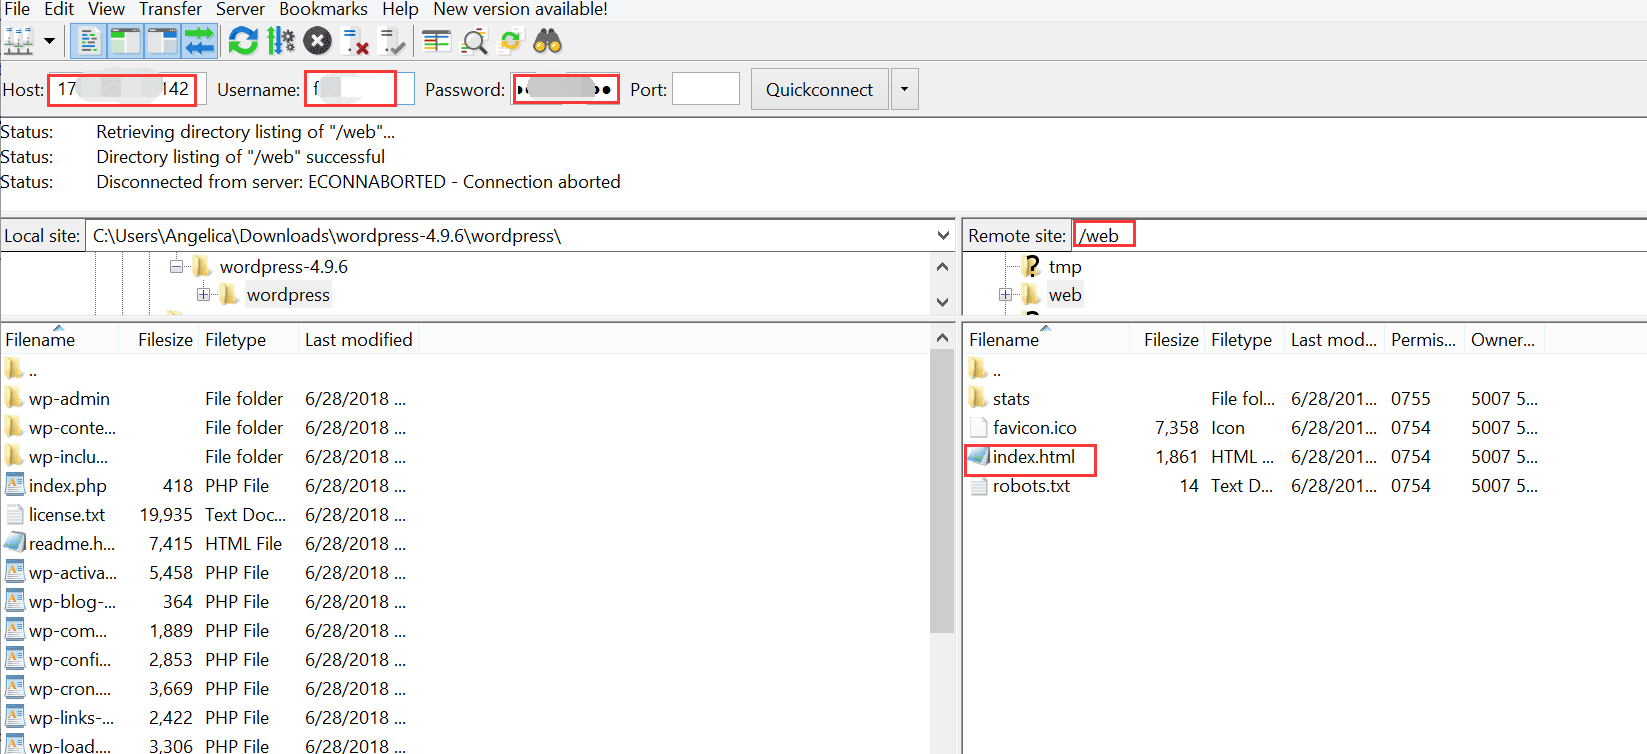
- Upload all WordPress extracted files into the website directory.
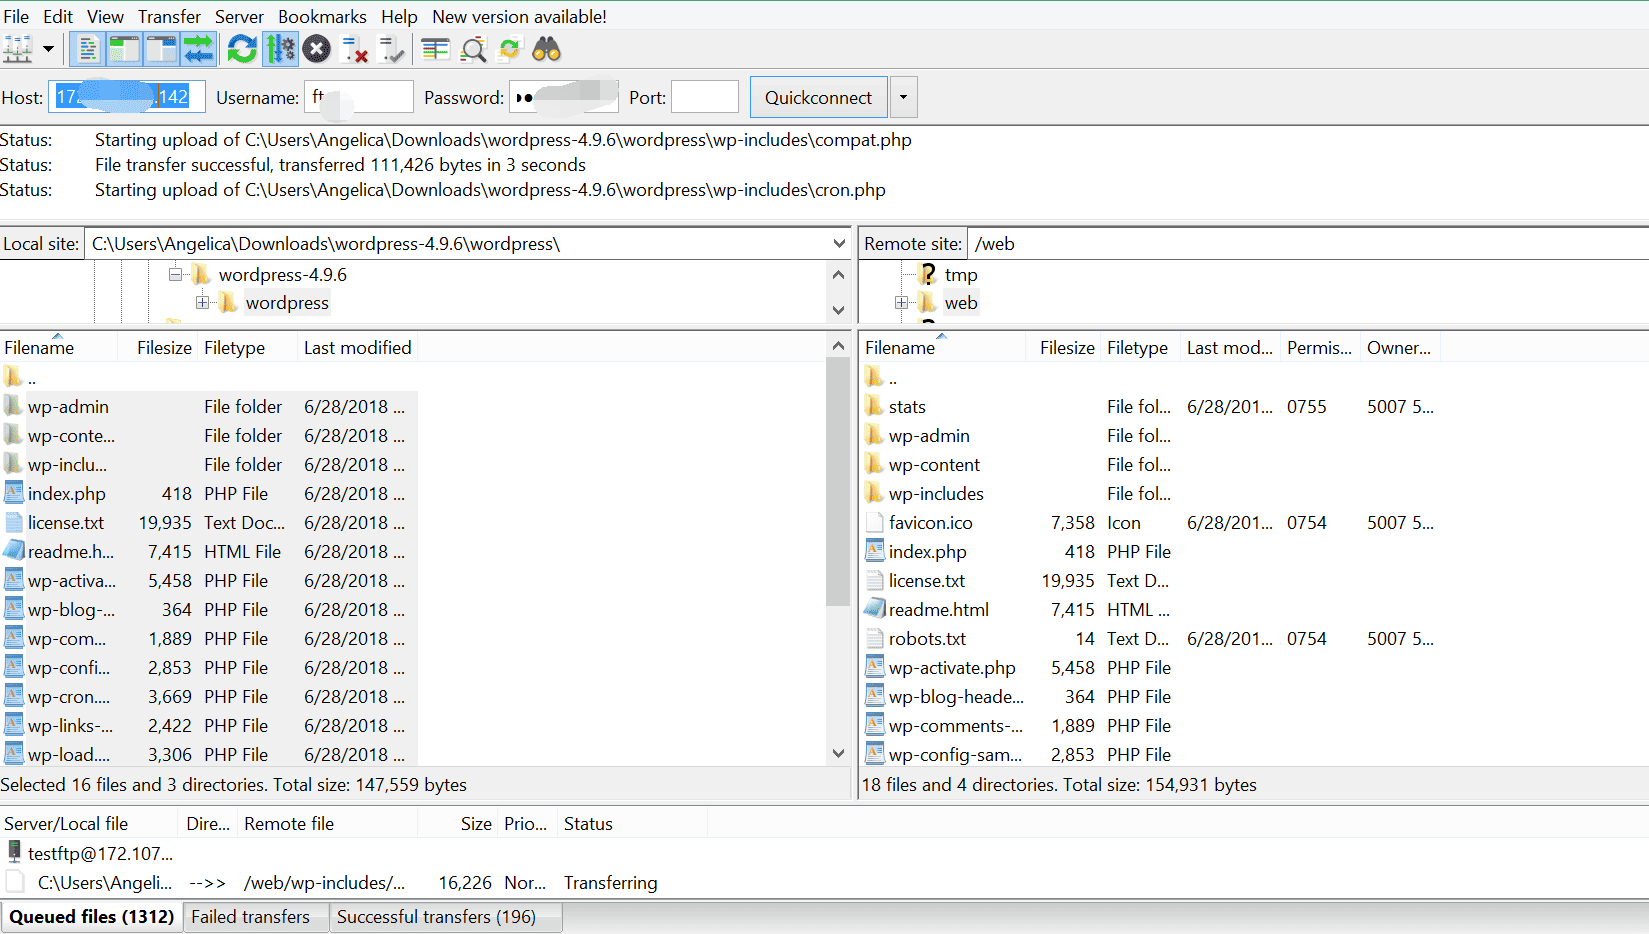
Step 4: Point Domain to Server with DNS Records
Point the domain to your server using DNS records. For details, see [How to Update DNS Records in ISPConfig]
After the DNS updates, opening your domain in a browser will launch the WordPress installation wizard.
Step 5: Configure WordPress Installation
- Open your browser and go to your domain (e.g.,
https://example.com). You’ll see the WordPress setup screen. - Select your language and click Continue.
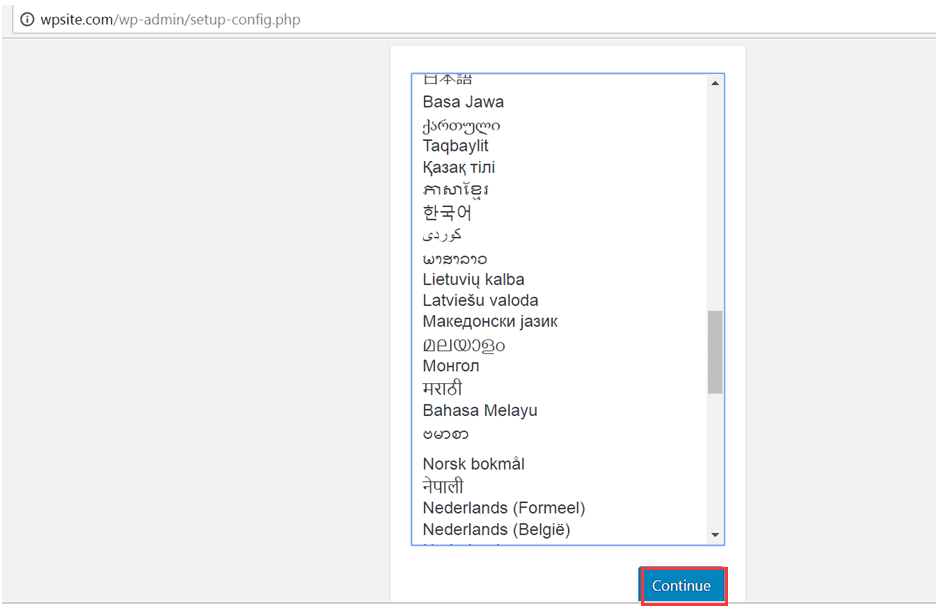
- Enter database details:
- Database Name: The name you created in ISPConfig
- Database User: The username you created
- Password: The database password
- Database Host: Usually
localhost - Table Prefix: Default is
wp_(you can change it if you want extra security).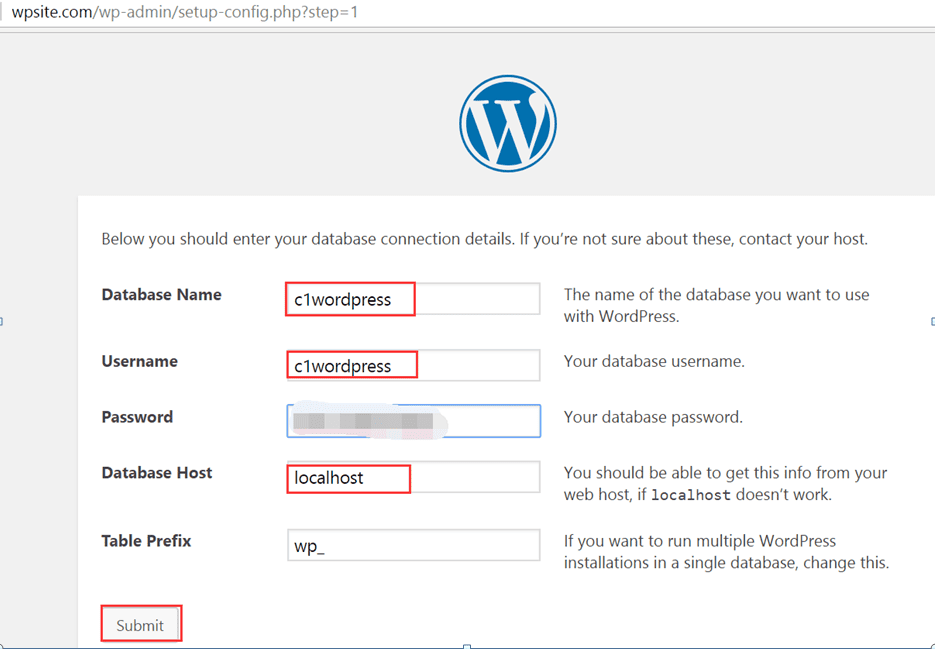
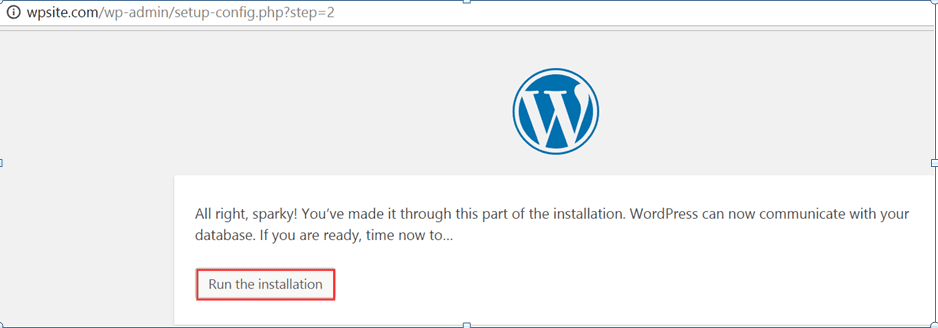
- Click Submit and then Run the installation.
Step 6: Set Up WordPress Website
Fill in site details:
- Site Title: Your website name
- Username: Your WordPress admin username
- Password: A strong password for WordPress login
- Email Address: Your admin email
After filling in, click Install WordPress.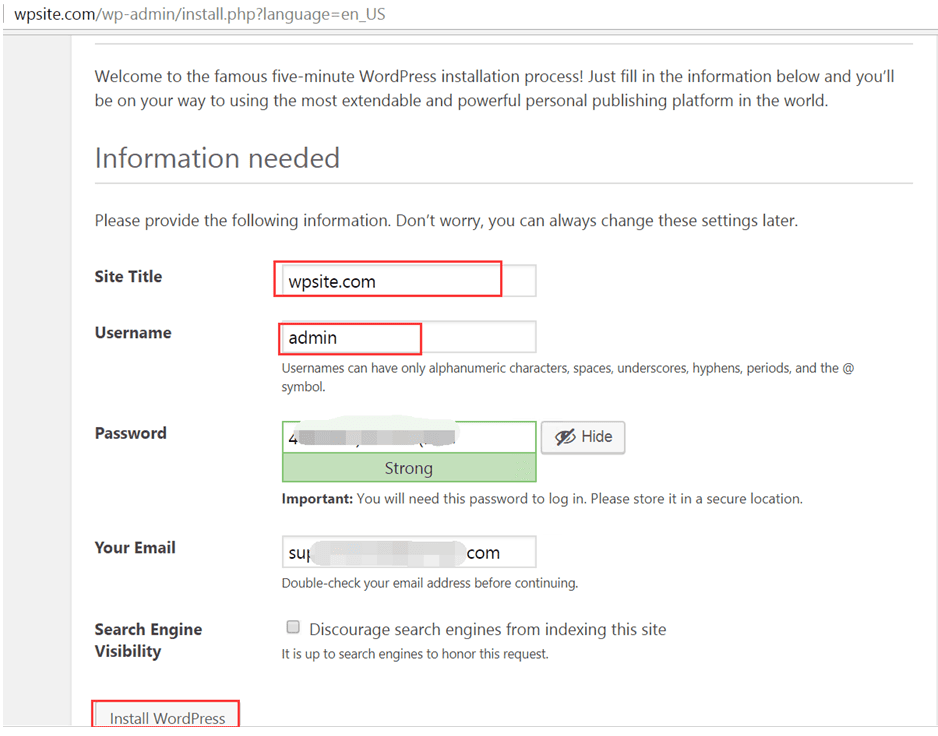
When the installation completes, click Log In. Use your new username and password to access your WordPress Dashboard at https://example.com/wp-admin/.
Congratulations! You’ve successfully installed WordPress on ISPConfig. You can now start customizing your theme, installing plugins, and creating content.
Conclusion
By following this guide, you learned how to:
- Download WordPress from the official site
- Install WordPress on ISPConfig by creating a website and database
- Use FileZilla to upload files
- Add DNS records to connect your domain
- Complete the WordPress setup wizard
Now your WordPress website is live. This is the perfect foundation to start blogging, building a business website, or setting up an online store.
Related Resources
download wordpress, install wordpress, setting up a WordPress site, configure wordpress, set up wordpress, ispconfig wordpress, set up a wordpress website, wordpress set up, install wordpress on windows