


How to Set Up Email Forwarding in MailEnable
Email forwarding, also called email redirection, means that all emails sent to one address will be automatically forwarded to another email address.For example: all emails to yourname@yourdomain.com can also be sent automatically to friend@example.comThis is very useful if:
Requirements Before You Start
- You need access to the MailEnable Admin Console (Messaging Manager).
- At least one mailbox (email account) must already exist in MailEnable.
Steps to Set Up Email Forwarding
Step 1: Open MailEnable Admin Console
- Launch MailEnable, then expand Messaging Manager on the left-hand menu.
Step 2: Go to Your Mailbox List
- Expand your PostOffice (the mail server domain).
- Click Mailboxes to see all created email accounts.
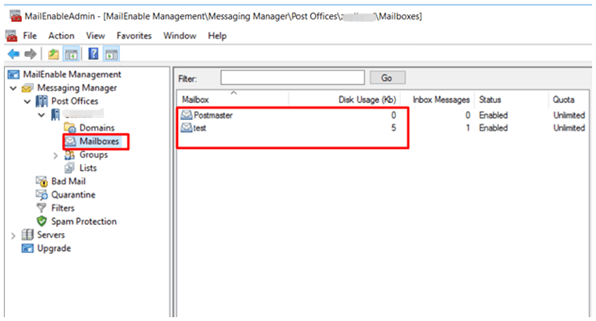
Step 3: Open Mailbox Properties
- Right-click on the mailbox you want to forward.
- Select Properties.
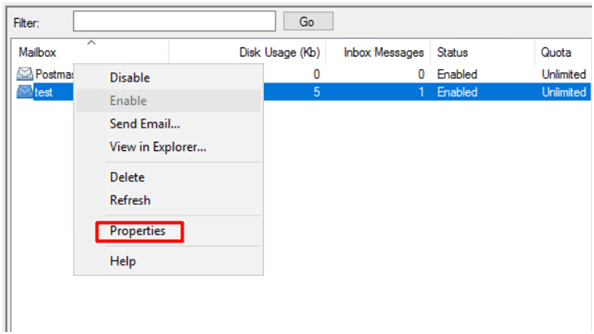
Step 4: Enable Redirection
- Go to the Redirection tab.
- Check the Redirect this mailbox to.
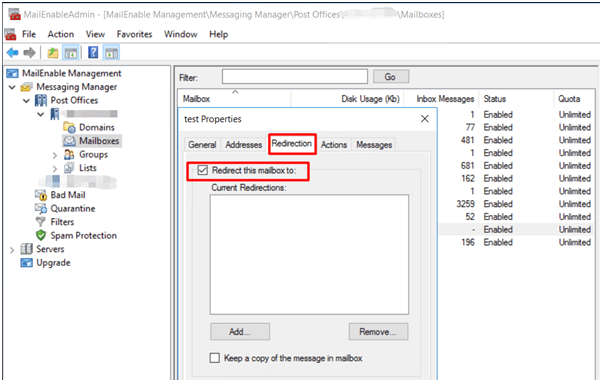
Step 5: Add the Forwarding Email Address
- Click Add.
- Type the destination email address (e.g., friend@example.com
). Click OK.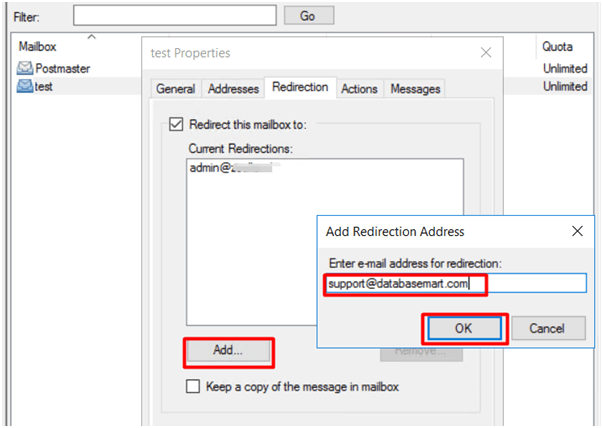
- You can add multiple addresses if needed; they will appear in the “Current Redirections” list.
Step 6: Keep a Copy in the Original Mailbox (Optional)
- If you want the original mailbox to still keep a copy of the emails, check Keep a copy of the message in mailbox.
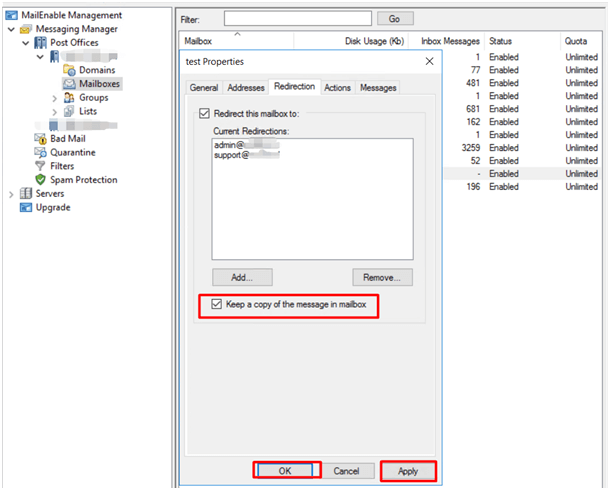
Step 7: Save Settings
- Click Apply and then OK. Now email forwarding is active!
Tips for Beginners
- Double-check the forwarding email address to avoid losing mail.
- Test forwarding by sending a test email.
- Multiple recipients: You can forward emails to more than one address.
- Disable anytime: simply uncheck the forwarding option if you want to stop it.
Keywords:
How to set up email forwarding in MailEnable, MailEnable email redirection tutorial, MailEnable beginner guide, How to forward emails automatically, Easy email forwarding setup
Outline