


How to Setup FTP in ISPConfig
Introduction
Managing websites often requires transferring files between your computer and the server. With ISPConfig, you can easily create FTP accounts, and with the FileZilla FTP client, you can set up FTP access to manage your files. This beginner-friendly guide will show you how to create FTP, configure FTP, and use FTP smoothly.
Steps to Use FTP in ISPConfig
Step 1: Create FTP Account in ISPConfig
To create an FTP account in ISPConfig:
- Log in to your ISPConfig control panel.
- Go to
Sites > FTP Accounts > Add new FTP User.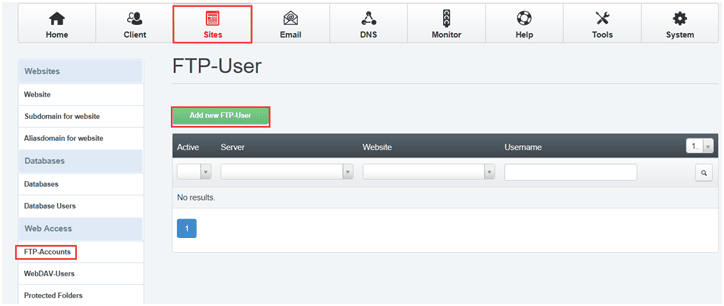
- Enter the required details such as username, password, and assign the account to a specific website.
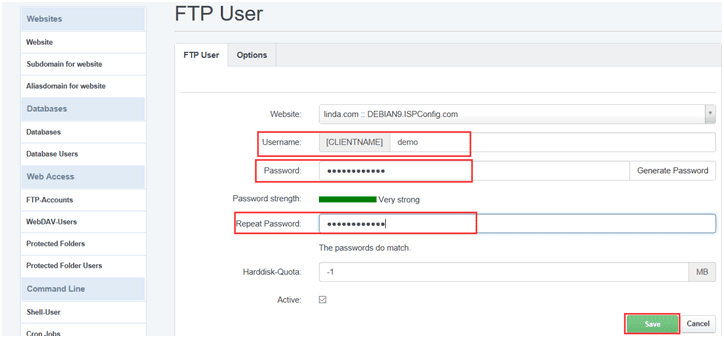
- Click Save to finish.
Note about Prefixes:
In ISPConfig, when you create an FTP account, the system will automatically add a prefix to your username. This prefix helps ISPConfig avoid duplicate usernames and identify which website the account belongs to. Please see the screenshot. The prefix is 'Iinda' in this image.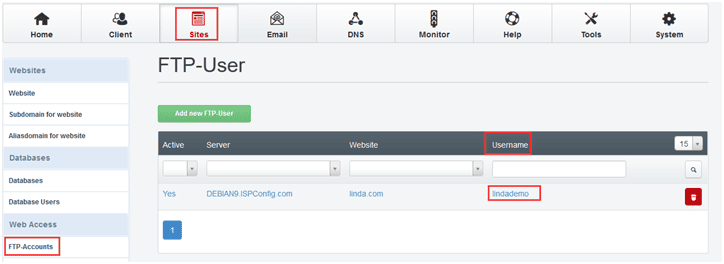
If you want FTP usernames without a prefix, go to: System > Interface > Sites > FTP user prefix, delete the contents of the box, and save the changes. Please see the screenshot.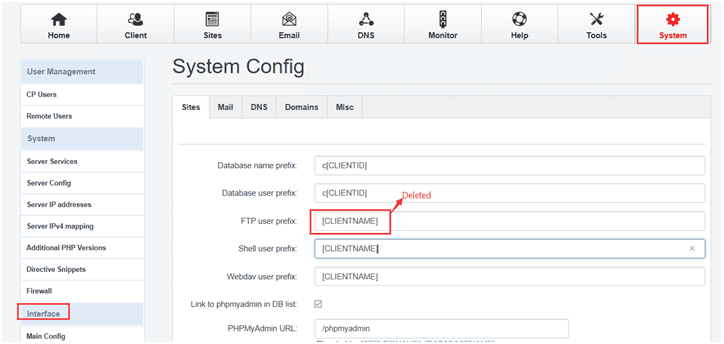
After that, we can see the username no longer includes the prefix.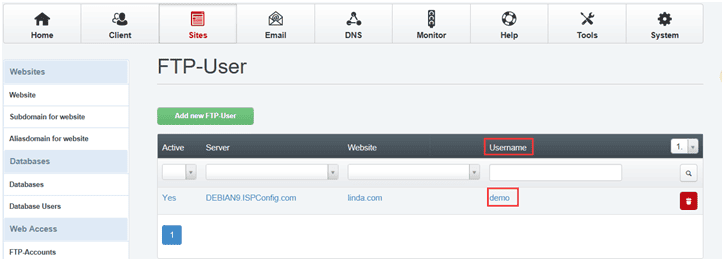
Step 2: Set up FTP Account in FileZilla
After you create FTP in ISPConfig, you need to configure FTP in FileZilla to connect to your server.
If you don’t have FileZilla installed, you need to install it, configure users and permissions first. Please follow this guide: [How to Install Filezilla Client]
Step 3: Configure FTP Account in FileZilla
Now let’s configure FTP in FileZilla. Depending on whether your ISPConfig FTP account has a prefix or not, follow Method 1 or Method 2.
Method 1: Configure FTP (With Prefix)
- Open FileZilla Client.
- Go to
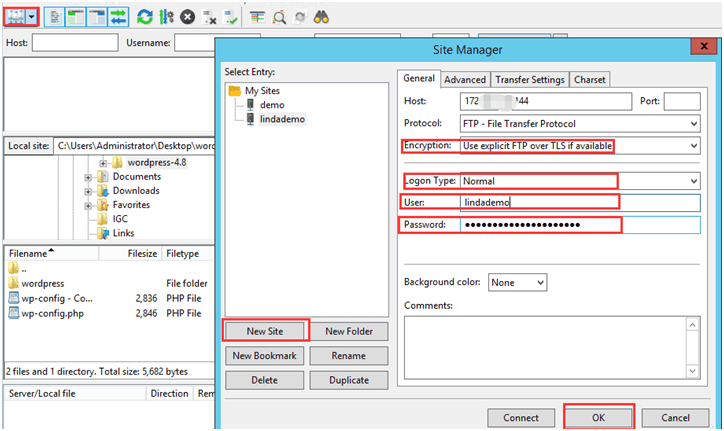
File > Site Manager > New Site. - Fill in the details:
- Host: Enter your server IP address
- Protocol: Choose FTP - File Transfer Protocol
- Encryption: Select Require explicit FTP over TLS (recommended)
- Logon Type: Select Normal
- Username: Enter the FTP username (with prefix, e.g.,
lindademo) - Password: Enter your FTP password
- Click OK to save settings.
Method 2: Configure FTP (Without Prefix)
If you removed the prefix in ISPConfig, repeat the same steps but use the username without the prefix (e.g., just demo).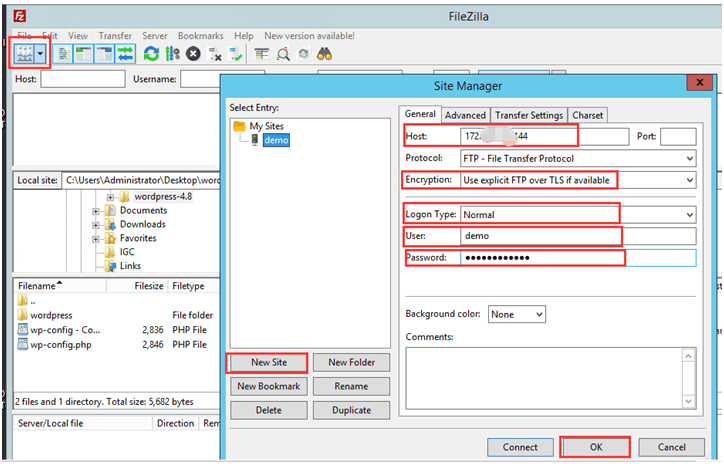
Step 4: Test FTP Connection in FileZilla
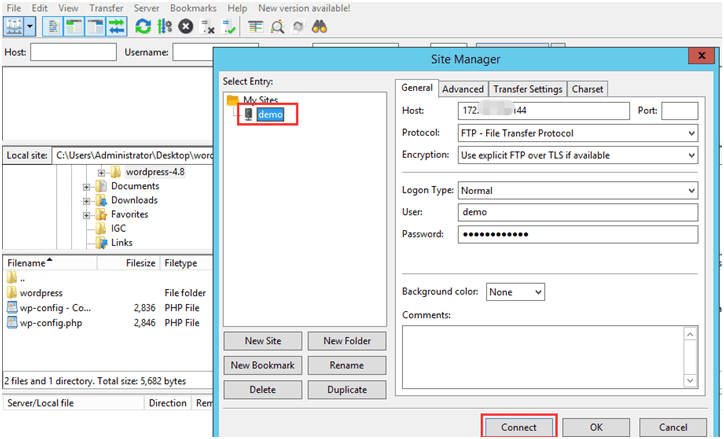
- In FileZilla, select your saved FTP account from Site Manager.
- Click Connect.
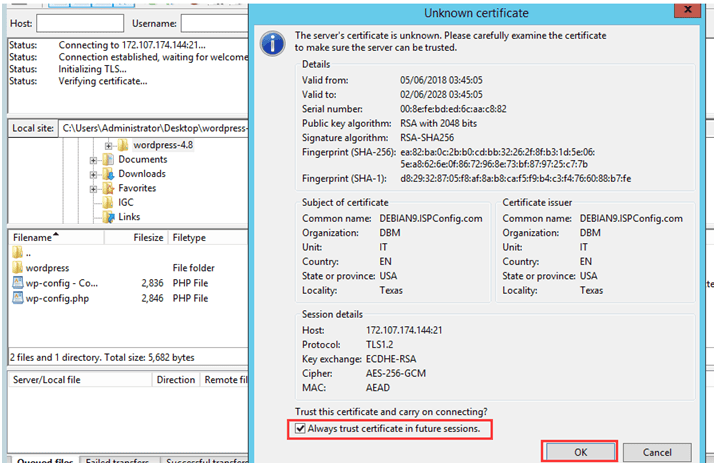
- When prompted, check "Always trust certificate in future sessions" and click OK.
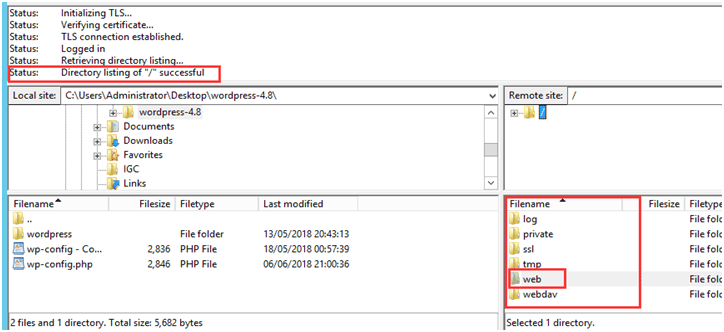
- Once connected, you can upload and download files between your computer and server.
Conclusion
By following this guide, even beginners can create FTP accounts in ISPConfig and use the FileZilla FTP client to manage website files. Whether you need to make your own FTP connection or simply set up FTP access, these steps will help you keep your website organized and secure.
filezilla ftp, setup ftp, create ftp, use ftp, configure ftp, create ftp account