


How to Configure SSL on Nginx
Introduction
Securing your Nginx web server with SSL is a critical step to protect data, enable HTTPS, and build user trust.
In this guide, you'll learn how to perform SSL setup on Nginx in Linux, whether you already have your certificate or plan to buy an SSL certificate.
Prerequisites
Before you begin, make sure you have:
- Linux Server with Nginx Installed
- SSL Certificate Files (including .key and .crt files). If you are still looking for a cheap SSL certificate, explore our SSL certificate offerings.
- Sudo/root privileges on the server
Steps to Apply an SSL on Nginx
Step 1: Edit Virtual Host Configuration File
1.1 Open the configuration file of the virtual host
Open the configuration file of the virtual host. The path to the configuration file is usually as follows:/etc/nginx/sites-available/your_domain_name.vhost.
1.2 Add the related SSL certificate information
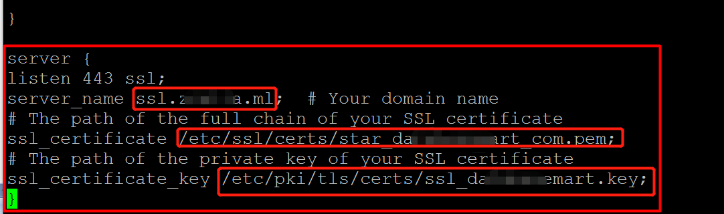
Add the following command lines to the end of the configuration file to update your SSL information:
server {
listen 443 ssl;
server_name ssl.xxx.ml;  # Your domain name
# The path of the .crt file of your SSL certificate
ssl_certificate /path/to/your_domain_name.crt;
# The path of the .key file of your SSL certificate
ssl_certificate_key /path/to/your_domain_name.key;
}
-
Step 2: Restart Nginx service
Restart Nginx service using the systemctl restart nginx.
Step 3: Verify SSL Installation
You can access your website via https://your\_domain\_name now.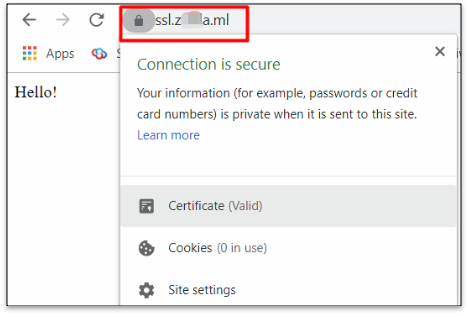
Step 4: Add Redirection from HTTP to HTTPS
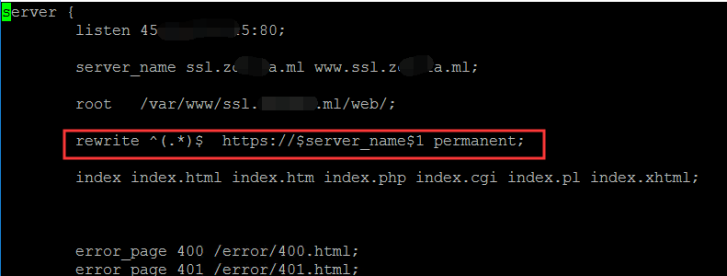
Edit the configuration file vi /etc/nginx/sites-available/your_domain_name.vhost and add the following command line to the file, as shown in the screenshot.
Step 5: Restart Nginx service
Restart Nginx service using the systemctl restart nginx.