


How to Order and Download an Issued SSL Certificate File

SSL Certificate General Process
An SSL certificate encrypts data between a website and its users, safeguarding sensitive information and enhancing security. It's crucial for protecting user privacy and preventing cyber threats.
Introduction
Purchasing and installing a certificate isn't overly complicated. This article will guide you through the process, ensuring you understand how SSL certificates work and outlines the steps to purchase and install an SSL certificate for your website from Database Mart.
Part 1: Order an SSL Certificate
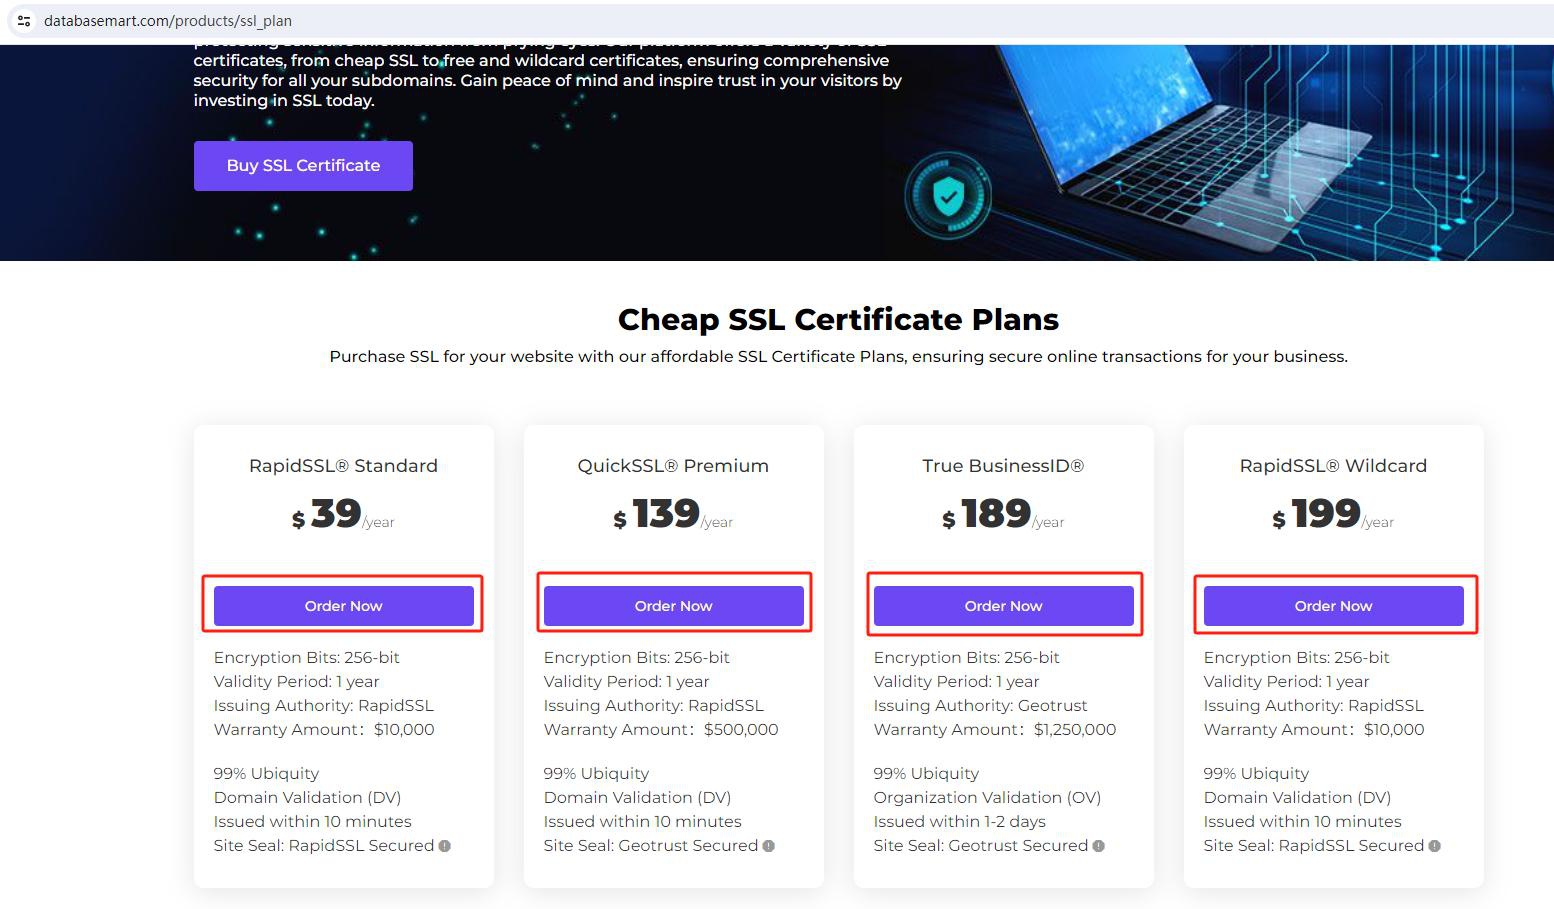
Database Mart offers four types of SSL certificates, allowing you to select based on your website's security requirements. You can place your order either on our SSL sales page or through the Client Console.
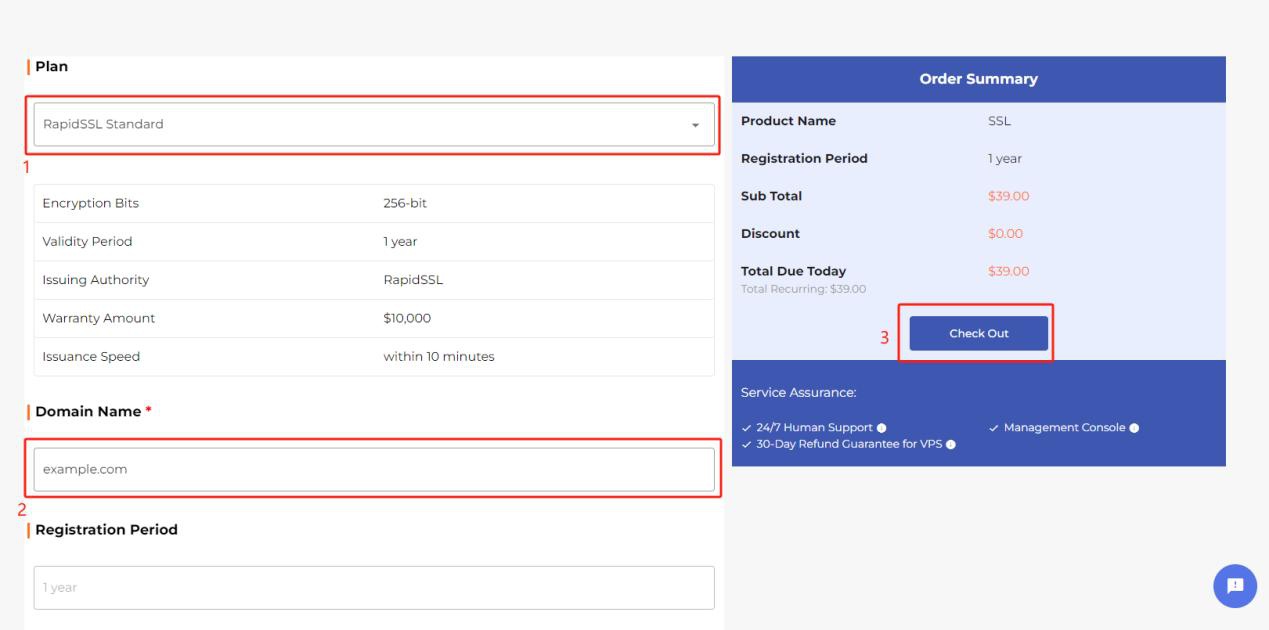
Proceed to the order page, enter the domain name for which you want to purchase an SSL certificate, and click the 'Check Out' button.
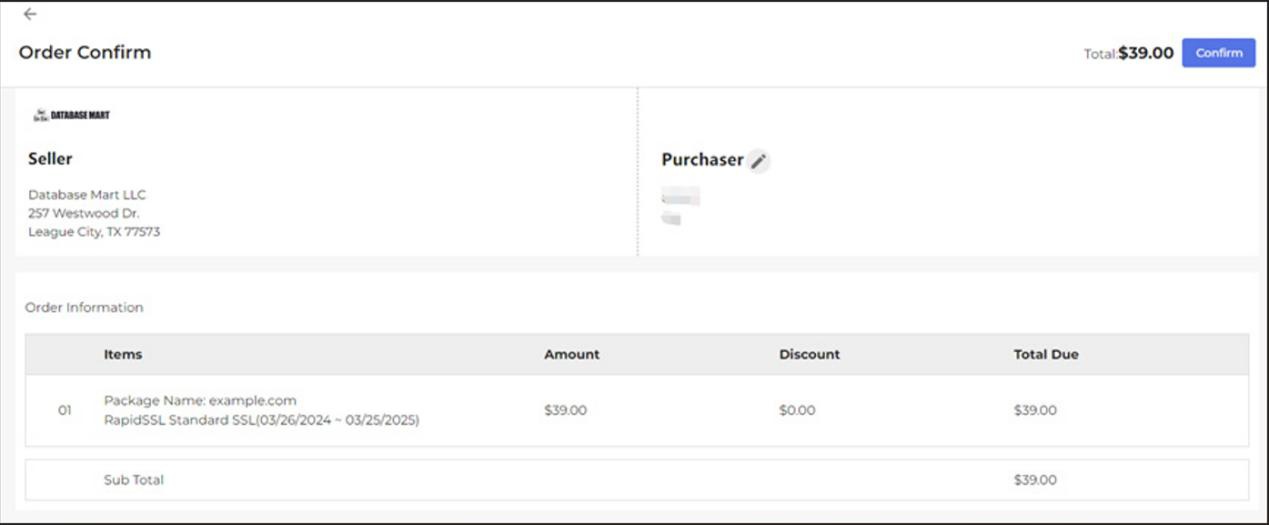
On the Order Confirmation page, fill in the purchaser's information, and then click the 'Confirm' button to make a payment.
Part 2: Complete SSL Certificate Information
Upon completing the payment for your SSL order, the system automatically initiates the SSL activation process. This process involves submitting additional information to confirm the purchase of the SSL certificate.
Here are the steps:
Step 1: Generate CSR
Generating a Certificate Signing Request (CSR) is the initial step in acquiring your SSL Certificate. There are two options for submitting the CSR
Option1: Generates the CSR in our system. You can select 'NO' in the 'Have a CSR?' section shown below. It will prompt for details such as the common name, organization, and country, which the Certificate Authority (CA) uses to generate your certificate. Once filled out, click the 'Next' button to proceed to the next step.
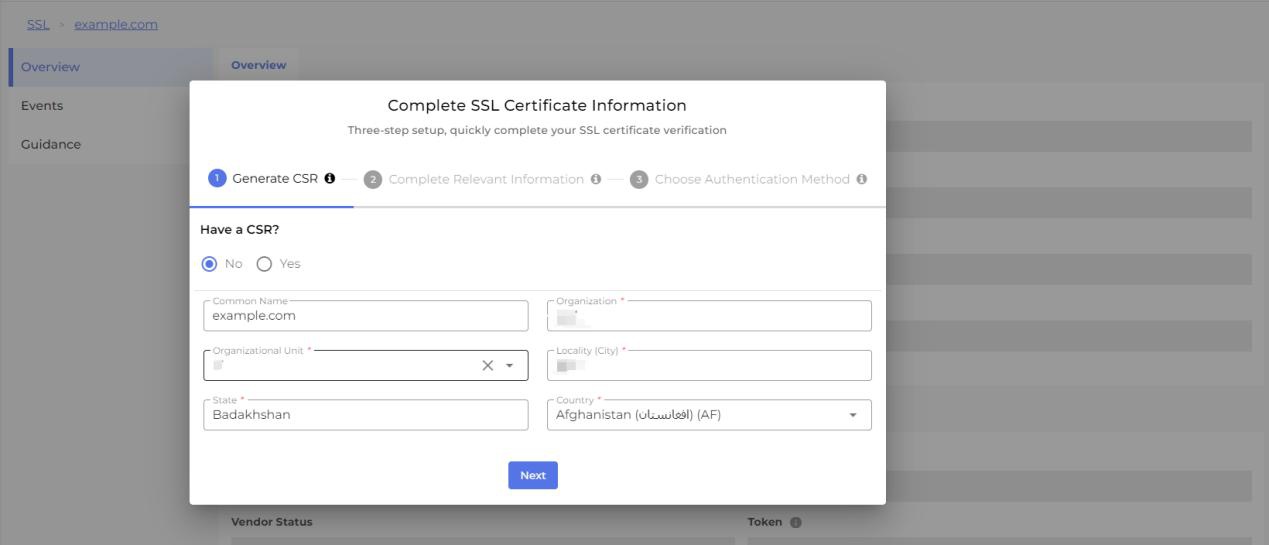
Option2: Possess a CSR file on your web service. You can select 'Yes' in the 'Have a CSR?' section shown below. Input your CSR file content, click 'Verify CSR' to confirm accuracy, then proceed to the next step by clicking 'Next'.
How to Generate a CSR on a Windows-based Server
How to Generate a CSR on a Linux-based Server
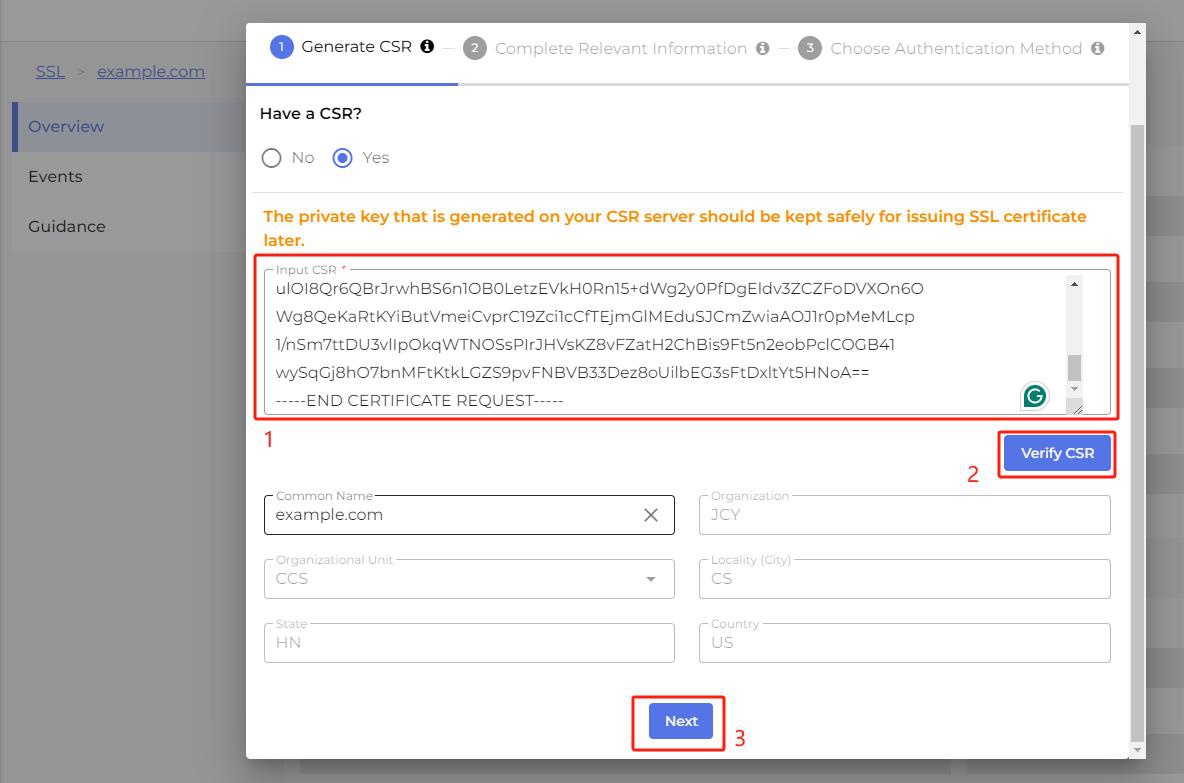
Step 2: Complete Relevant Information
At this step, you'll need to provide the Site Administrator Contact Information and Technical Contact Information.
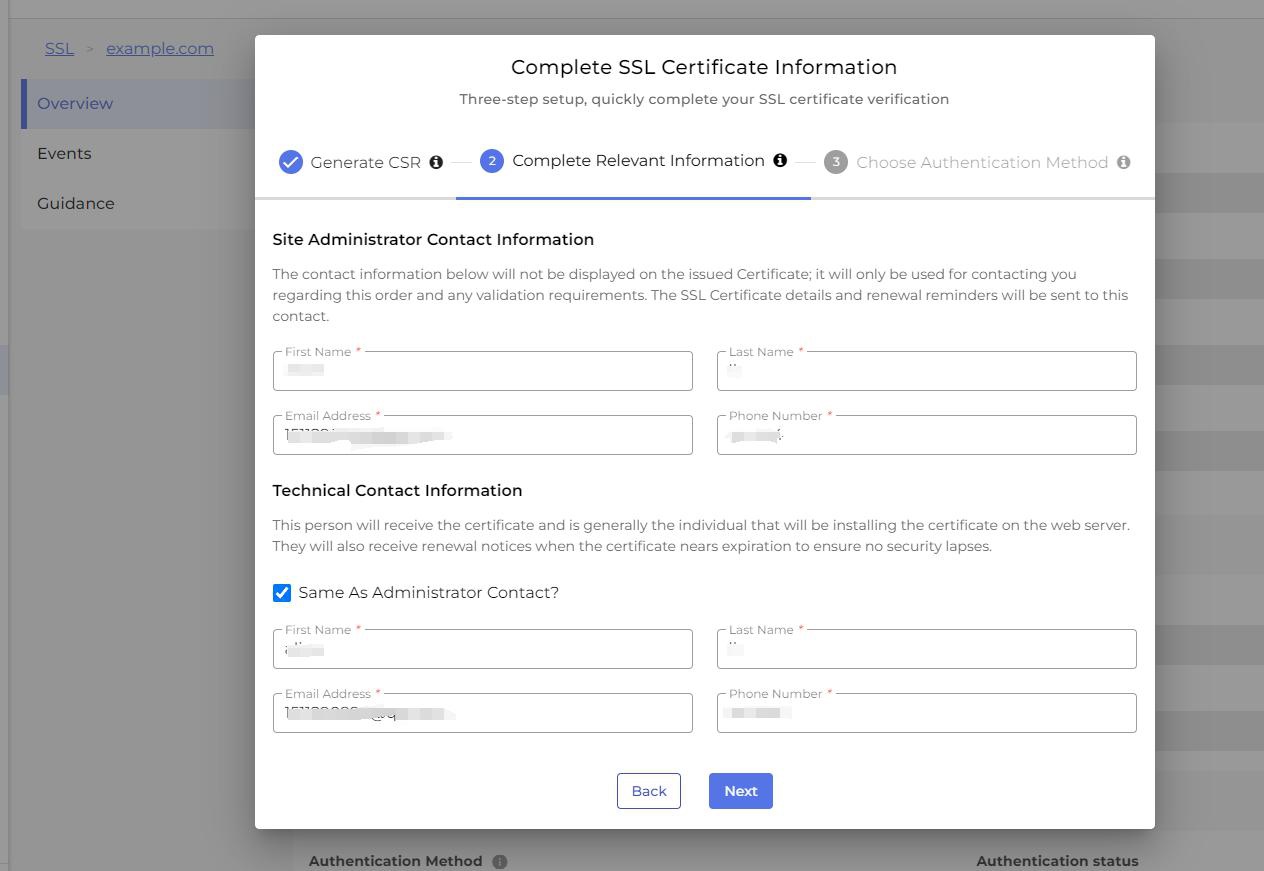
Step 3: Choose Authentication Method
The certificate authorities (CA) need to verify the legitimacy of your business before issuing an SSL certificate for your website. The information required for validation varies based on the type of SSL certificate chosen. You have three options to approve the Certificate Authority: HTTP, DNS TXT Record, or Email. Please select one method and click the 'Finish' button.
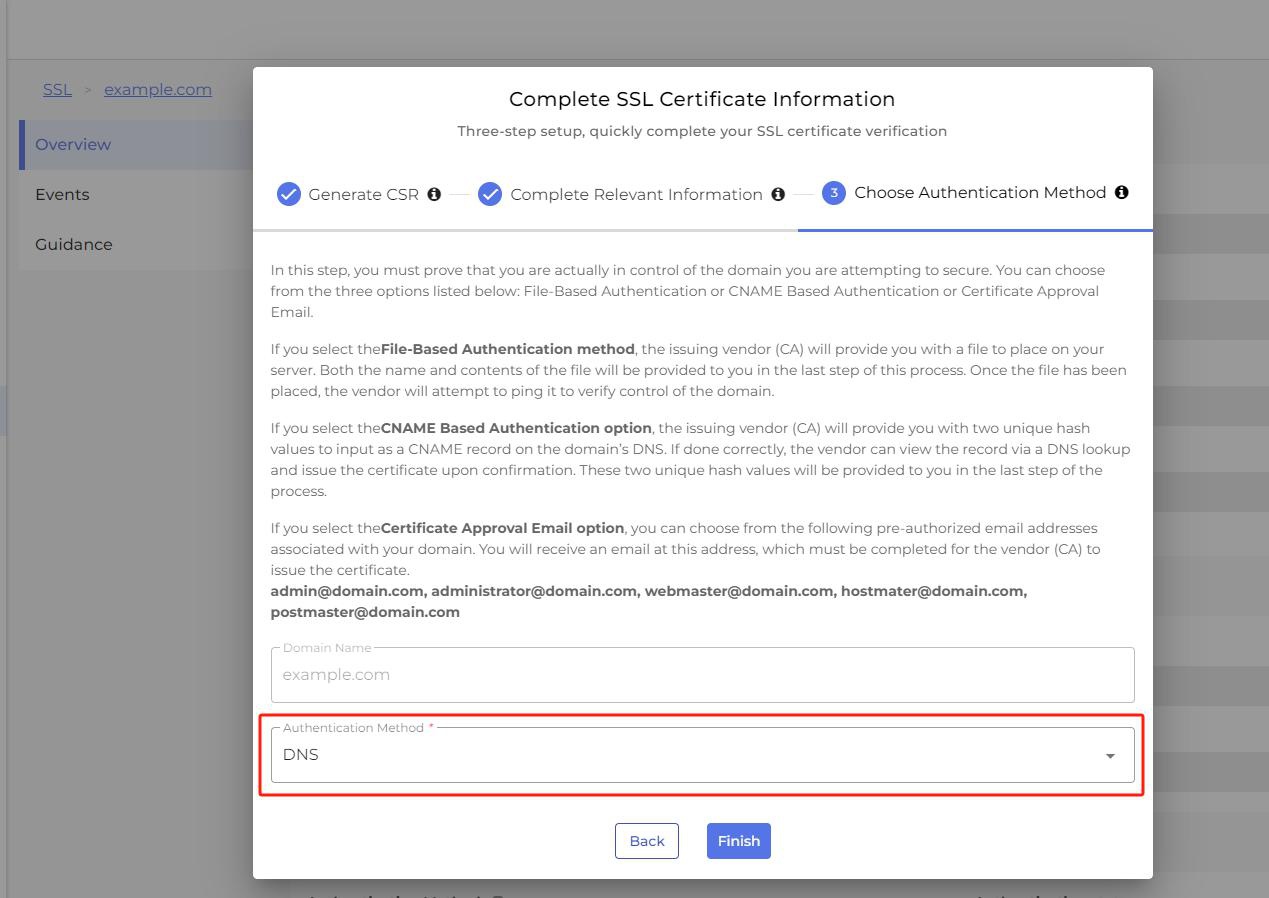
Step 4: Approve the Certificate Authority for Validation
Once you’ve selected an authentication method, you must complete the validation process to have your SSL certificate issued.
- HTTP File Upload
Download the auth file from your order and upload it to: yourdomain.com/.well-known/pki-validation/[filename].txt, ensuring it’s publicly accessible. - DNS TXT Record
Add the provided TXT record to your domain’s DNS zone. Once it propagates, the certificate will be issued. - Email Approval
Ensure admin@yourdomain.com is active. Click the approval link in the email sent to that address.
For detailed instructions, please refer to How to Approve the Certificate Authority for Validation. After approving the certificate request, the certificate will be issued shortly.
How to Approve the Certificate Authority for Validation
Part 3: Download and Install SSL Certificate
After your certificate has been successfully issued, you can proceed with the installation process. The specific steps are as follows:
Step 1: Download the Issued SSL Certificate File
To download the certificate, navigate to the 'SSL Overview' page in the client Console, and locate the 'Download Certificate' section. Click on 'Download Certificate' to initiate the download process.
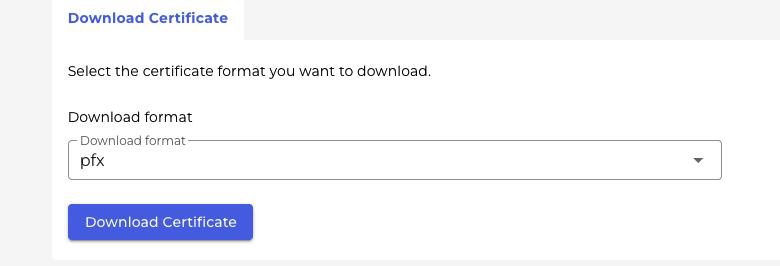
Please ensure to select the appropriate SSL certificate format based on your web server type:
For Nginx web service, choose “Nginx” format.
For Apache web service, choose the Apache format.
For Windows IIS service, if you generated the CSR on our Client Console , please select the .pfx format.
If the CSR is generated from your own IIS service, please follow the steps outlined in How to Complete a Certificate Request to complete the certificate request process.
Step 2: Apply the SSL to the Website
Install your certificate according to the type of web services you're using and the corresponding certificate format.
Apply the SSL certificate on Windows IIS. You'll need the .pfx SSL file and its import password, provided upon completing Step 1. For instructions on applying the SSL on Windows IIS, please refer to our guide on How to Apply an SSL on Windows IIS.
Apply the SSL certificate on Apache or Nginx. You'll need a .crt file and a .key file. You can download the .crt file during Step 1 of the SSL certificate download process. If you are using your own CSR, the .key file is generated when you create the CSR.
For instructions on applying the SSL on Apache, please refer to our guide on How to Apply an SSL on Apache.
For instructions on applying the SSL on Nginx, please refer to our guide on How to Apply an SSL on Nginx
Part 4: Test and Confirm
Testing and confirming SSL installation is a crucial step to ensure its effectiveness. Here are the main tips:
Visit Your Website: Open your website in a web browser using the 'https://' prefix.
Check the SSL site at https://www.sslshopper.com/ssl-checker.html.
Part 5: How to Renew an SSL Order
An SSL certificate secures the connection between your website and your visitors. It ensures data privacy, builds trust, and enables the HTTPS padlock in browsers. Renewing your SSL certificate on time is essential to keep your website secure and trusted.
Step 1: Pay for the Renewal
Our system will generate an invoice for the renewal certificate seven days before it expires. Once you receive the invoice, please pay for it.
Step 2: Configure the Certificate
Log in to the control panel and locate the SSL service on the SSL list page. Then, go to the management page by clicking the "Manage" button.
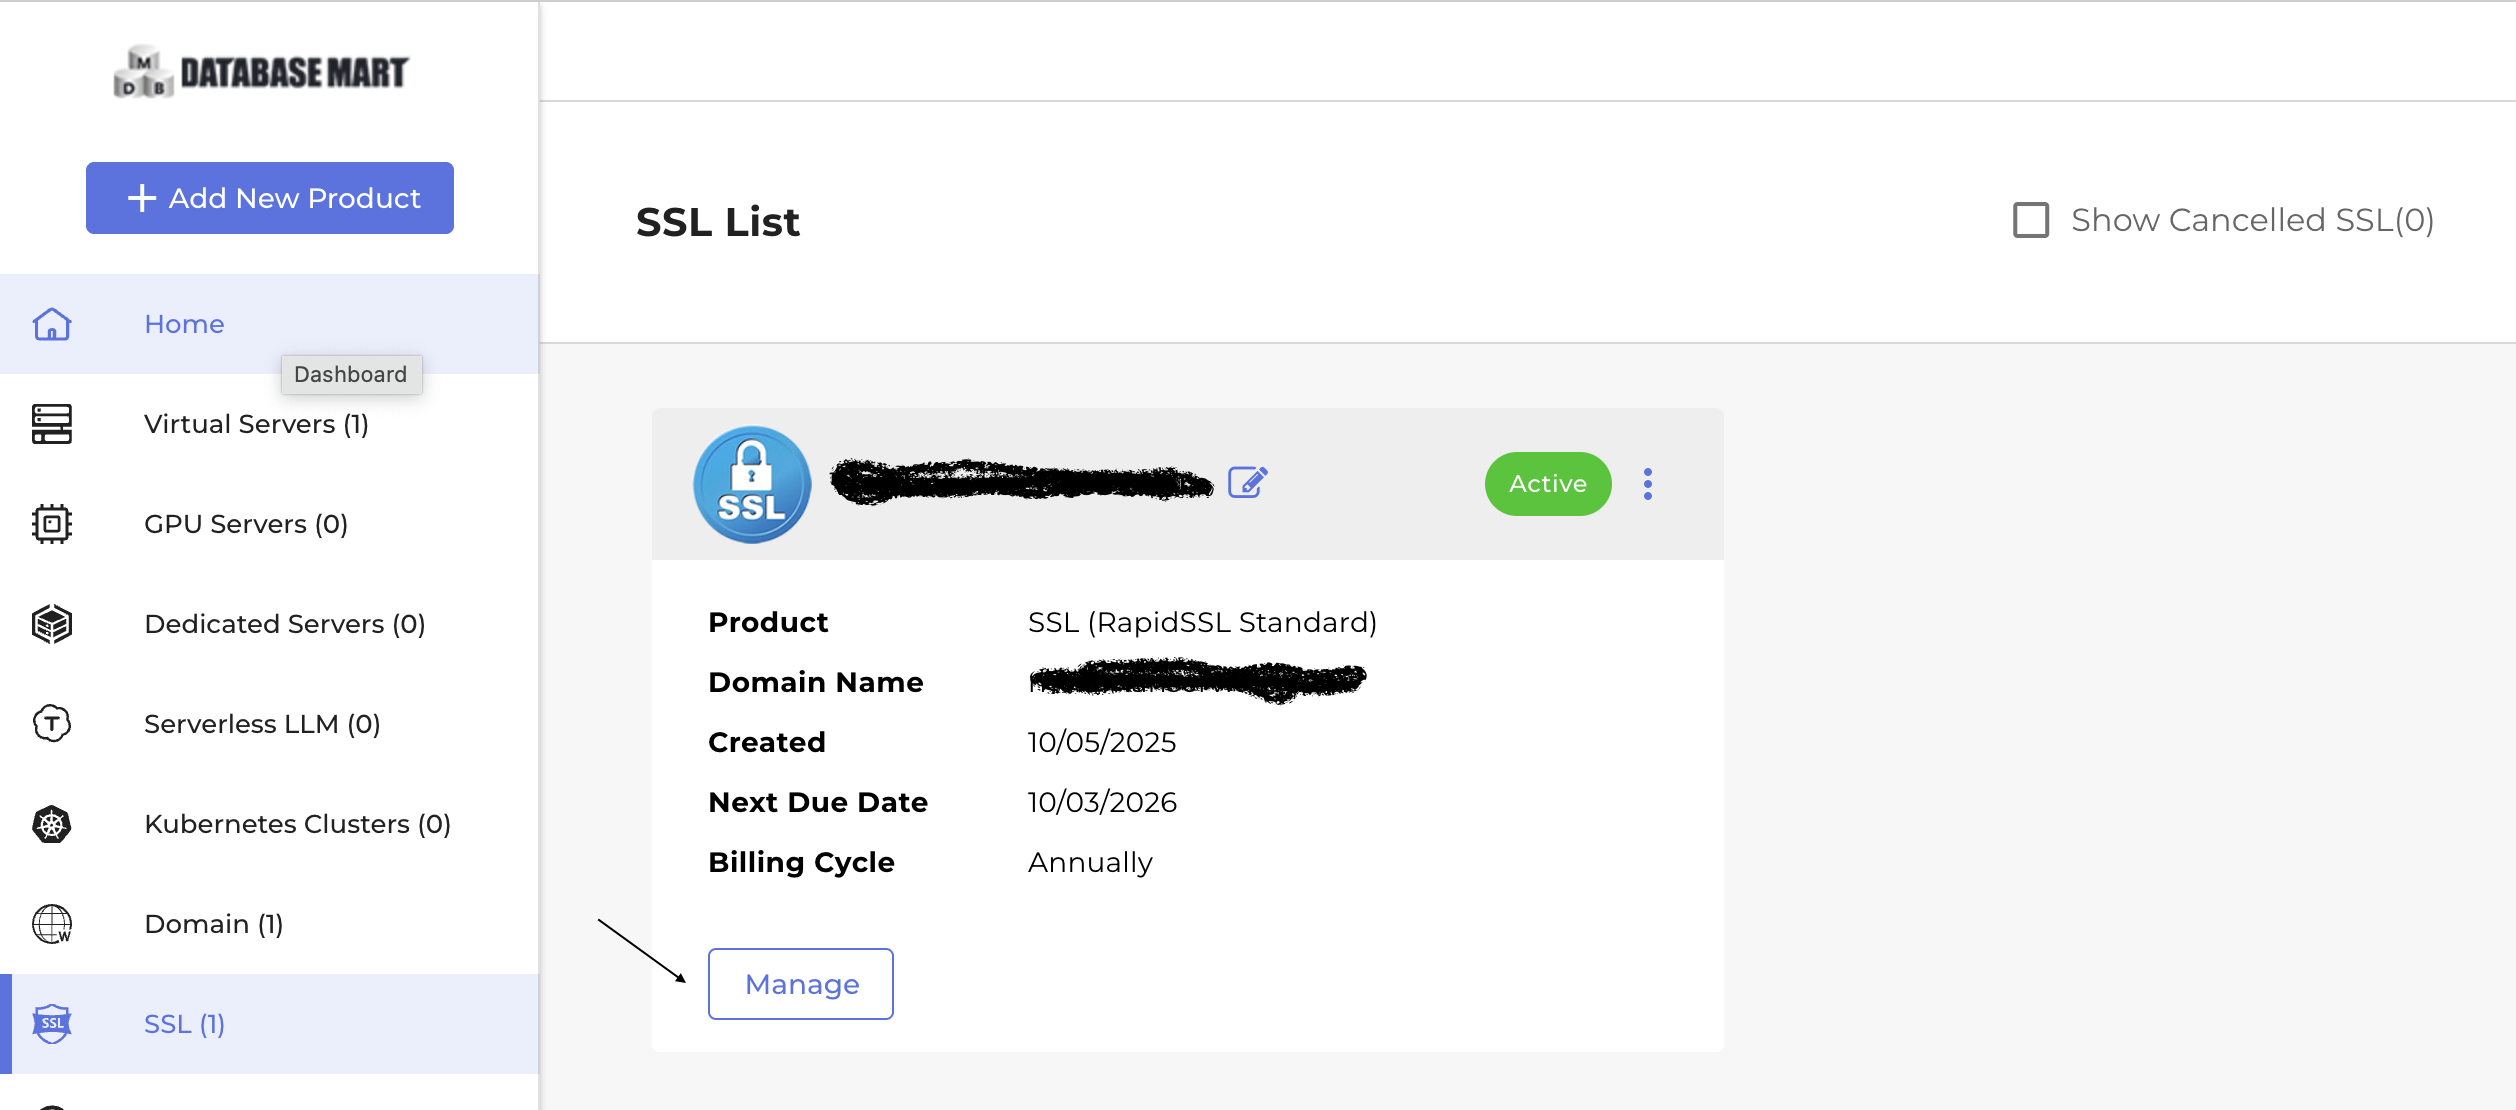
Then, please refer to the guidance on Approving a Certificate Authority for Validation.
Step 3: Download the Issued SSL Certificate File
After approving the certificate request, the certificate will be issued shortly. Please download the issued SSL file. You can refer to the guidance on How to Download an Issued SSL Certificate File.
Step 4: Complete the Certificate Request (Windows-Based Server Only)
Please skip this step if you generate a CSR on a Linux-based server.
If you generate a CSR on a Windows-based server, please complete the certificate request by referring to How to Complete a Certificate Request.
Step 5: Apply the SSL to the Website
Apply the SSL on Windows IIS
Applying the SSL on Windows IIS requires a .pfx SSL file and its import password. About how to apply the SSL on Windows IIS, please refer to How to Apply an SSL on Windows IIS.
Apply the SSL on Apache or Nginx
Applying the SSL on Apache or Nginx requires a .crt file and a .key file. The .crt file can be downloaded via step 3: Download SSL certificate. The .key file will be generated when you generate the CSR.
If you have a .pfx file, please convert the file to a .crt file and a .key file.
When you get the .crt file and .key file, you are ready to install the certificate.
For how to apply an SSL on Apache, please refer to How to Apply an SSL on Apache.
For how to apply an SSL on Nginx, please refer to How to Apply an SSL on Nginx.
If you encounter any issues during the SSL installation process, please feel free to contact our technical support team at any time.